


Decorating Cookies
From easy to elegant, decorated cookies let your inner artist shine.First, choose your cookie recipe
Elegant, light gold butter cookies are a classic choice, as is dark and spicy gingerbread. Light spice cookies hover somewhere between those extremes, with oatmeal decorating cookies offering a whole-grain option. And finally, two varieties of gluten-free cookie guarantee everyone in the crowd will be happy.
There are several distinct stages to making rollout cookies. It's easy to break the process down into simple steps that, depending on your schedule, can be spread out over the course of several weeks.
- Cookie dough can be made in advance, and refrigerated (up to 1 week) or frozen (up to a couple of months).
- Cookies can be rolled, cut, baked, and cooled, then stored in an airtight container (for a week) or in the freezer (up to a month), before being decorated.
- Finished (decorated) cookies can be frozen for up to a month.
Before you begin, here are some handy all-around tips:
- Chill cookie dough before rolling.
- For ease of handling, roll smaller rather than larger pieces of dough; keep unrolled dough chilled until you're ready to work with it.
- To really nail your baking time, bake and cool 3 or 4 test cookies first, before baking the whole batch.
- Cool cookies completely before decorating.
Let's get started by making cookie dough
-

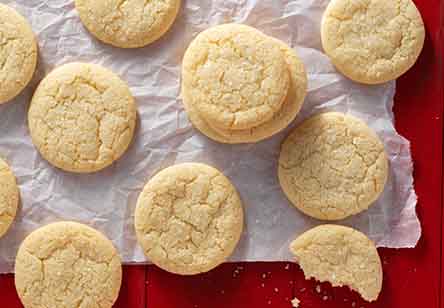
Holiday Butter Cookies
These buttery sugar cookies roll out nicely, and have a beautifully tender/crisp texture.
-

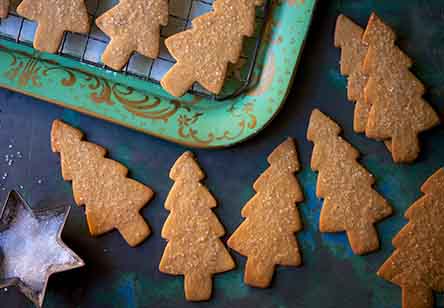
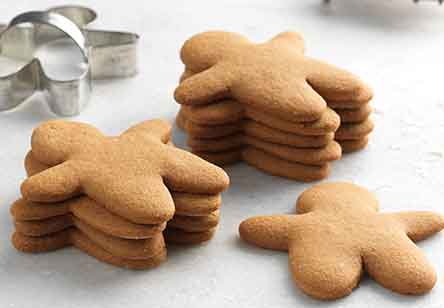
Gingerbread Cookies
This molasses-dark, ginger-and-spice flavored cookie is perfect for gingerbread men.
-
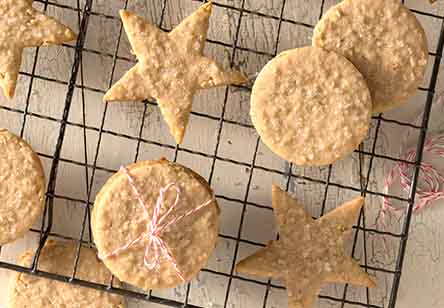
Light Spice Holiday Cookies
Can't decide whether you want to make sugar cookies or gingerbread?
-
Oatmeal Decorating Cookies
These chewy oatmeal cookies are easy to roll and cut out with your favorite shaped cutter.
-
Gluten-Free Gingerbread Cookies
Can you catch a gluten-free gingerbread man? You can now with this rollout recipe!
-
Gluten-Free Sugar Cookies
Get ready to roll and cut this gluten-free cookie into whatever shape fits the occasion.


Next, roll your cookie dough
-

Roll out your dough and cut out cookies directly on a sheet of parchment to fit your cookie sheet. Leave enough space between cut shapes for the cookies to spread a bit when baked.
-

Using a small spatula, carefully remove the scraps of dough from between the cookie shapes. You can ball this up and re-roll it.
-

Transfer the cookies, parchment and all, onto your cookie sheet. Voilá! Perfect cookies ready for baking, with no misshapen cookies from transferring with a spatula.


Finally, choose your decorating style
Are you a decorating minimalist? Don't have the patience for hours of painstaking piping? Imaginative use of a few basic cutters, icing, and colored toppings are all you really need to make good-looking cookies
Are you a cookie artist? LOVE playing with multiple bags of tinted icing to create simply gorgeous works of cookie art? We can help. See our complete cookie icing and decorating tips
Select your icing
-

Glaze
Cookie glaze is thin, satiny, and dries hard. It's perfect for adding a written message, or coating with colored sugar (see below). Read more about cookie glaze consistency
-

Frosting
This spreadable frosting is similar to buttercream, and stays soft on your cookies. Add sugar decorations for a fun or elegant touch.
-

Royal icing
This icing dries hard and opaque, and can be spread or piped atop cookies. Which type of royal icing should you make? Read more about royal icing consistency


Try this basic decorating technique
-

Start with a freshly iced cookie; you want to work while the icing is still wet.
-

Lay the cookie on a piece of parchment. Generously cover the cookie with sugar or sprinkles.
-

Gently tap off the excess sugar.
-

Use the parchment as a scoop to transfer the excess sugar back to a bowl, for further use. The cookie can take several hours to dry.


