


As the cost of food continues to rise, I continue to try to bake everything possible at home. We don't eat a lot of sweets, but bread is a must-have staple: toast for breakfast, sandwiches for lunch, rolls or focaccia for dinner. Thus I've made it my goal each weekend to bake a week's worth of bread.
White sandwich bread is a piece of cake (HA). I'll make one loaf for our lunchtime sandwiches, and another, swirled with cinnamon, for breakfast toast (stay tuned for a blog on that at the end of this month).
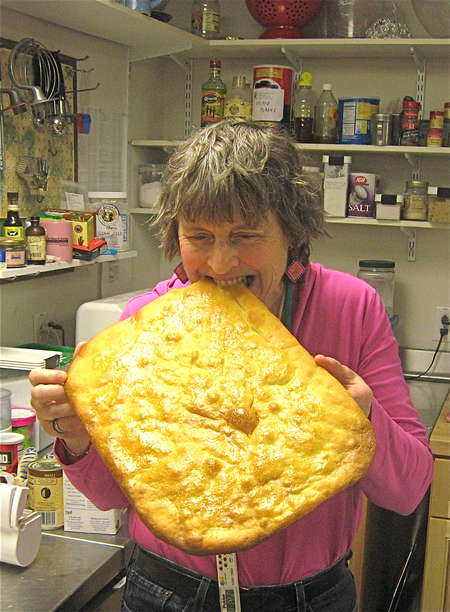
For dinner, I'll often make a couple of big slabs of focaccia; they keep well, and cut-off squares reheat easily in the toaster. And boy, don't I love focaccia... I couldn't resist taking a bite of one, hot out of the oven, and our roving kitchen photographer (a.k.a. Andrea) caught me!
Other times I make something whole-grainy. My favorite is Raisin Rye Pecan Bread. Even though it's more breakfast- than dinner-like, I just plain enjoy it. And the sweetness of the raisins, plus nuttiness of the pecans, often marries quite well with the beef stew, curried chicken and veggies, or whatever leftovers we happen to be having.
One recent weekend I was paging through one of the professional baking magazines I receive, and an article caught my eye:
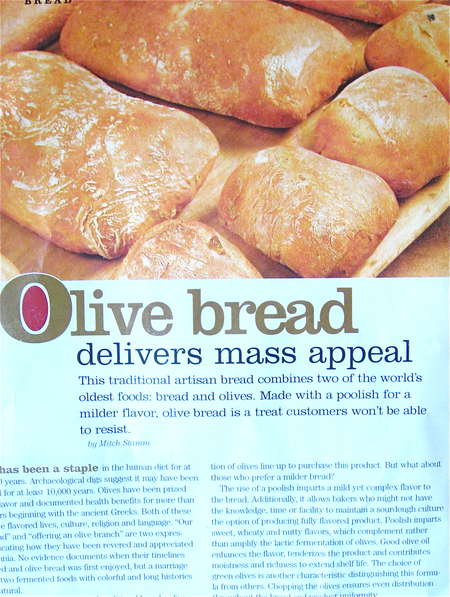
Ahhh, olives... one of my favorite food groups. Groups? Well, there's olive oil, of course, my favorite all-purpose fat: extra-virgin first-pressed for salad; mild “light” (inexpensive) oil for bread-baking; a peppery version enhanced with garlic for bread-dipping...
Then there are the olives themselves: black out of the can, green out of the jar, or any of the wonderfully tasty versions (big, meaty Cerignolas are a current favorite) from the fresh foods section at the supermarket. And let's not forget tapenade, and green olives stuffed not with the plebeian pimiento, but with garlic cloves, or even anchovies... Well, you get the picture. Olives are always in my fridge.
Thus olive bread spoke to me. I read the recipe, which made 16 dozen rolls; cut it down to home size; and quickly threw them together here at work. WOW. Nice. Chewy, tasty, little bits of green olive scattered throughout. And they looked really “professional,” with their shaggy, floury surface. (Everyone was asking, “Hey, who made the ciabatta rolls? they look gorgeous!”)
Then, the true test: I brought them home. Would they translate to a dinner bread? Absolutely. With spaghetti, as the buns for hamburgers, with grilled spareribs... Plain enough to go with anything, tasty enough to stand alone (with a drizzle of olive oil), these rolls have made it into my permanent repertoire.
Like baguettes, these rise in a floured cloth. That's what gives them their pretty crust. Please don't skip this step; it's easy, and really does give the rolls a professional look. As befits their professional magazine (“Modern Baking”, fyi) origin.
Hope you enjoy these Olive Rolls.

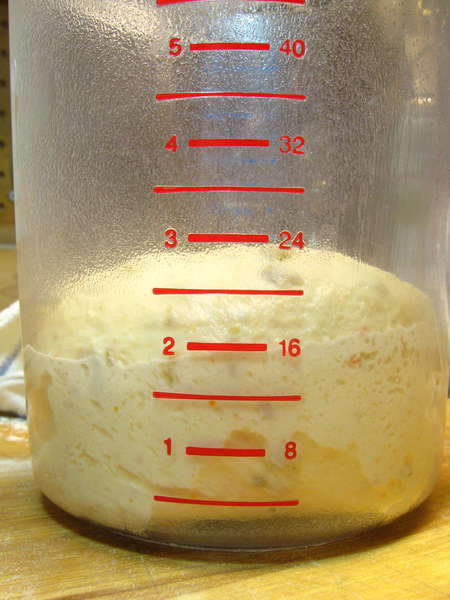
First, make a starter. Flour, water, and yeast will bubble and expand overnight, giving the rolls a jump-start on both texture (a better rise) and flavor.
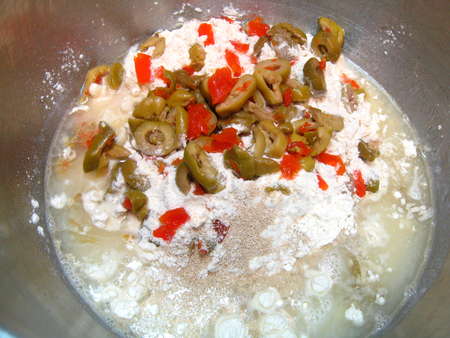
Combine the starter with the remaining dough ingredients; I've used plain-jane bottled green olives here, but use the ones of your choice. If they're bottled in liquid, squeeze them dry before adding to your dough.

Just about 5 minutes later, in a stand mixer, you've made a soft, fairly sticky dough.
Put it in a lightly greased, covered container...
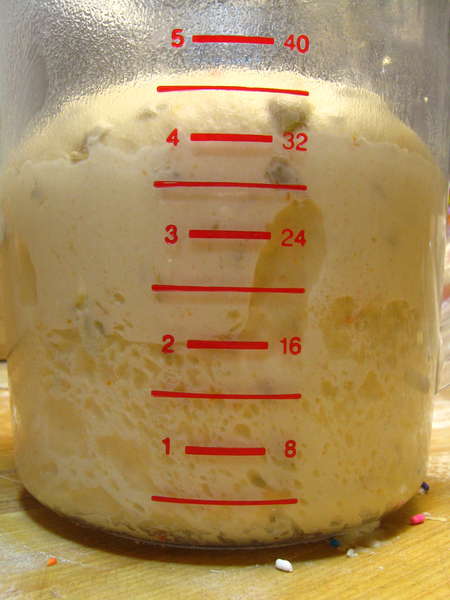
...and let it rise for about an hour. It'll get nice and puffy.
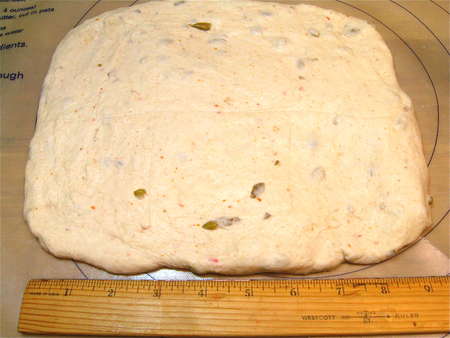
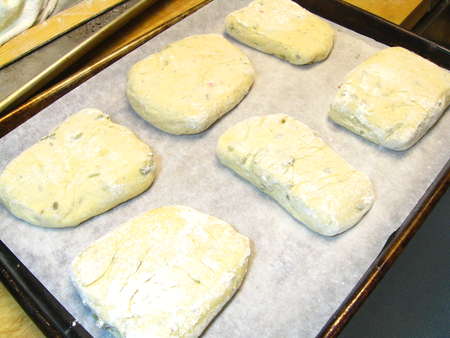
Gently deflate the dough, and pat it into a 9” x 8” rectangle. Make the corners as square as you can; this will result in a prettier roll.

Cut the dough into six 3” x 4” rectangles.
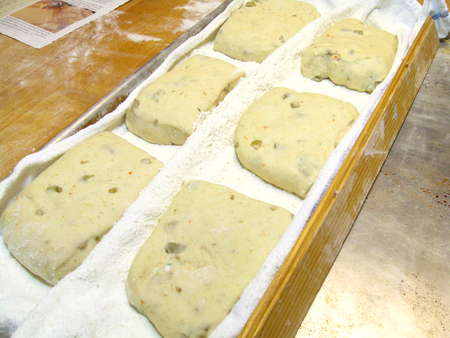
Place the rolls in the folds of a floured couche or cotton towel. There's no secret technique here; simply sprinkle a smooth cotton towel with flour, rubbing it in gently and shaking off much of the excess.
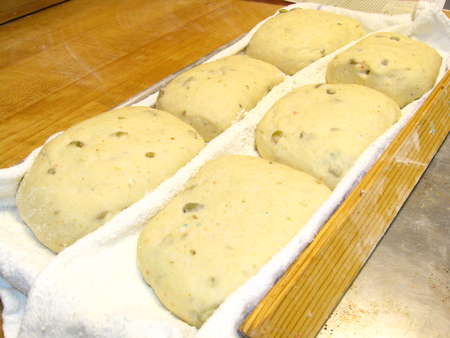
Let the rolls rise, covered, for 60 to 90 minutes. They'll become nicely puffy.
Gently pick up the rolls and place them, floured side up, on a parchment-lined or lightly greased baking sheet. Put them in the oven...
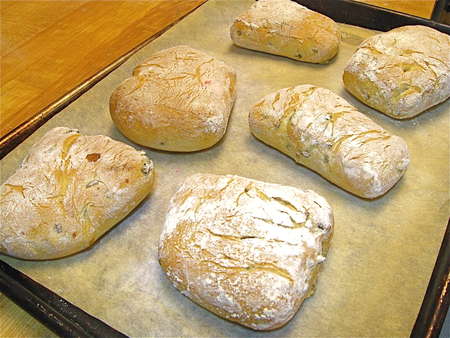
...and 25 minutes later, voilà! Olive rolls.

A wonderful addition to the bread basket.
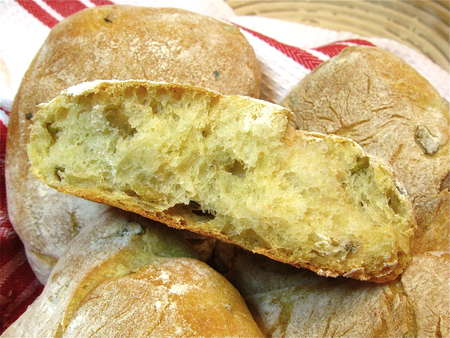
And look at that nice, open texture. Break out the olive oil!
Check out our recipe for Rustic Olive Rolls.
