


Brioche.
If you have any experience at all with brioche, merely seeing the word probably sends a shiver down your spine.
A shiver of anticipation for the ultra-tender, super-buttery bread that emerges from your oven.
And a matching shiver of angst at the difficult dough that precedes that loaf.
There's a reason brioche, France's signature breakfast bread, is so tender. Two reasons, actually: butter, and eggs. Lots and lots of both.
Which means lots and LOTS of hassle with sticky dough – if you're kneading by hand.
Here's my advice: unless you're one of those strong-willed folks who would have considered the Lewis and Clark Expedition a day in the (national) park, DO NOT try to make this dough by hand.
Use your mixer. Or better still, your bread machine, set on the dough cycle.
I try to be all-inclusive; I know there are many of you whose favorite tool is your hands. And I concur – a seasoned bread-baker can handle most yeast doughs without resorting to machinery.
But brioche dough? It's sticky. It's gloppy. Imagine trying to knead a pound of butter...
Which is just about what you're trying to do here, given brioche's butter-intensity.
Me, I resort to my trusted old friend, the Zojirushi bread machine. Hold on, purists - I'm NOT going to bake brioche in the machine. Possible, yes; desirable, not really.
But kneading brioche dough in the Zo?
Alors, c'est un piece de gateau! (Corrections welcome here - high school French was LONG ago.)
Plus, kneading dough in my Zo yields superior results. Take a look:
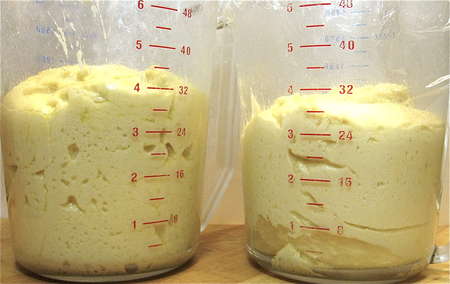
On the left, Zo dough after its first rise. On the right, dough prepared in a stand mixer.

After its overnight rise, the Zo dough is still winning the race (to the top of the cup). The bread machine simply does a superior kneading job – which is why we turn to our seven test kitchen Zo's so regularly.
Sales pitch? You bet. The holidays are looming. Gifts are being baked and bought. If my mom didn't already have a Zo, it would be at the top of my list for her.
So if you know someone who LOVES LOVES LOVES bread; and is challenged by kneading (time, age, technique, whatever the reason) – please consider the Zo.
It's truly a gift that keeps on giving. For long-time bread-bakers short on time and energy, or newbies just learning yeast's secrets, Zo is truly the path of least resistance – and greatest success.
And now, back to our regularly scheduled program.
Let's bake an over-the-top loaf of Chocolate-Cherry Brioche.
What flavor marries well with cherry? Vanilla, sure. But don't forget almond, a touch of which in any cherry dish points up its “cherri-ness.”
Speaking of cherries, dried ones can be expensive. So if you're going to purchase them, buy the best: look for Michigan cherries that are fat and moist.
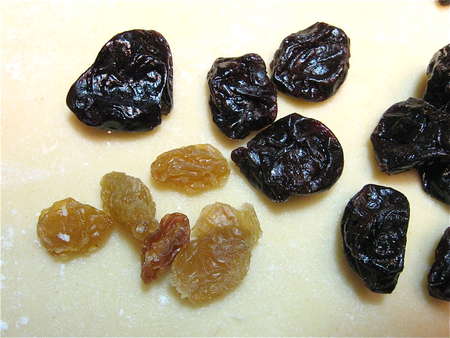
And BIG. Here they are next to golden raisins.
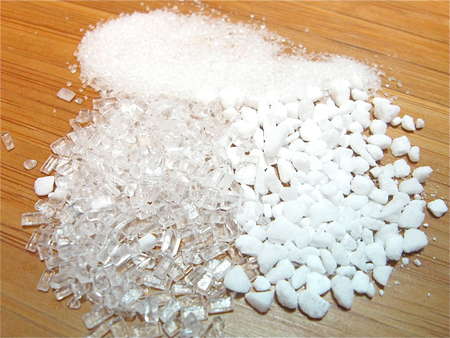
Another choice to consider: the sugar atop the loaf. Pictured above are granulated sugar (at the top of the photo), coarse white sparkling sugar (left), and pearl sugar (right). Granulated sugar will basically disappear, leaving a slight glaze. Coarse and pearl sugars will remain intact, providing crunch and glitter (coarse sugar), or a snowy effect (pearl sugar).
Try mixing coarse and pearl sugars for the best of both worlds.
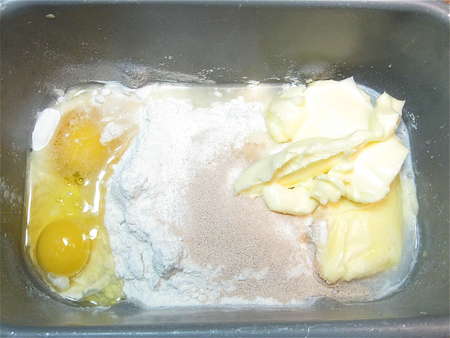
Let's get down to business. Put the following into your bread machine bucket, or mixing bowl:

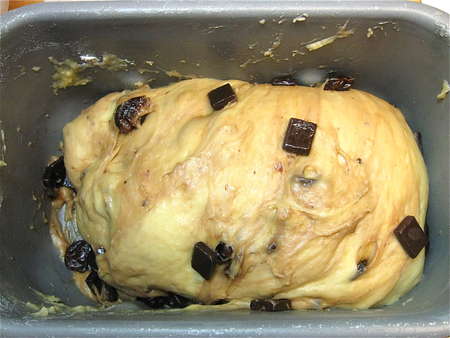
Program your bread machine for the dough cycle, and press Start. After a few minutes the dough will look like this. See what I mean about a hand-kneading challenge?
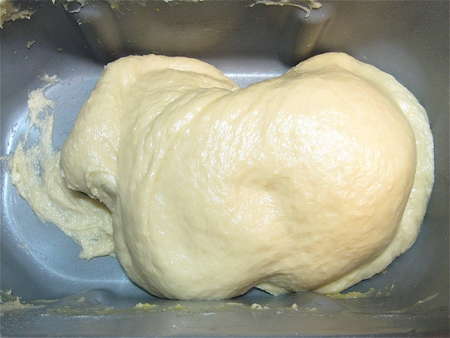
But when it's done kneading - YES. Lovely and smooth.
If you use a stand mixer, this dough takes longer than most to develop, so be prepared to let it mix and knead for up to 15 minutes. You'll probably want to stick with the beater blade longer than normal. How long? Till the dough comes together enough that it looks like the dough hook would work.
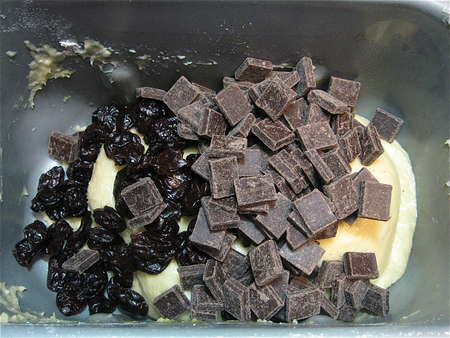
If you're using a bread machine, add 2/3 cup (113g) semisweet or bittersweet chocolate chips or chocolate chunks, and 2/3 cup (113g) dried sweet cherries about 1 minute before the end of the kneading cycle.
You don't want to add them too soon; the point is to barely distribute them throughout the dough without breaking them up.
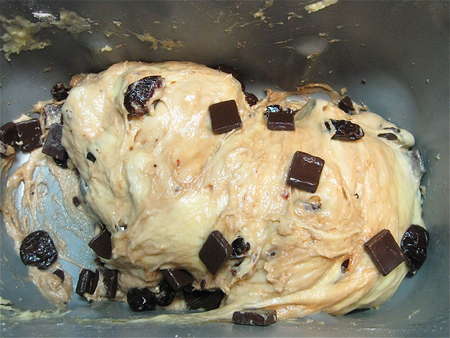
If you're using a mixer, briefly knead in the chips/chunks and cherries once the dough is fully kneaded.
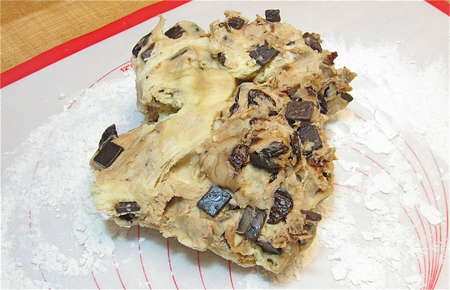
Let the machine complete its entire dough cycle, then cover the bucket with plastic wrap, and refrigerate the dough for several hours, or overnight.
If you've kneaded the dough in a stand mixer, form it into a ball (it'll be very soft), place it in a greased bowl, cover the bowl, and it let rise for 1 hour. Then refrigerate the dough for several hours, or overnight. Refrigeration will slow the fermentation and chill the butter, making the dough easier to shape.
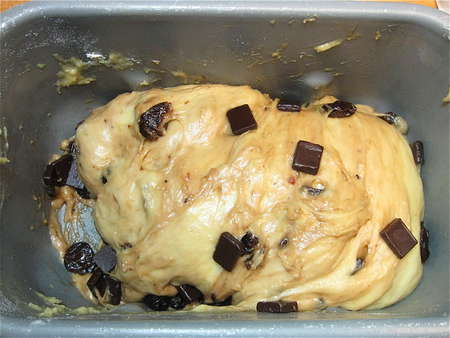
Here's the dough after its overnight rise; as you can see, it's puffed a bit. But this isn't a wild riser, so don't expect it to fill the pan (or even come close).
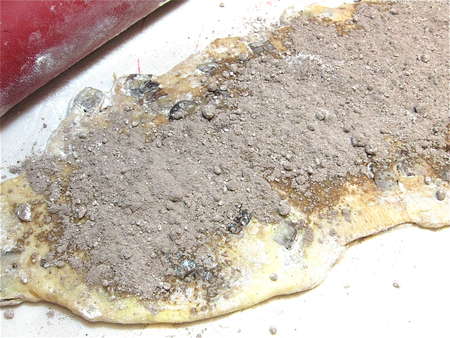
Before you start shaping the dough, make the filling by whisking or shaking together 1/3 cup confectioners' sugar and 2 tablespoons cocoa powder, preferably Dutch-process. You'll want to work quickly once the dough is out of the fridge - the warmer/softer the dough gets, the more of a challenge it is to work with. So best have all your ducks in a row (and your filling made) before you start on the dough.
Turn the cold dough onto a well-floured work surface. I'm using our silicone rolling mat here.
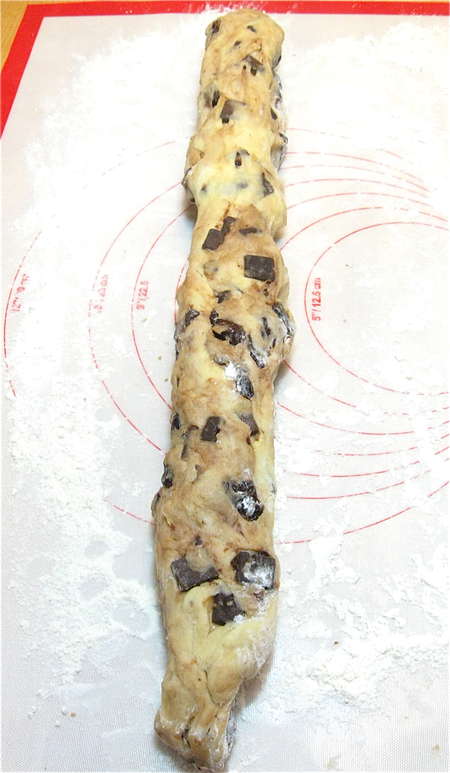
Shape the dough into a 24” log.
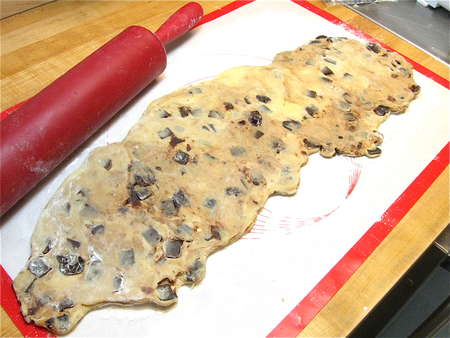
Flatten it out so it's about 6” to 7” wide. Don't try to make it perfectly even; it'll look ragged.
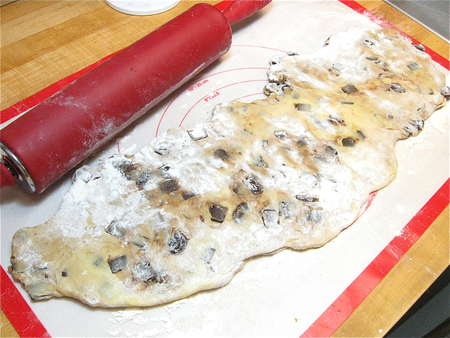
Turn it over, to make sure it's not sticking. See the excess flour?
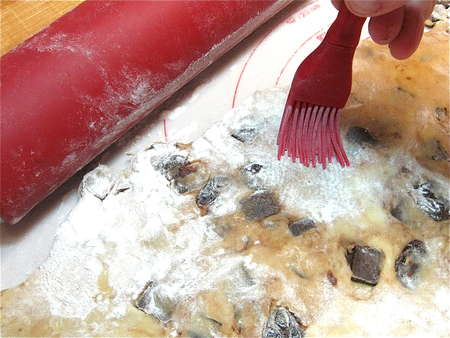
Brush it off. Don't be finicky; just brush off what you can.
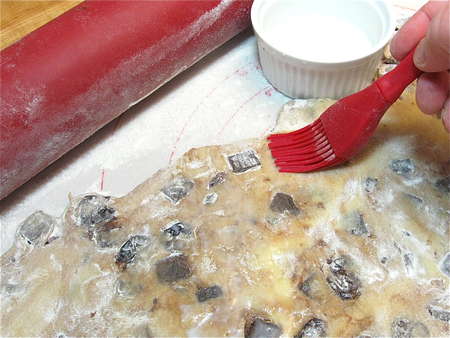
Brush the dough with milk or water.
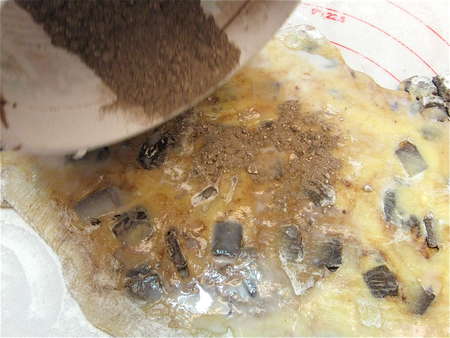
Sprinkle the filling evenly atop the dough.
Like this. See how I've left one long side bare?

Starting with the long side that's NOT bare, roll the dough into a log. Yes, this will be a somewhat messy process. Just tuck any errant cherries or chocolate chunks back inside.

Place the log seam side down on your work surface, smoothing it as best you can.

Lay the log in a lightly greased 9” round cake pan that's at least 2” tall. You can simply lay it in a circle, squeezing the ends together...
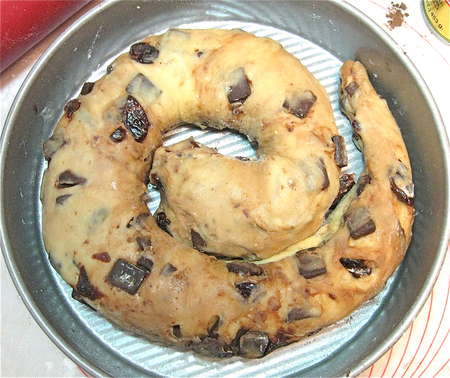
...or shape it into a coil, which I prefer. It makes the slices more interesting-looking when you serve the brioche.
Taper the tail end...
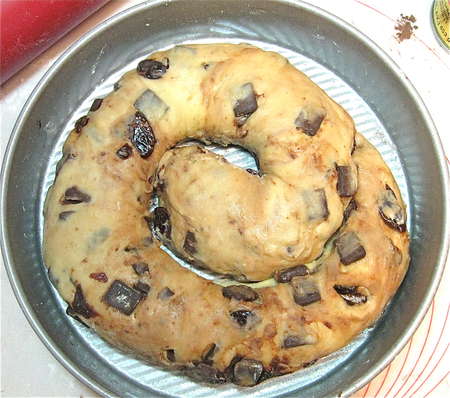
...and tuck it underneath.
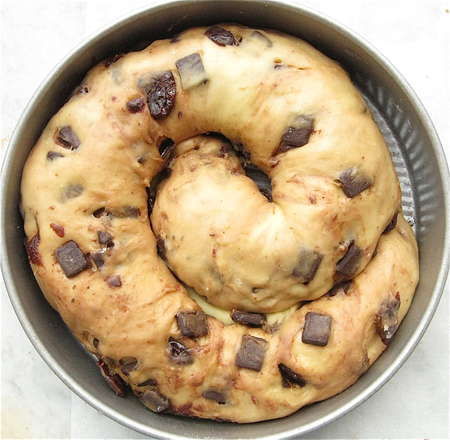
Cover the pan, and allow the brioche to rise for 2 to 3 hours, till it's quite puffy.
Towards the end of the rising time, preheat the oven to 350°F.
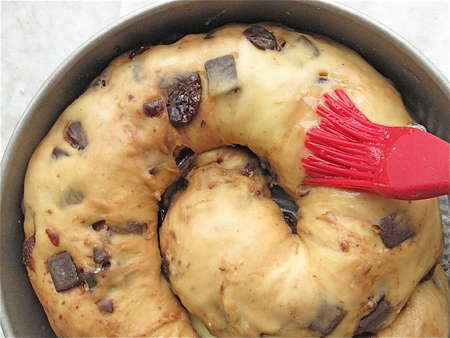
Brush the risen brioche with the egg white reserved from the dough. Whisk the white with 1 tablespoon of cold water first; it'll make it easier to spread.

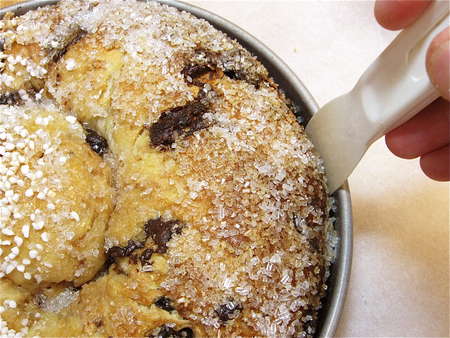
Sprinkle with 2 to 3 tablespoons Swedish pearl sugar, or coarse white sparkling sugar. Or a combination.
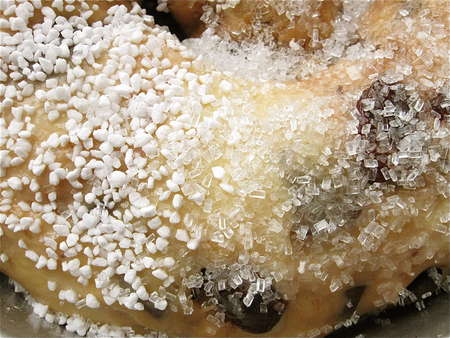
Here I've segregated the two sugars, so I could really see how they look, side by side, on the baked loaf.
Go heavy on the sugar.
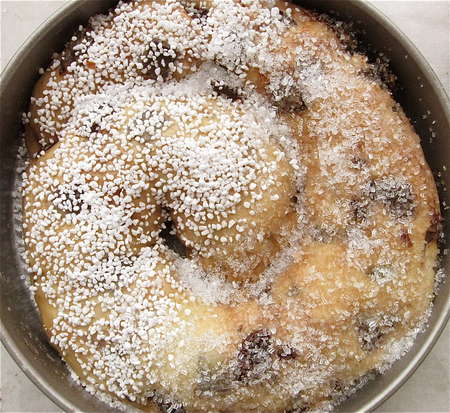
Bake the brioche for 20 minutes.
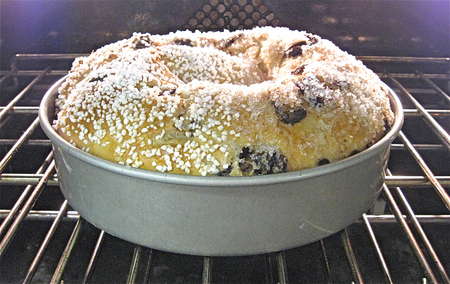
Nice rise! This is why you want to make sure your pan is at least 2” deep. Some manufacturers try to save money by skimping on depth, making a pan that's 1 3/4” deep, or even 1 5/8”. A solid 9” x 2” round pan should be a basic part of every baker's pan-theon (groannnn....)
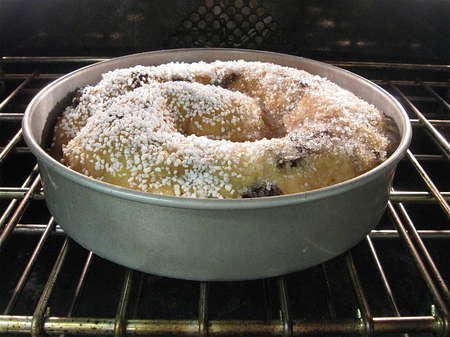
Tent it with aluminum foil, and bake for an additional 30 to 35 minutes, until it's golden brown and its interior registers 190°F on an instant-read thermometer.
Remove the brioche from the oven, and after about 5 minutes loosen the edges.
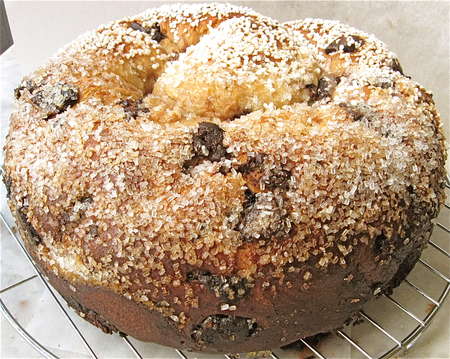
Carefully turn it out of the pan onto a rack to cool.
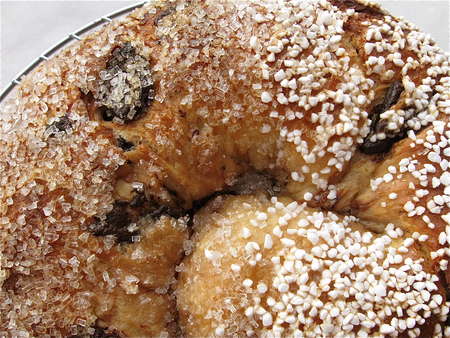
So how do those sugars look? As expected – the coarse white is glittery, the pearl snowflake-y.
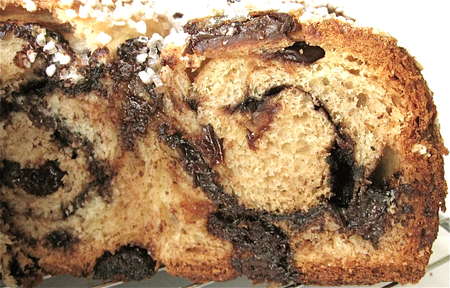
Remember what I said about the coil making a more interesting slice? Note the double swirl effect.
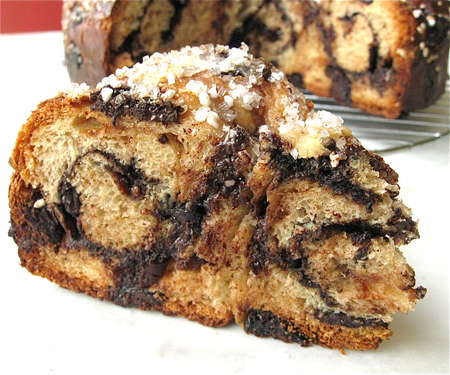
How's that, sports fans? The melty chocolate chunks, moist cherries, that cocoa swirl... all packed into a buttery brioche.
DO try this at home. Honest, it's not hard at all – so long as you don't try to knead the dough by hand.
(Have I mentioned recently how wonderfully the Zo kneads dough?)
Read, rate, and review (please!) our recipe for Chocolate-Cherry Brioche.
