


Who'd ever think of making your own homemade ice cream sandwiches?
After all, it's easy enough to pick up a box at the supermarket. You can probably get store brand for under $3.
And, aside from that slightly freezer-burned, vaguely fake taste, they're pretty good. Right?
That's what I thought, until I made my own ice cream sandwiches last week.
WOW.
Even setting aside the lack of freezer burn and aftertaste of the various preservatives and artificial flavors that go into mass-market ice cream sandwiches, this homemade version of a classic store-bought treat is striking.
I kind of knew, inside my baker's head, that homemade ice cream sandwiches – like most treats that are homemade – would probably taste better. But inertia kept me on the path of "Make your own cookies and bread; buy ice cream treats at the store."
Then, earlier this summer, I got an ice cream maker.
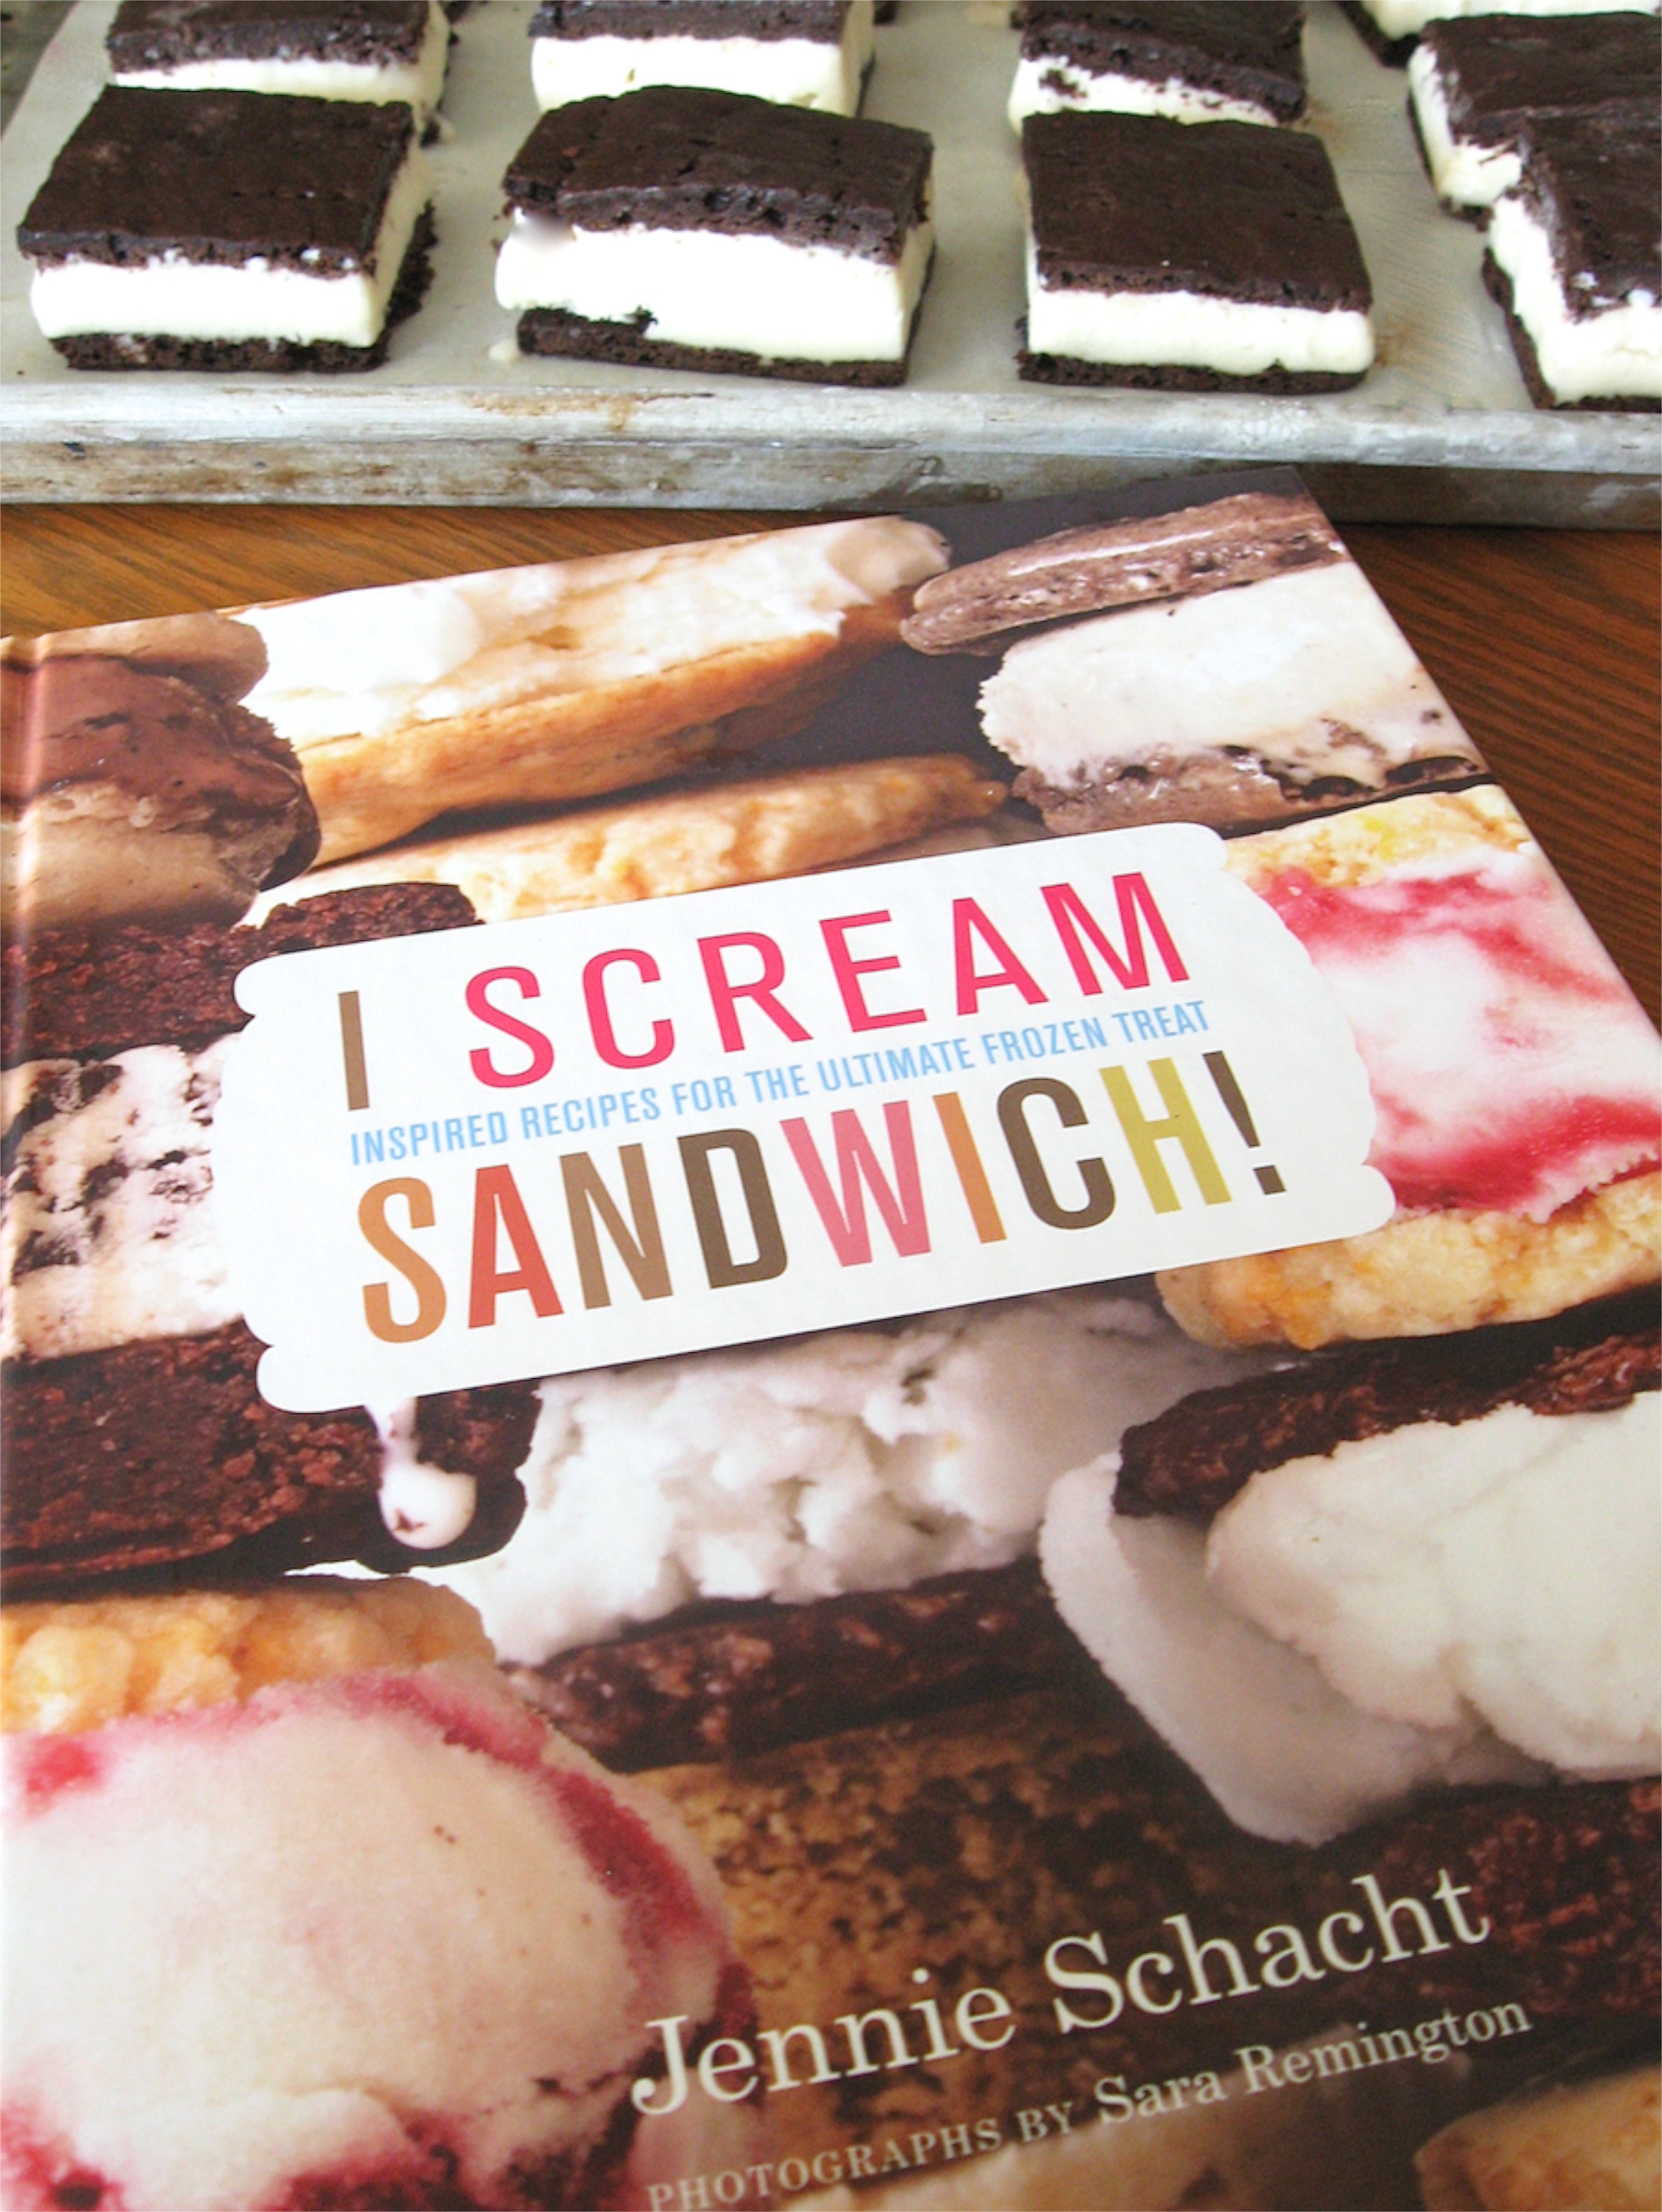
And quickly thereafter, was introduced to this book. Which, during the sweltering days we've "enjoyed" this month, has become a very cool bedside companion.
Milk Gelato on Warm Chocolate Chip Cookies, anyone?
Flipping through the book, I wondered where to start. Well, why not right at the beginning? The book's first recipe is fittingly entitled "Pure Nostalgia – Vanilla Ice Cream on Soft Chocolate Cookie Bars."
Exactly what I used to cough up a hard-earned dime for at the Good Humor truck. I guess the days of 10¢ ice cream sandwiches are long gone, eh?
Anyway, if you have an ice cream maker, it's absolutely worth it to make your own ice cream for these sandwiches.
Substitute store-bought vanilla ice cream, if you like; but this recipe for vanilla ice cream, with its interesting addition of tapioca starch for thick, smooth texture, is outstanding.
If you're making your own ice cream, here's Jennie's recipe:

2 cups (454g) whole milk
1/3 cup (67g) granulated sugar
2 tablespoons golden syrup or light agave nectar (or light corn syrup, or honey*)
2 tablespoons (14g) tapioca starch (or minute tapioca, finely ground in a spice or coffee grinder)
1/4 teaspoon kosher salt or a scant 1/4 teaspoon table salt
1 cup (227g) heavy cream
1/2 teaspoon vanilla extract
*I've added these choices beyond what the recipe calls for, for those who don't want to purchase golden syrup or agave nectar.
Whisk together 1/2 cup (113g) of the milk, the sugar, syrup, tapioca starch, and salt in a saucepan. Stir in the remaining milk, and the cream.
Cook and stir the mixture over medium-high heat until bubbles form around the edge and it begins to steam. Simmer for 3 to 5 minutes, stirring constantly, until the mixture thickens to the consistency of a cream sauce; don't let it boil.
Remove the mixture from the heat, stir in the vanilla, and chill thoroughly in the refrigerator. For best results, the mixture should be very cold. Make it ahead and refrigerate overnight or for up to a couple of days, if desired.
When the mixture is thoroughly chilled, freeze it in your ice cream maker, following the manufacturer's directions.
I like to add alcohol to homemade ice cream, to keep it from becoming rock-hard in the freezer. If desired, stir 3 tablespoons rum (vanilla rum is tasty), brandy, or vodka into the ice cream as soon as it comes out of the ice cream maker.
Transfer the ice cream to a storage container, and freeze until solid, at least several hours. If you've added the alcohol, it'll still be soft enough to scoop easily. If not, you'll need to let it soften a bit before using it for ice cream sandwiches.
Speaking of sandwiches – let's make the chocolate cookies.
Preheat your oven to 350°F, with a rack in the center. Lightly grease a piece of parchment about 12" x 16", and place it on a flat work surface.

In a medium-sized bowl, whisk together the following:
1 1/4 cups (149g) King Arthur Unbleached All-Purpose Flour
1/2 cup (43g) Dutch-process cocoa powder or all-purpose baking cocoa
1/2 teaspoon baking soda
1/2 teaspoon kosher salt or 3/8 teaspoon table salt
Set the mixture aside.
Place the following in a larger bowl:
6 tablespoons (85g) unsalted butter, softened
1/2 cup (99g) granulated sugar
1/4 cup (53g) light brown sugar
1 teaspoon vanilla extract
Beat at high speed until well combined and somewhat expanded; the mixture will look a bit grainy, but also fairly creamy.
On low speed, add half the flour/cocoa; then 2/3 cup (152g) whole milk; then the remaining flour/cocoa, scraping the bowl between additions.
Can you use lower-fat or skim milk? Of course; the cookies will simply be less tender.
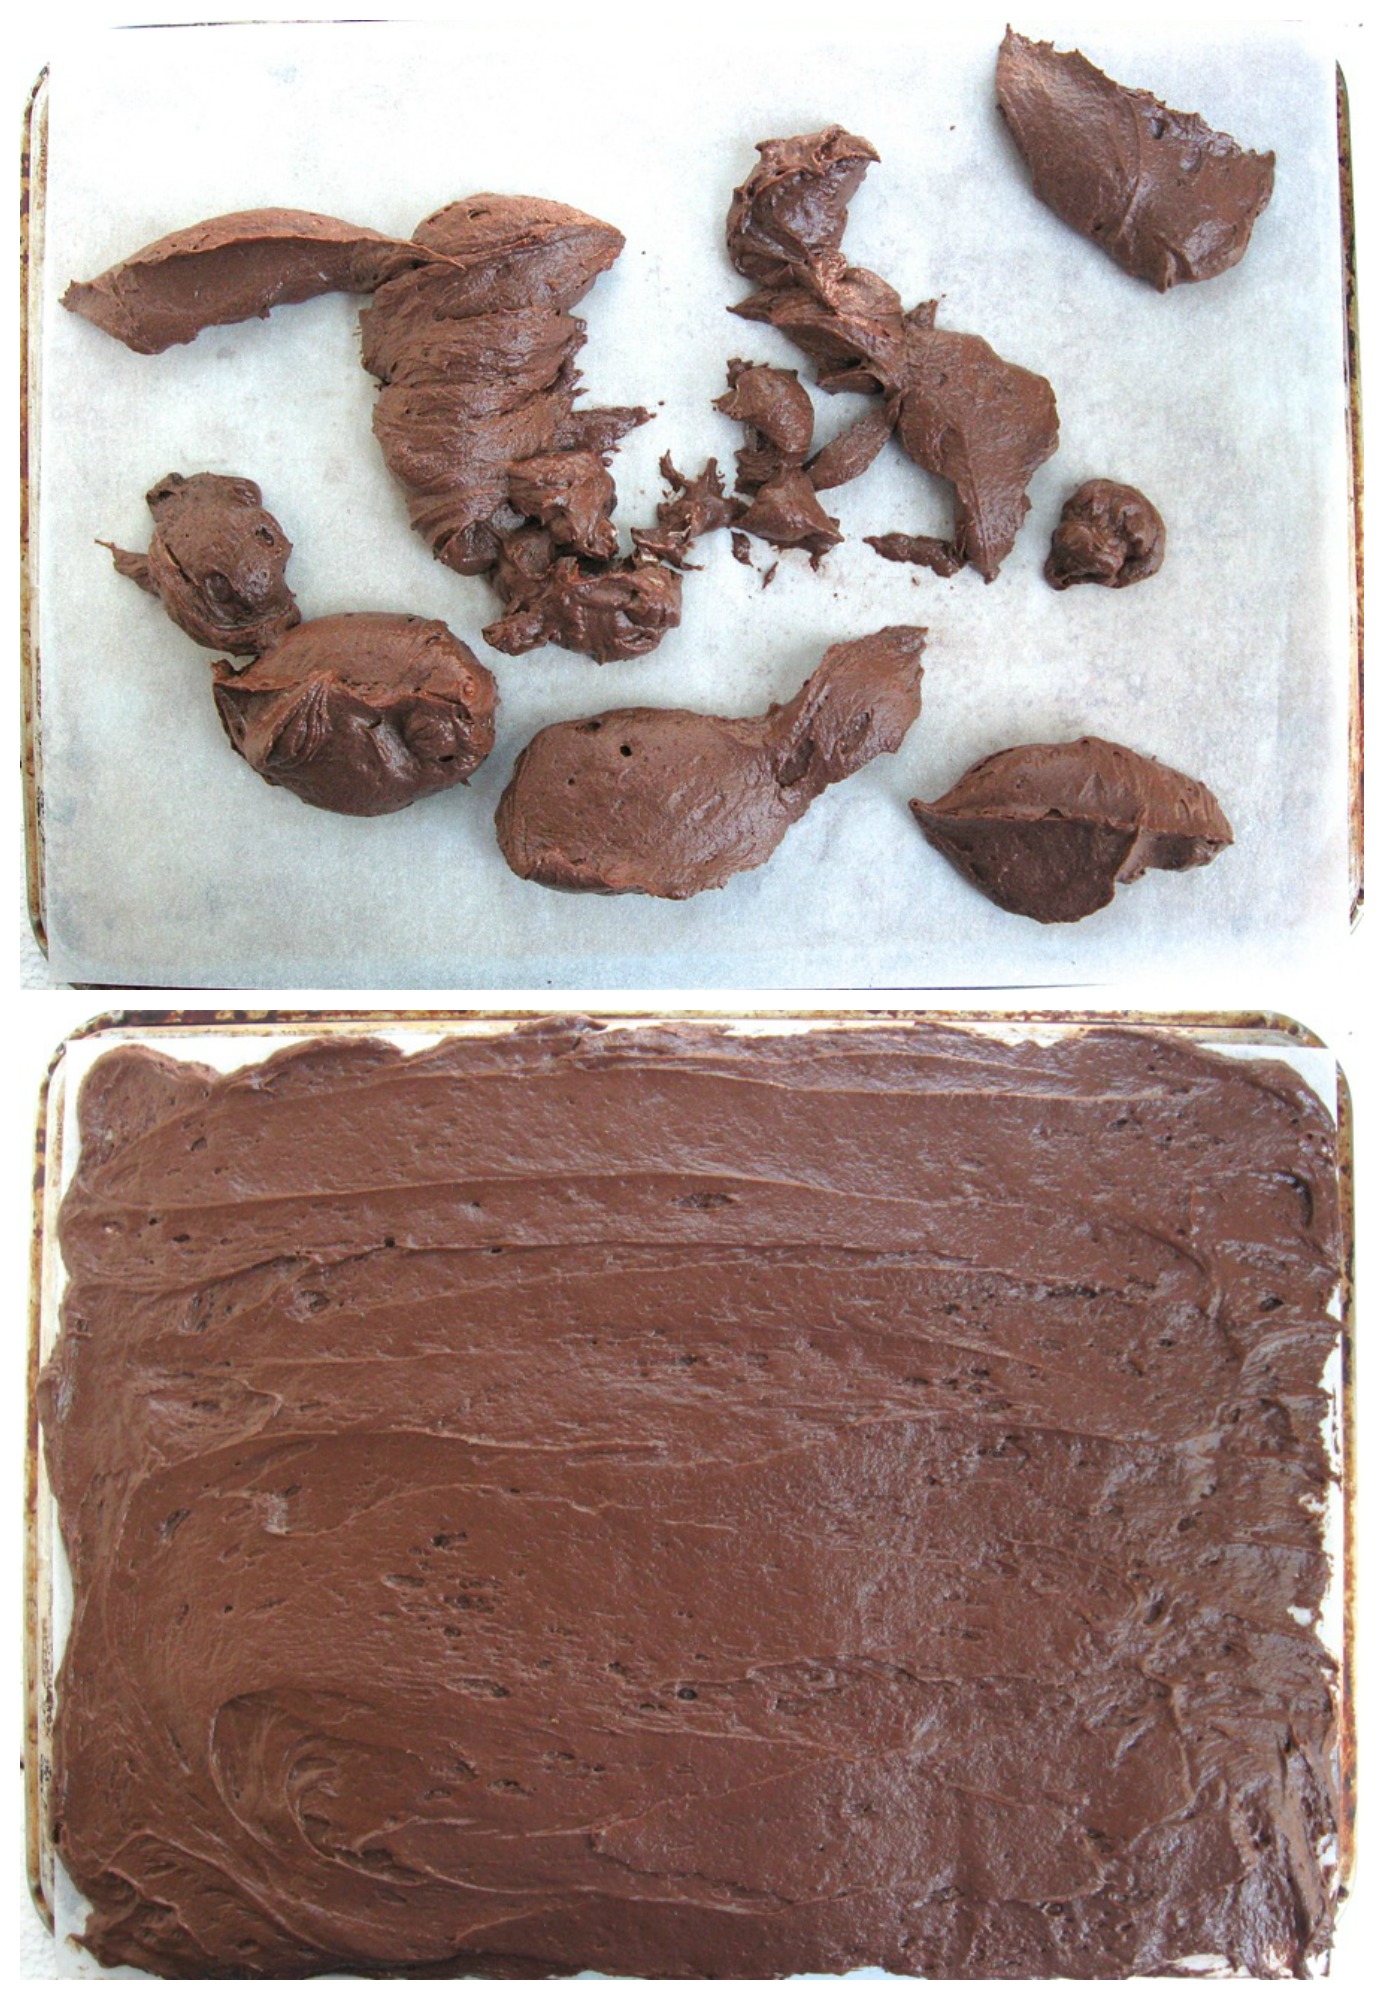
Dollop the batter all over the prepared parchment paper. Use a spatula to spread it to the edges of the parchment, smoothing it as flat as possible.
Pick the parchment up, and set it into a half-sheet pan (18" x 13"), or onto a large cookie sheet.
Bake the cookie slab for about 10 minutes, until it just loses its shine. Remove the pan from the oven, and cool the cookie on the pan for about 5 minutes. Cut it in half crosswise to make two rectangles, each about 8" x 12".
Trim the edges of each rectangle, if desired; you'll make neater-looking sandwiches.

Use a fork to prick the top of the cookie slabs in neat rows, like the top of a traditional ice cream sandwich.
Place the cookie slabs, with their parchment, on a rack or racks to cool completely. When completely cool, wrap well and place in the freezer. If there's room, freeze them on a baking sheet; it's good to have a cold surface to work on when you're making the sandwiches.

When you're ready to assemble the sandwiches, check your ice cream. If it's rock-hard, get it out of the freezer and let it soften until it's scoopable. If you've added the rum or other alcohol, it'll be scoopable right out of the freezer.
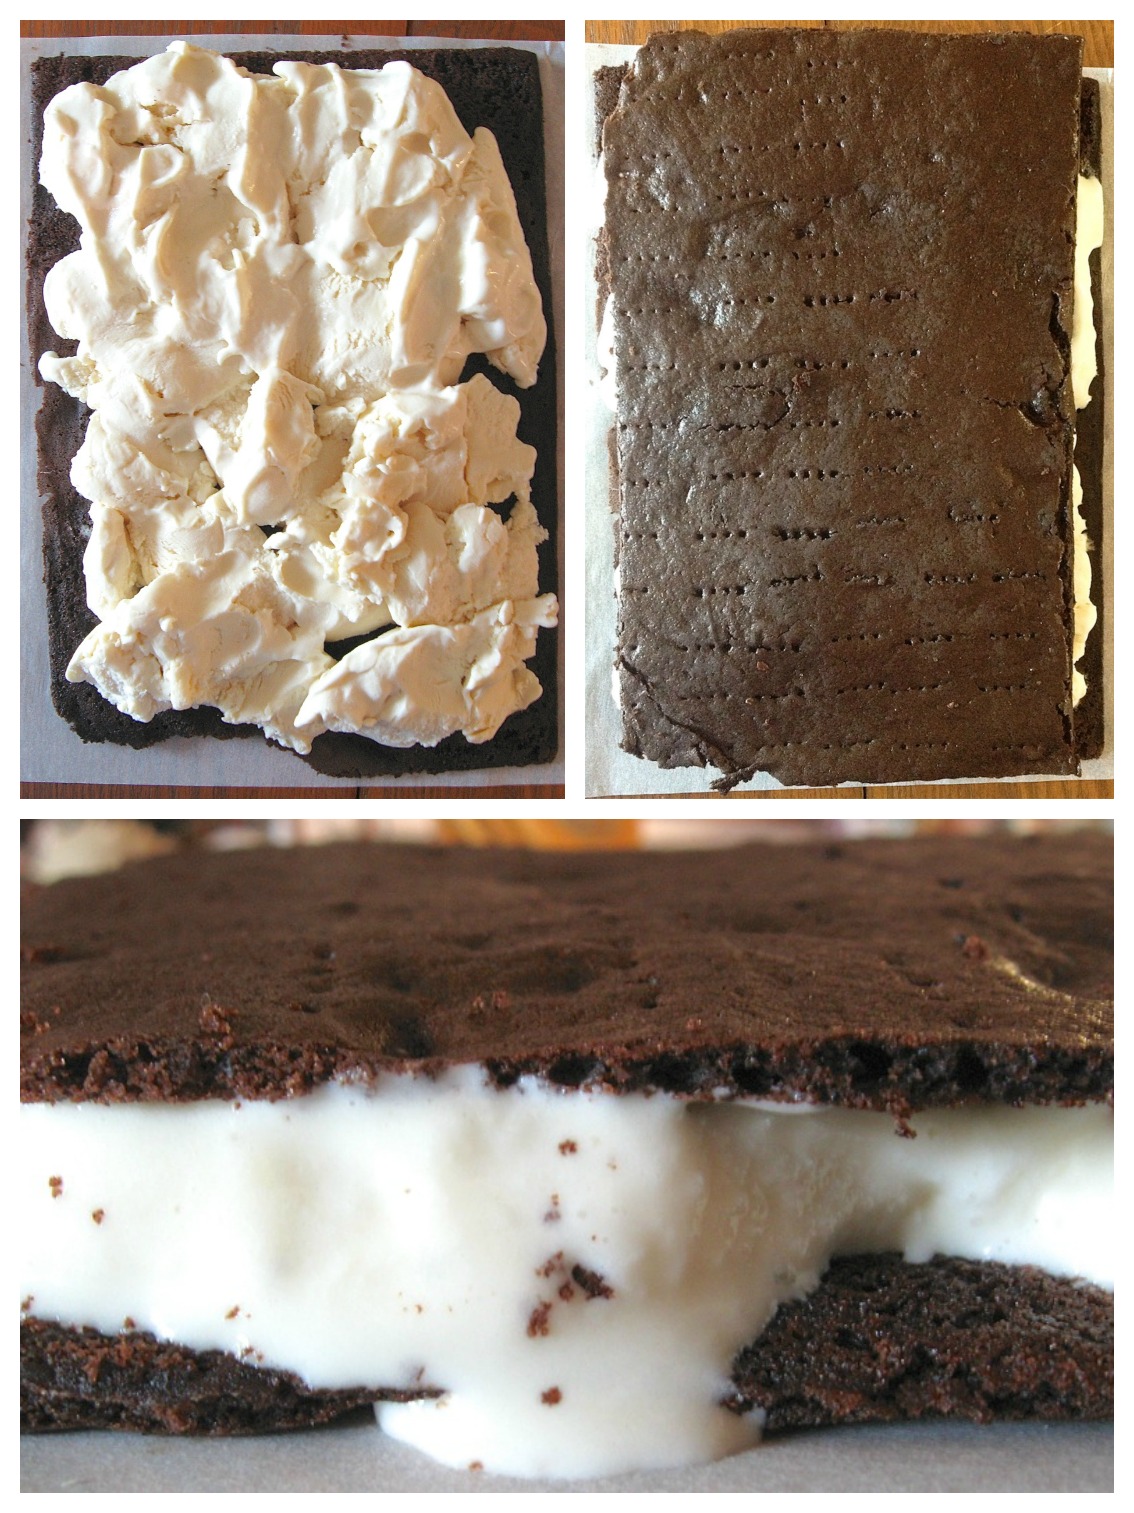
Peel the parchment off the backs of the cookie slabs. Place one slab, bottom up, on a cold surface. Spread with ice cream.
Top with the second cookie slab, top side up. Press down firmly to distribute the ice cream evenly between the cookie slabs.
At this point, the ice cream will probably be starting to melt. Put the sandwich back in the freezer for 15 minutes or so, to firm up.

Use a sharp knife to trim the edges of the sandwiches, if necessary or desired.
Cut the slab into 12 squares.
![photo[2]](/sites/default/files/blog-images/2013/07/photo2.jpg)
Now THAT'S an ice cream sandwich!
Serve immediately; or wrap squares individually in plastic wrap, and store in the freezer.
"So," you say, "Remind me why I should make my own ice cream sandwiches? Looks like kinda a lot of work..."
It's true, they're not quick and easy. But the cookie part is so very chocolate-y; and the ice cream, so strikingly vanilla; the whole such a wonderful amalgam of tastes and textures; AND no artificial ingredients or flavors...
'Nuf said? If you need more encouragement, I highly recommend Jennie's book, I Scream Sandwiches. I'm thinking Vanilla Bean Frozen Custard on Oatmeal Cookies Dipped in Dark Chocolate next...
Read, make, and review Jennie's recipe for Chocolate Ice Cream Sandwiches.
