16 tips to make your best pie yet
Up your pie-baking game with these essential techniques.


What's your definition of the perfect pie?
We all have our own parameters and standards; none right, none wrong, all different. But the perfect pie — well, most of us can agree on certain things. Its crust should be tender and flaky, not leathery or hard. Golden, not burned, and not pale and soggy. Its filling needs to be nicely sliceable: not stiff as wet cement, nor slumping into the pan in a watery mess.
It's time to polish up your pie skills. Whether you're a beginner or a well-seasoned expert, you'll find at least one "ah-ha moment" in the tips below.
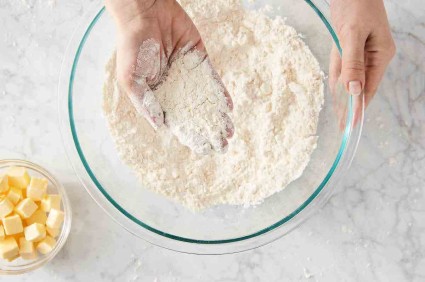
Don’t use cheap ingredients in your pie crust. With just two ingredients (flour and fat) poised to make or break your crust, it pays to buy the best. King Arthur Unbleached All-Purpose Flour (or our softer pastry flour, Perfect Pastry Blend) are top-quality flours that yield consistently good results.
And as for fat: All butter and shortening are not created equal. Some less-expensive store brands have more water (and less fat) than the national brands, and they can make your crust stiff or leathery, rather than flaky. Our advice? Use well-known brands (we like Vermont’s Cabot butter, and Crisco shortening). Or find a store brand that works for you, and stick with it; don't dub around with cheap substitutes — especially when your Thanksgiving pie is on the line!
And which crust is "better" — one made with butter, or shortening, or a combination? See butter vs. shortening.
The secret to wonderfully flaky pie crust lies in the balance of fat and water: the higher the ratio of fat (to a point), the flakier/more tender the crust.
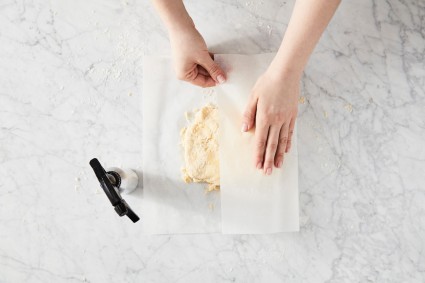
Many pie bakers make the mistake of adding too much water (even just a touch too much can negatively affect your crust), in an attempt to make the dough cohesive. Here's a tip: Once the dough starts to come together, dump it out onto a piece of parchment or waxed paper, and spritz any dry areas with a water bottle. This will help keep the fat/water ratio in balance. For complete instructions, see our blog post Pie, any way you slice it.
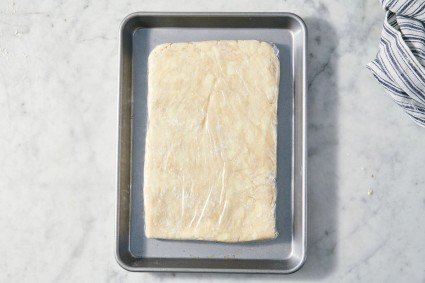
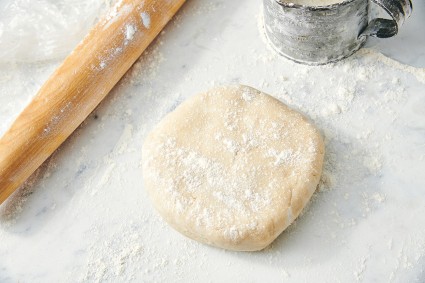
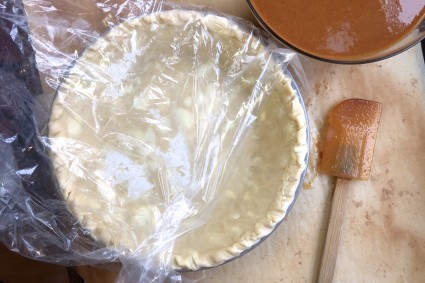
Pie crust is easiest to roll after about 30 to 40 minutes of refrigeration. Once you've shaped it into a disk (or a rectangle to make a slab pie, as shown above), wrap it in plastic or waxed paper, and chill it in the fridge. You want it to be stiff enough so it’s not sticky, but not so stiff that it cracks around the edges as you roll; 30 minutes is just about right. If the dough has been refrigerated longer than that, give it about 20 to 30 minutes at room temperature to soften up before rolling.
Does your pie crust slide down the side of the pan as it bakes, or shrink away from the rim? That means you’ve rolled it too much, and/or not let it rest before baking. The gluten in pie crust becomes elastic as you roll the dough — the more you roll, the more elastic it becomes. If you fill the crust and put it directly into the oven, that elastic gluten pulls the crust away from (and down) the sides of the pie pan.
The solution? Refrigerate the crust once you’ve rolled it out (while you prepare the filling). This gives the gluten a chance to relax (no shrinking or sliding) and also hardens the fat (superior flakiness).
So the crust is in the fridge — time for the sales pitch! But really, even if we didn’t sell this stuff, I’d recommend it.
1) An old-fashioned apple peeler-corer-slicer. Stick an apple on the prong, turn the handle, and less than 10 seconds later you have a cored, peeled, perfectly sliced apple.
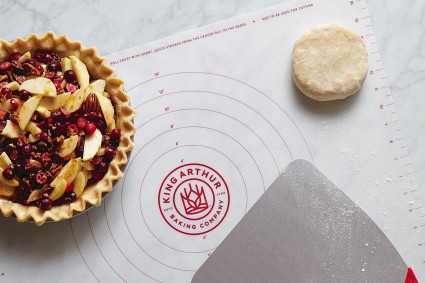
2) A silicone rolling mat. Makes cleanup a breeze. The one I use has measured circles marked on it, so you can roll your crust perfectly round, and to the exact right size.
3) A giant spatula. Use it to pick up the crust as you roll, to sprinkle more flour underneath. Then use it to pick up the crust and gently lay it in the pie pan.
4) 9" parchment rounds, the perfect size for lining your crust before adding pie weights, dried beans, uncooked rice, etc. prior to pre-baking.
Be absolutely sure, when rolling out pastry dough, that it's sufficiently floured. There’s nothing quite so frustrating as rolling out a lovely round of dough, then being unable to get it off the table into the pie plate. Take a giant spatula and, after every five or so strokes of the rolling pin, use it to lift the crust off the counter or mat, and sprinkle more flour underneath.
That said — don't overdo the flour. Too much flour will make your crust dry. As you roll, use a pastry brush to brush off any excess.

Do you have trouble making a smooth edge when you’re rolling out pastry dough? Does your rolled-out dough look like a relief map of Australia?
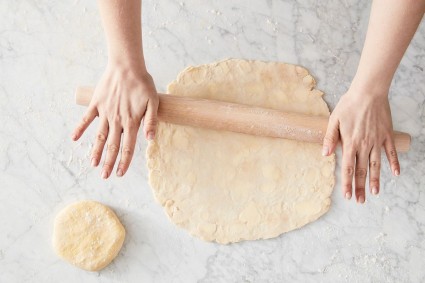
It helps to start with a nice, smooth edge. Shape prepared dough into a round disk about 3/4” thick, then roll the disk, like a wheel, along a clean work surface. Roll several times, until the edges are nice and smooth. Rolling dough into a smooth circle is much easier when you start with a smooth circle.
Be sure to roll the crust large enough for the pan you’re using. A good rule of thumb is the pan’s diameter plus twice the pan’s height, e.g., a 9” x 1 1/2” pie pan needs a 12”-diameter bottom crust.
Why is this important? Because pastry dough that’s stretched to fit a pan will try its hardest to revert to its original size as it bakes. If you’ve stretched a too-small round of dough to cover the pan, it’ll most likely shrink down the sides of the pan, disappearing into the filling as the pie bakes. Not ideal!
Did your grandma roll her rolling pin and roll back and forth, back and forth over pie crust dough? Well, this is one time you shouldn’t follow Grandma’s example! Rolling dough first one way, then the other “confuses” the gluten, making it tough.
The best way to roll pie crust? Start at the center and roll outward, towards the edges, giving the crust a quarter-turn every couple of rolls. This “aligns” and strengthens the gluten in the dough without making it tough. And if you're worried about the pin sticking to the crust, put a piece of parchment between the two; works like a charm!
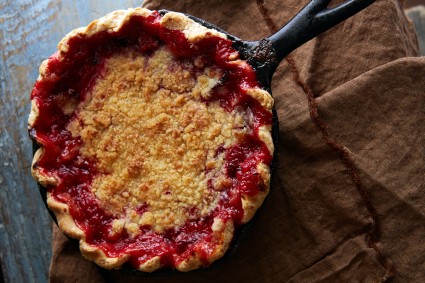
Now, on to the pan. If you're a pie baker who battles soft, white, flabby bottom crusts, try this trick: Bake in a well-seasoned 9" to 10" cast-iron skillet. Cast iron, being both black and iron, conducts heat extremely well; set it on the lowest rack of your oven, and your pie's bottom crust will be wonderfully browned.
Whatever pan you choose, it's best that it be darker in color (like our dark-gray 9" King Arthur pie pan), rather than lighter; a light-colored, shiny metal pan will produce a light-colored, under-baked crust.
Do you prefer baking in a glass or stoneware pan? No problem; if it works for you, stick with it.
Grease your pie pan? Doesn't seem like you'd need to, since the crust includes a significant amount of fat. But here in the Test Kitchen, we've found that a spritz with your favorite non-stick vegetable oil spray (our favorite is Everbake) makes it easier to get that first slice of pie out of the pan — especially if any sticky filling has seeped out and is acting like glue.
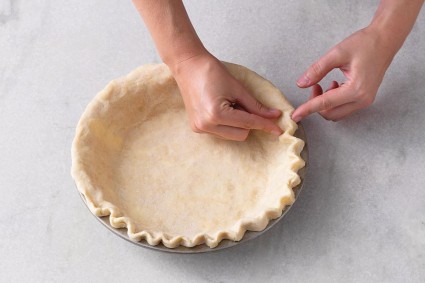
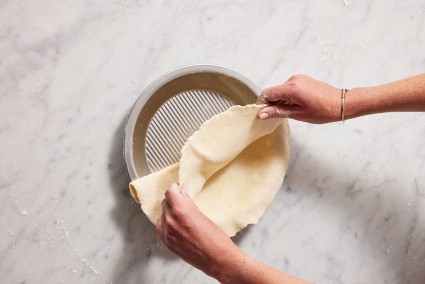
If you're making an open-face (single-crust) pie — e.g., pumpkin, chocolate cream, custard, apple crumb — you'll want to "crimp" the edge of the crust: which means prettying it up a bit, rather than simply letting it sit there all raggedy-looking.
The simplest "finish" to the edge of a crust is simply to trim off any overhang, then press it down onto the rim of the pan gently, with the tines of a fork; this is an appropriate crust when the filling isn't liquid.
For a liquid filling, it's best to make a stand-up edge, in order to better contain any sloshing filling as you're moving the pie from counter to oven. To make a stand-up edge, press and squeeze the crust's overhang into a vertical "wall;" then use your fingers to flute the wall. (Watch how to do it here.) A spoon pressed around the outer edge makes a pretty crimp, as well. See more ideas: Fun ways to crimp pie crust.
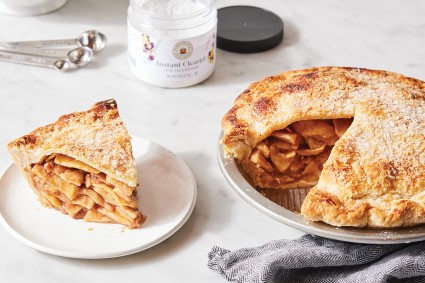
When you’re making apple pie, choose apples according to how soft you like your filling. Of commonly available apples, McIntosh will make a very soft, smooth filling; Cortland, a bit less soft; and Granny Smith, the most toothsome, chunky filling.
Check out local varieties by slicing in chunks, and microwaving for several minutes, side by side; you’ll be able to tell easily which apples soften as they cook, and which remain firm.
Who's had this experience? You cut into your pie, and the filling drains out of the crust into the bottom of the pan. Not a pretty sight.
Fix #1: Don't cut your pie until it's absolutely cold. Cutting a piece of pie when the pie's even lukewarm can cause the filling to run into the breach. To enjoy a slice of warm pie, wait until the entire pie cools completely (this can take up to 6 to 8 hours); then cut a piece, and rewarm briefly; the microwave works well here.
Fix #2: Use the correct amount of thickener. Whether you prefer flour or cornstarch, tapioca or Instant ClearJel or Pie Filling Enhancer, it's important that you match the type of fruit to the type and amount of thickener. This can be tricky; for lots of helpful tips, see our Pie Thickener Guide.
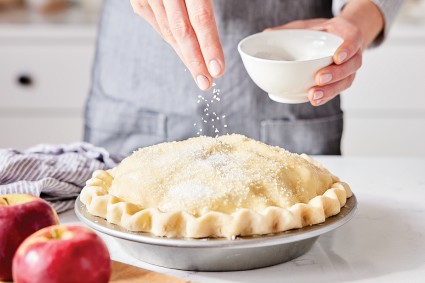
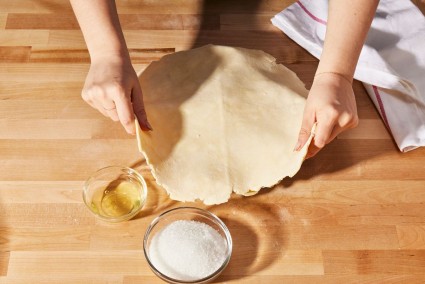
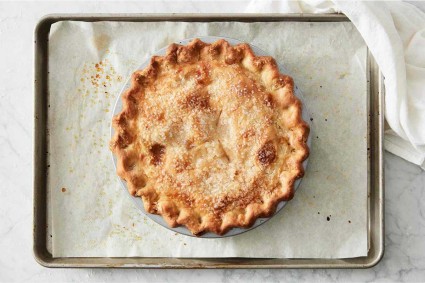
For a lovely final touch atop a double-crust pie, before baking brush the crust with milk or cream, and sprinkle it with coarse white sugar (sparkling sugar). For apple pie, try cinnamon sugar.
If you've baked many fruit pies, you've probably experienced the dreaded boil-over: the filling bubbles up and out of the crust, onto the floor of your oven, where it smokes, turns black, and fills your kitchen with the aroma of burned sugar. Not pleasant.
It's inevitable that fruit pies will sometimes spill their filling; make sure you're prepared by setting the pie pan on a baking sheet lined with parchment. While the filling may burn and even smoke, at least you can simply discard the parchment afterward — rather than stick your head in the oven and scrape gluey black residue off its floor.
Can you freeze pie and bake it later? Absolutely! Our blog post on freeze-and-bake fruit pies tells you everything you need to know to get ahead of the Thanksgiving curve — or to save some of summer's fresh berry pies to enjoy in January.
And there you have it — pie news you can use. This Chocolate Cream Pie is now well within your reach! And we bet you're inspired to make pie crust, right? Enjoy our recipes for Classic Single Pie Crust and Classic Double Pie Crust.
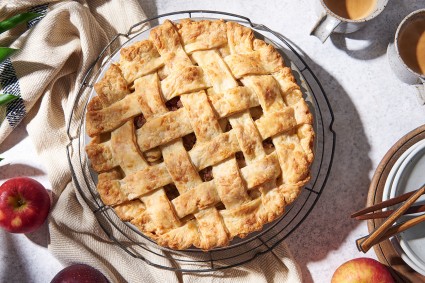
Want to weave a lattice crust, make cutout decorations, create a braided edge, and more? Read our Pie Baking Essential Guide.
Cover photo and food styling by Liz Neily.
