


It's been a long winter. Record snowfall and week-long stretches of -0°F temperatures have really taken the joy out of the season for many. But, we made it! Spring is right around the corner, and with it comes warm weather and green grass. Finally.
There's no better way to celebrate the coming of spring than with maple. The sap from maple trees will only flow in the spring if there's a very cold night, followed by a warmer day (above freezing). I can relate; after a winter as long and cold as this one, I also only feel like moving when there's a warm day.
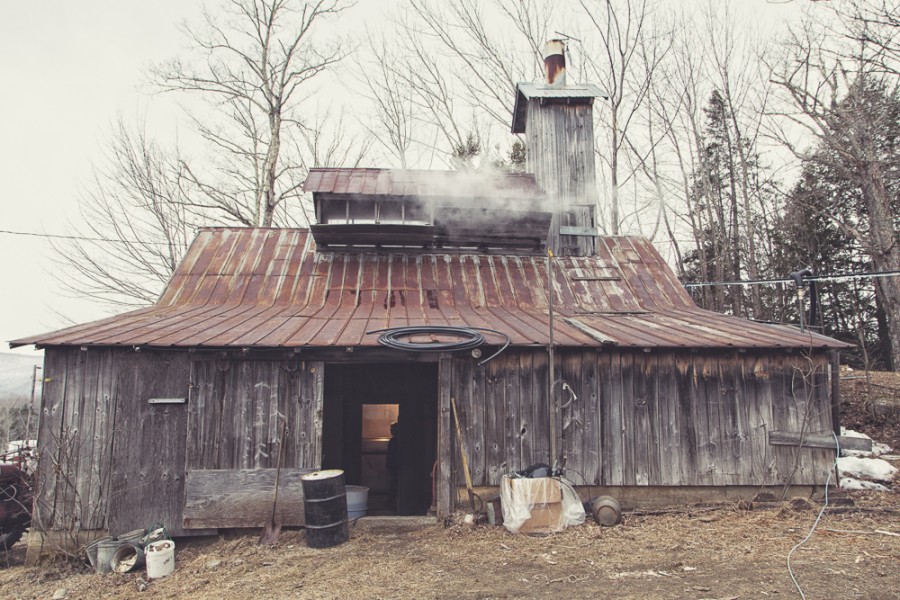
My family used to tap trees when I was younger. Each morning before school, my brother and I would take a trip around the mountain, visiting our plastic milk bottle taps and collecting all the sap into big 5-gallon pails strapped to the back of the snowmobile that we hauled back to the house. It was far too heavy for us to carry down by hand.
Our small garage woodstove was topped with the largest pot we owned, and was continually fed our sap gatherings until we boiled down enough syrup to last the year.
I asked my mom why we stopped making maple syrup. Her response? "Your dad and I were sick of a sticky house. There were so many critters that wanted to come in and lick the walls!" This was a downside I had never considered. Luckily, we have friends with sugar houses, so we can continue to get our local maple syrup, minus the visits from our raccoon and bear friends.
Did you know it takes (on average) 40 gallons of sap to produce 1 gallon of maple syrup? Each tapped tree only yields 5 to 15 gallons of sap a year, so it takes quite a few trees for people to get their syrup fix.
To go along with the effort of tapping and gathering is the boiling. And boiling. And boiling. There's a lot of time invested in the quest for the sweet stuff. Just a little fun fact to keep in mind the next time you happen to glance at the price on each container of syrup.
Because maple syrup and maple sugar are so expensive, I'm often quite stingy with them on top of my pancakes and in my coffee and other desserts. The exception? These doughnuts. Adding maple sugar to the batter really delivers a ton of flavor in each bite.
Indulge. Splurge. It's totally worth it.
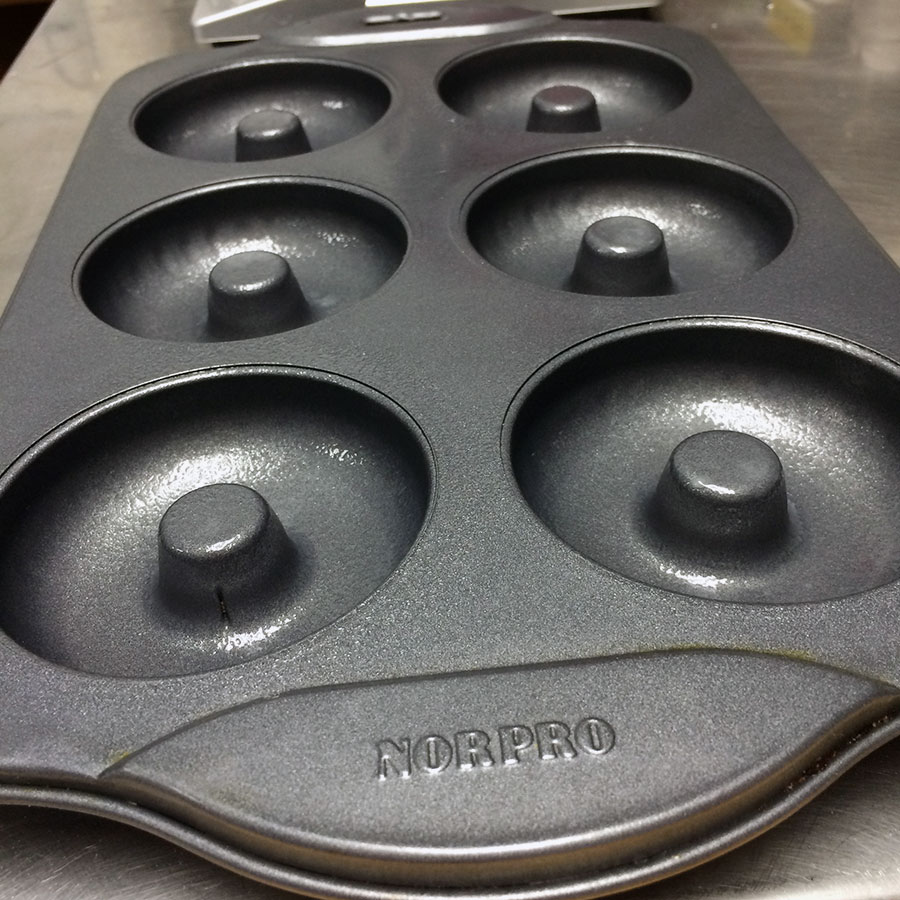
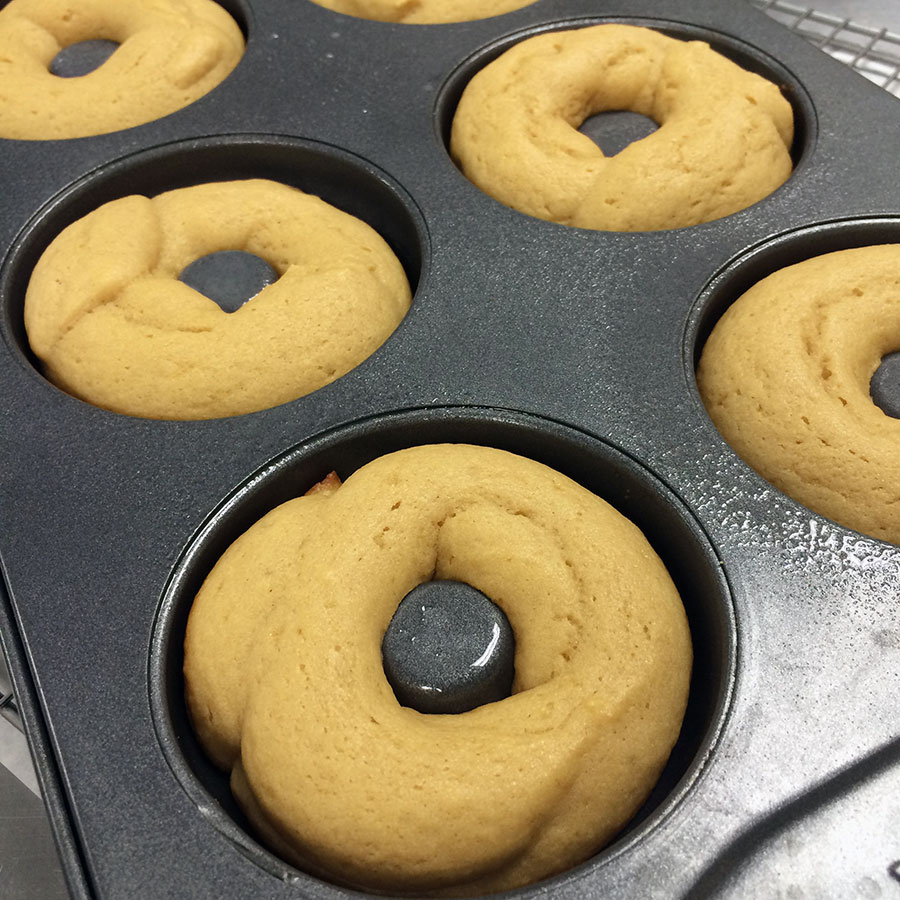
Preheat the oven to 375°F. Grease a standard-sized doughnut pan.
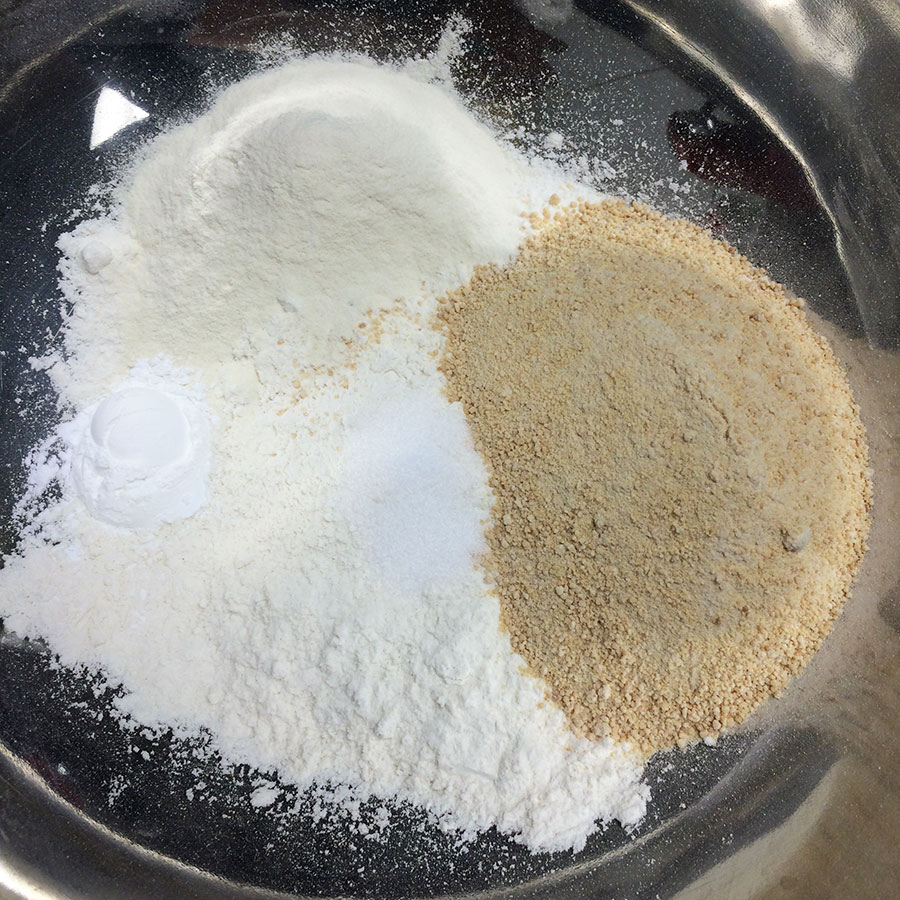
Whisk together:
3/4 cup (85g) King Arthur Unbleached All-Purpose Flour
1/2 cup (78g) maple sugar
2 tablespoons (25g) potato flour
3/4 teaspoon baking powder
1/4 teaspoon salt
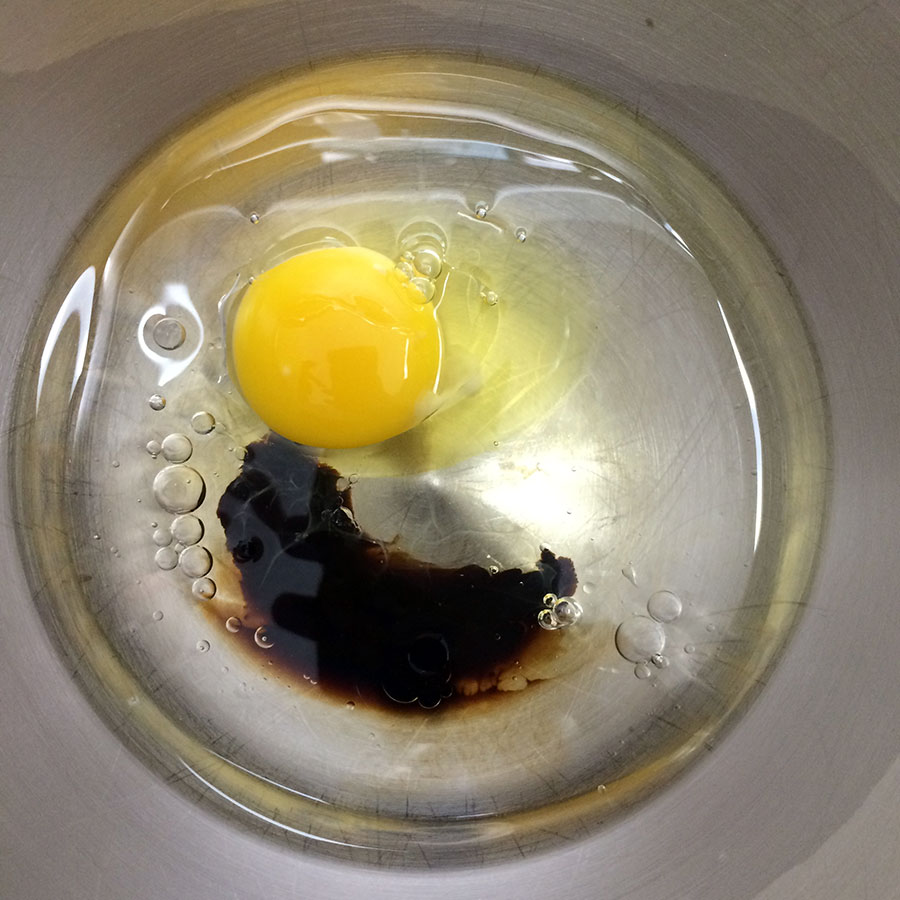
In a separate bowl, beat until well combined and frothy:
1 large egg
6 tablespoons (85g) water
3 tablespoons (39g) vegetable oil
1/4 teaspoon maple flavor; optional, but it really enhances the flavor!
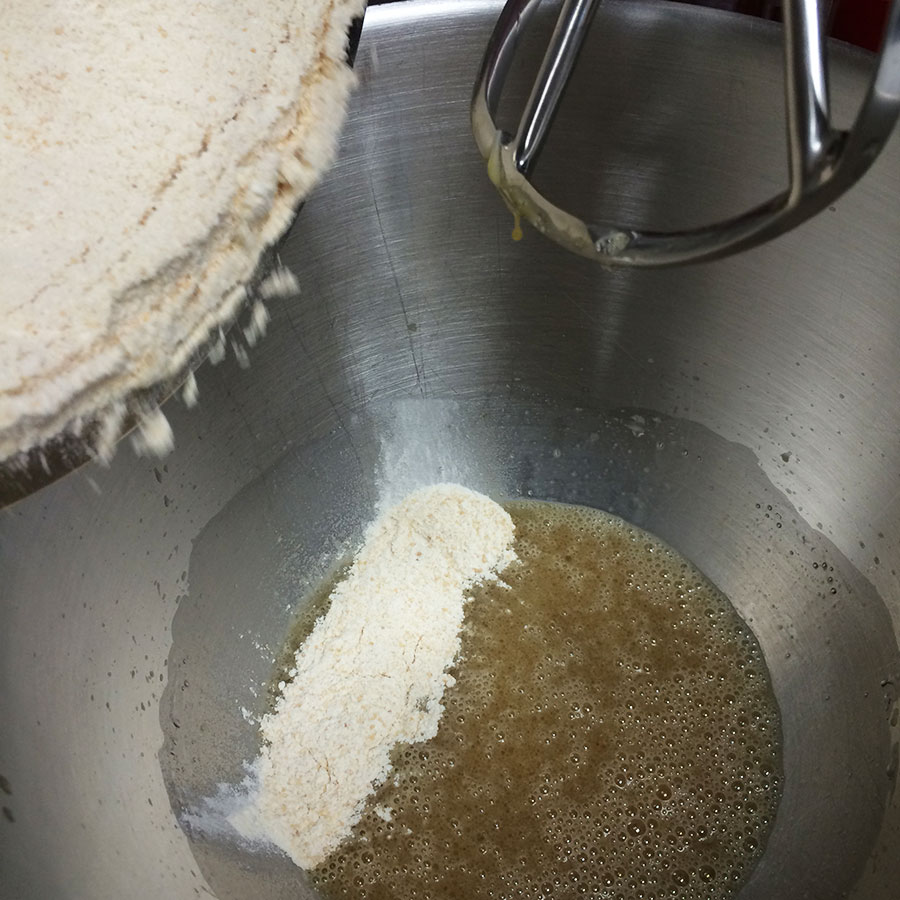
Add the dry ingredients to the egg mixture...
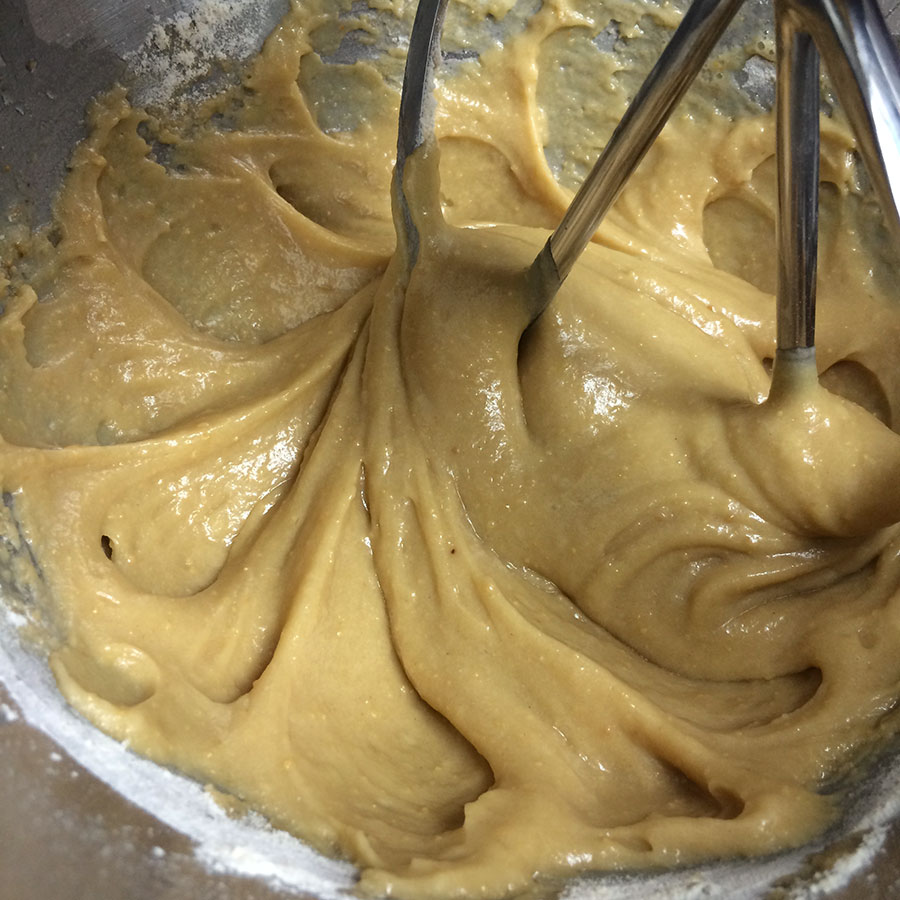
...and stir until well combined.

Fill each doughnut form about half full. I found piping the doughnut batter with a piping bag worked the best here, as it's a thicker batter.
Bake the doughnuts for 12 to 14 minutes, until they spring back when touched lightly and are a very light brown color on top.
While the doughnuts bake, prepare the glaze.

Whisk together:
2 tablespoons (20g) maple sugar
2 tablespoons (28g) confectioners' sugar
2 tablespoons (28g) heavy cream
1/8 teaspoon maple flavor, optional

Microwave the combined ingredients on high for 30 seconds, to allow the maple sugar to fully dissolve.
Remove the doughnuts from the oven, and allow them to rest in the pan for a few minutes before turning them out onto a rack to finish cooling. A firm tap on the rack when the pan is inverted usually does the trick.
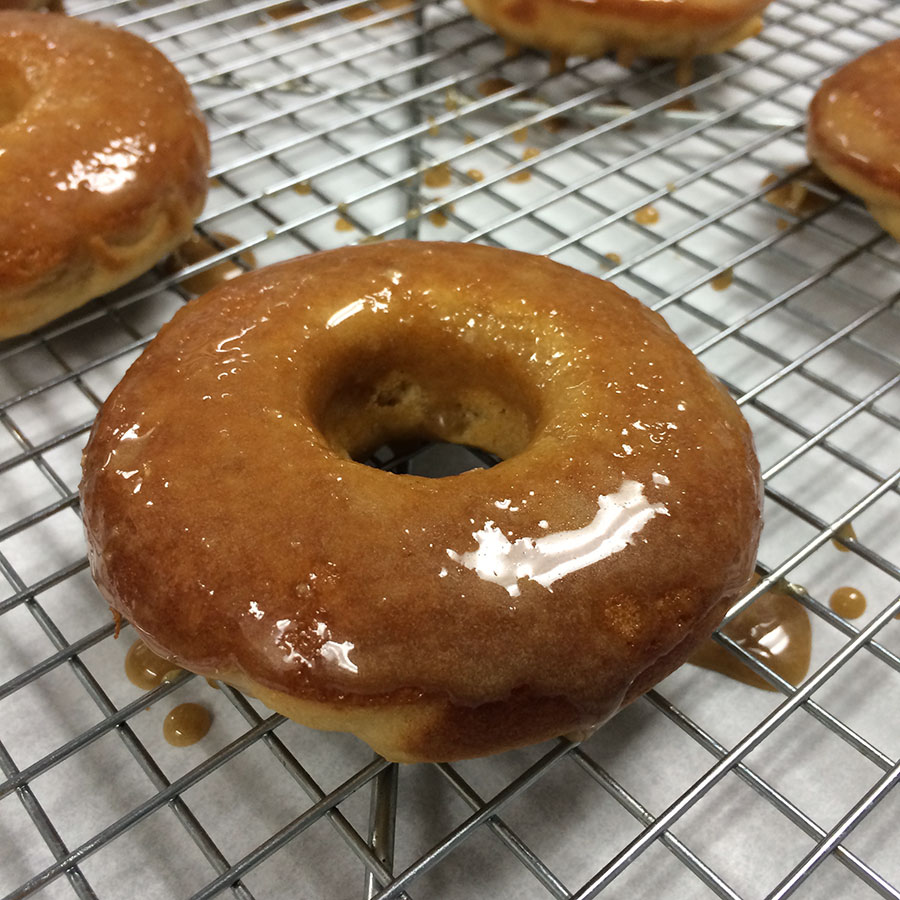
While the doughnuts are still warm, dip the tops in the glaze. Feel free to serve them warm and gooey, though the glaze will firm up when the doughnuts are fully cooled.
Also, feel free to sprinkle crushed walnuts over the top of the warm glaze, if you'd like. This recipe makes 6 flavorful, standard-sized maple treats.

Can you make these doughnuts without potato flour? I tested with and without, and the answer is yes. It will, however, alter the texture. The potato flour absorbs a lot of liquid and gives the doughnuts more of that classic doughnut texture. Without it, they were more like a soft cake.
The ones on the left (in the two bottom photos above) are made without potato flour. The bottom left doughnut was also dipped in a glaze that was only heated for 15 seconds. The maple sugar didn't have nearly enough time to dissolve, as you can tell!
The flavor didn't change, though, so feel free to whip these up with or without. They were all delicious experiments, trust me.
Enjoy your homemade maple doughnuts with a cup of coffee or tea, while sitting in the sweet, sweet, sunshine. Winter 2015, you were... memorable. Bring on the warm!
Please bake, rate, and review our recipe for Maple Doughnuts.
