Let's face it: Pie tastes good regardless of how pretty it looks. But learning some pie crust decorating basics can take an already delicious pie up a notch, adding a visually enticing element. Plus, it's fun to practice!
Whatever your comfort level with pie crust, there's a technique here for you. You can start with something simple, like crimping. Then move on to perfecting the lattice crust, then learn to make a braided crust.
We'll also show you some creative ways to top your pie with cutouts and shapes. This technique is easy to adapt for any holiday or occasion (leaves for fall, hearts for Valentine's Day, you get the idea!).
These decorating techniques work with any pie crust, but an excellent place to start is our Classic Double Pie Crust recipe. Now let's get fancy.
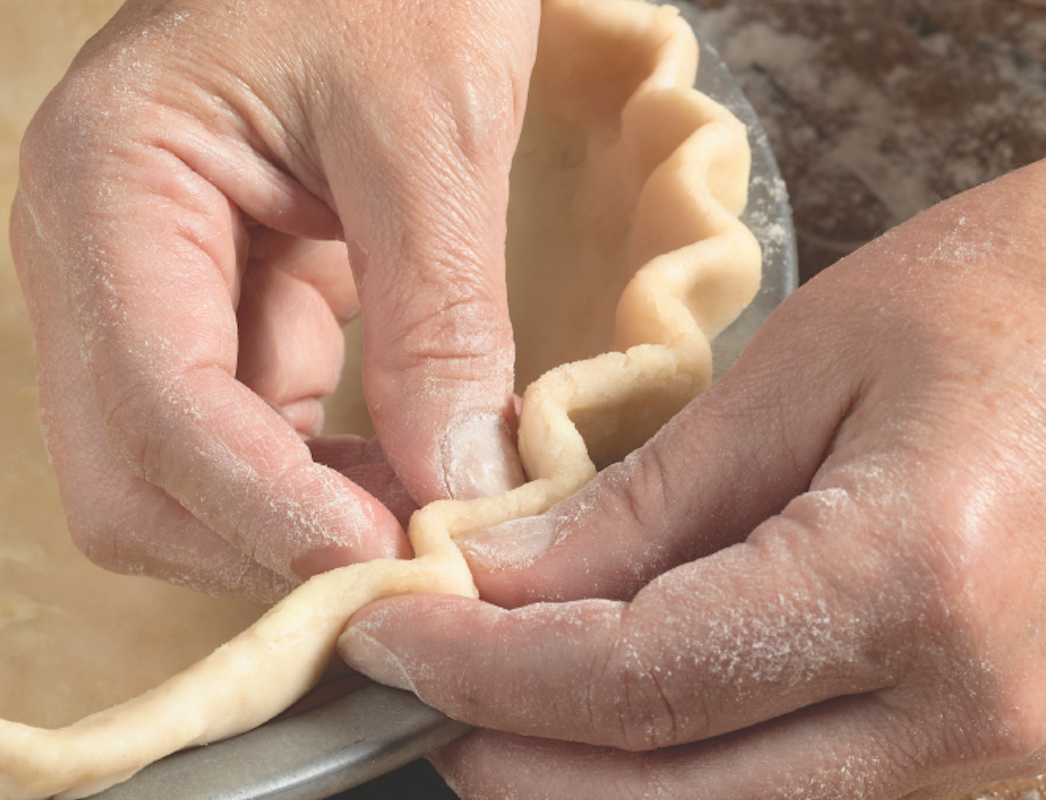
First, place your pie crust in the pan. Trim the edges of the crust so there's only about 1" of overhang. Tuck the overhanging dough underneath the rest of the crust, so that your crust fits the pie plate exactly.
Using the thumb and forefinger of one hand and the thumb of the other hand, press to form evenly shaped crimps around the entire crust. Use light pressure as you crimp.
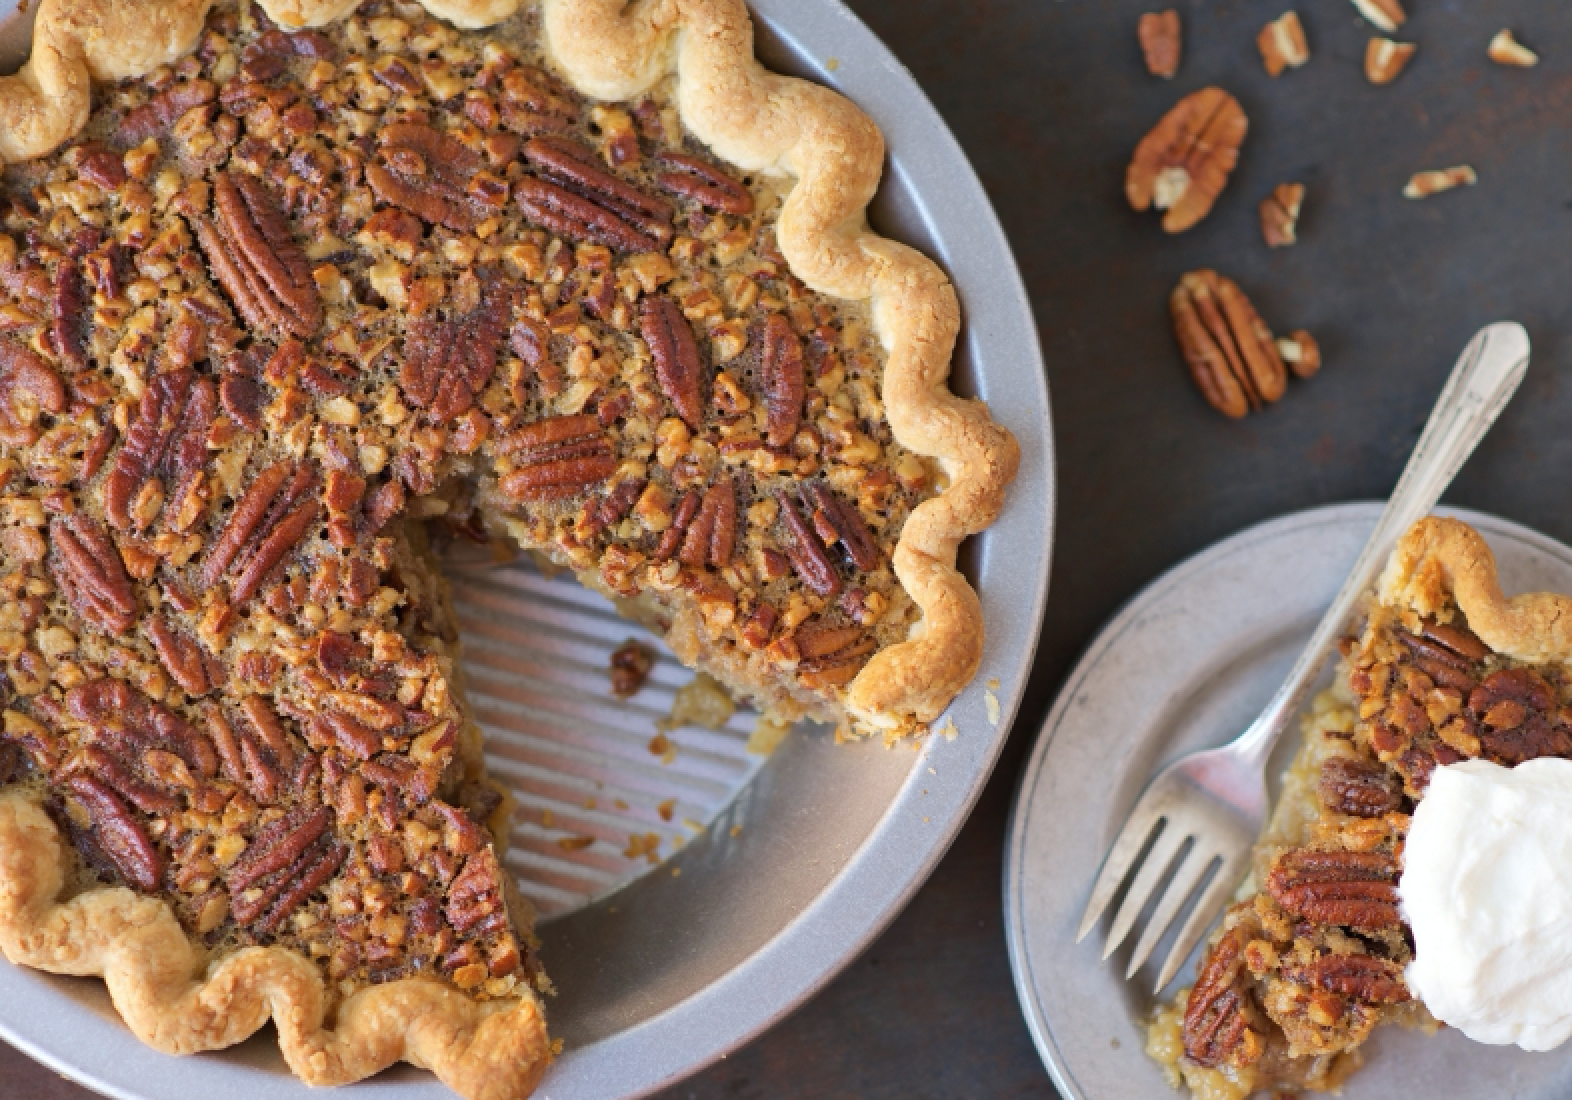
Practice the crimp on our Old-Fashioned Pecan Pie recipe.
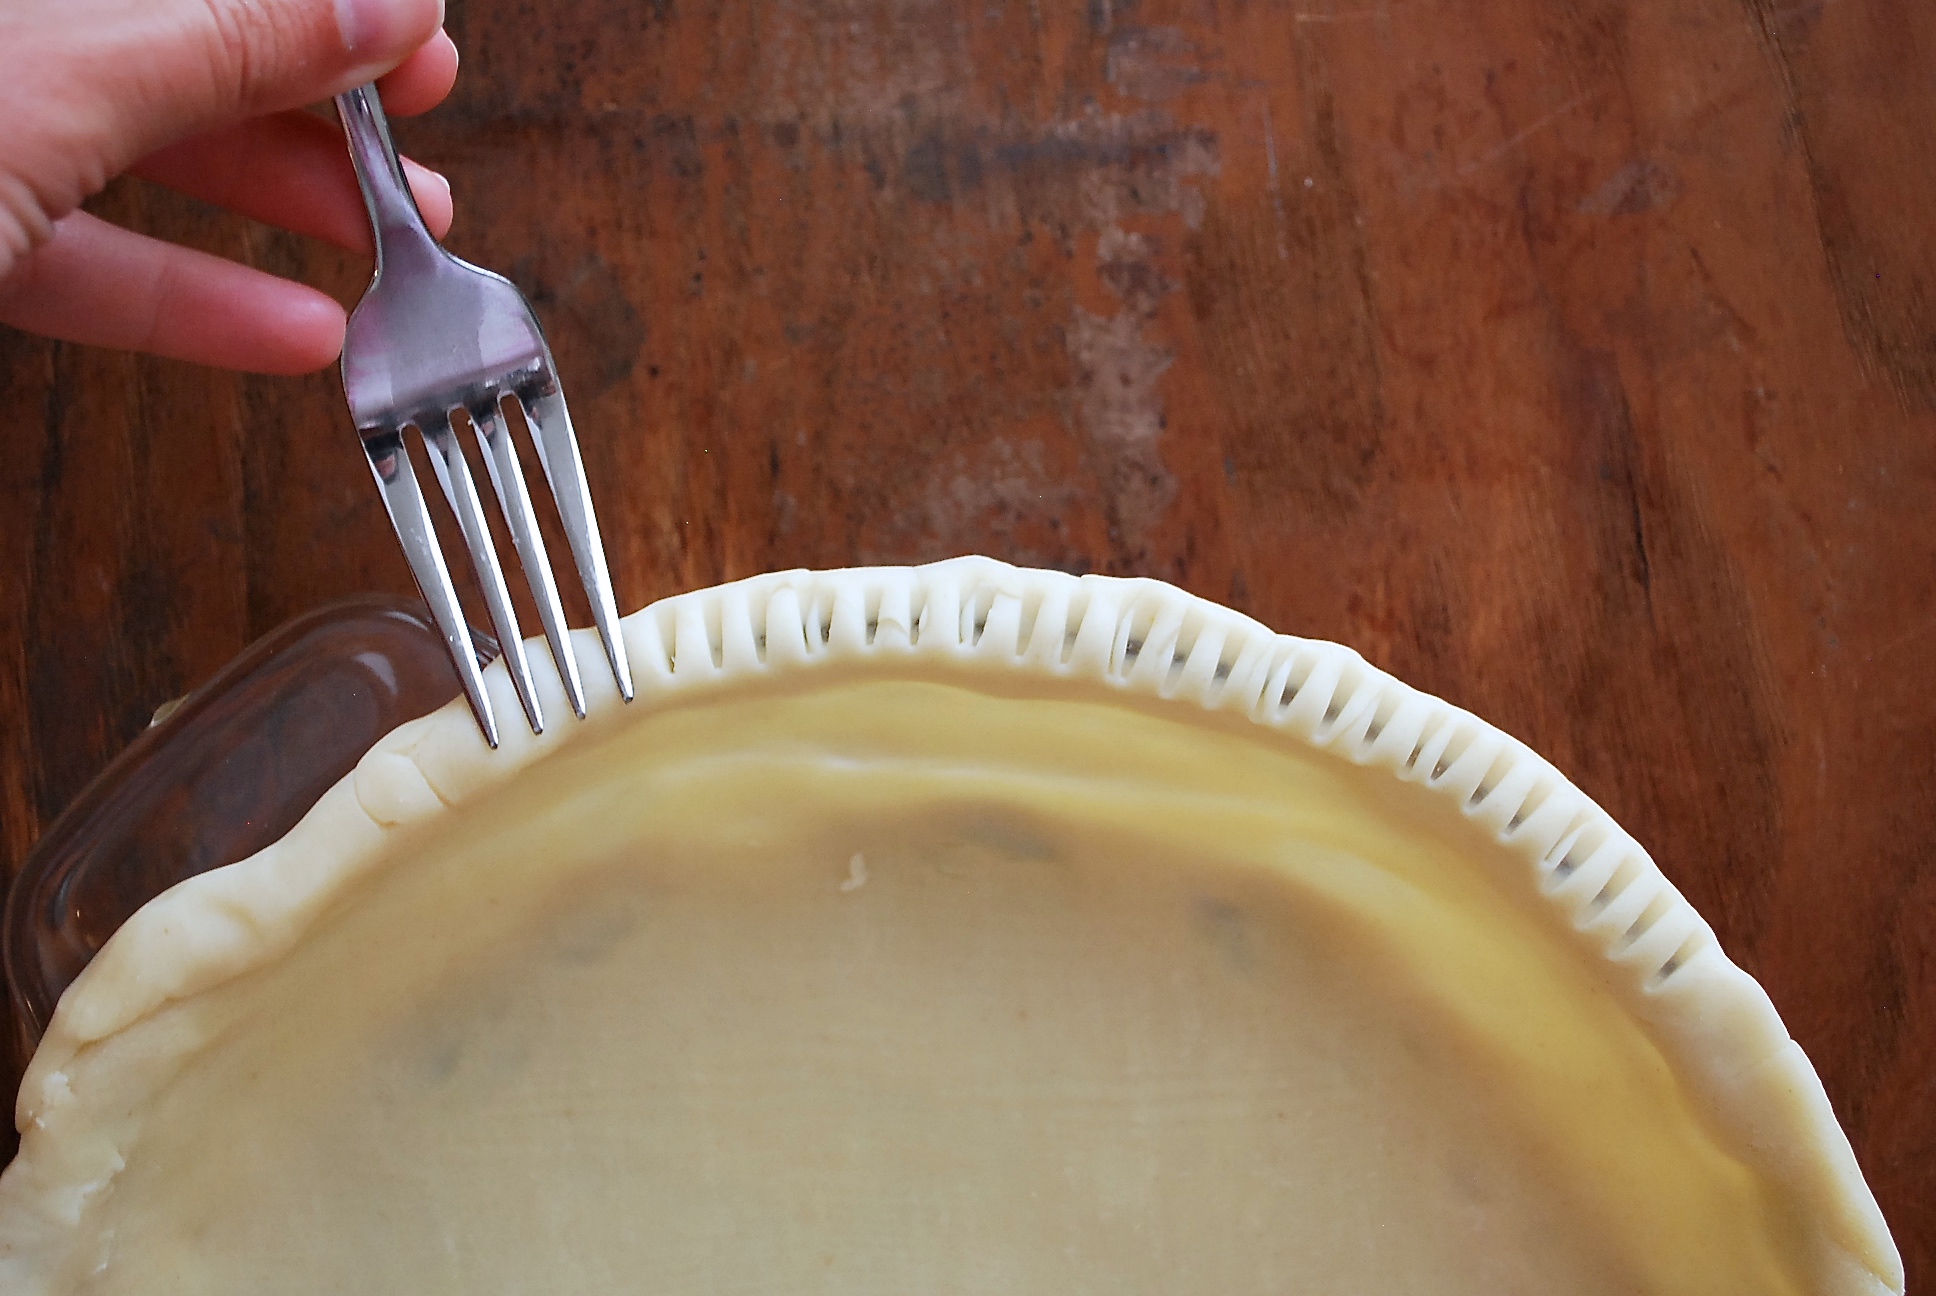
This is a simpler way of crimping that creates a neatly decorated crust. Prepare your crust as you would for the regular crimp. Using the tines of a fork, press gently down on the edge of the crust. Continue pressing around the entire edge to form evenly spaced lines.
This technique is often used to seal the edge of hand pies. Try it out in our Toffee Apple Hand Pies recipe or our Mr. Washington's Cherry Pie recipe.
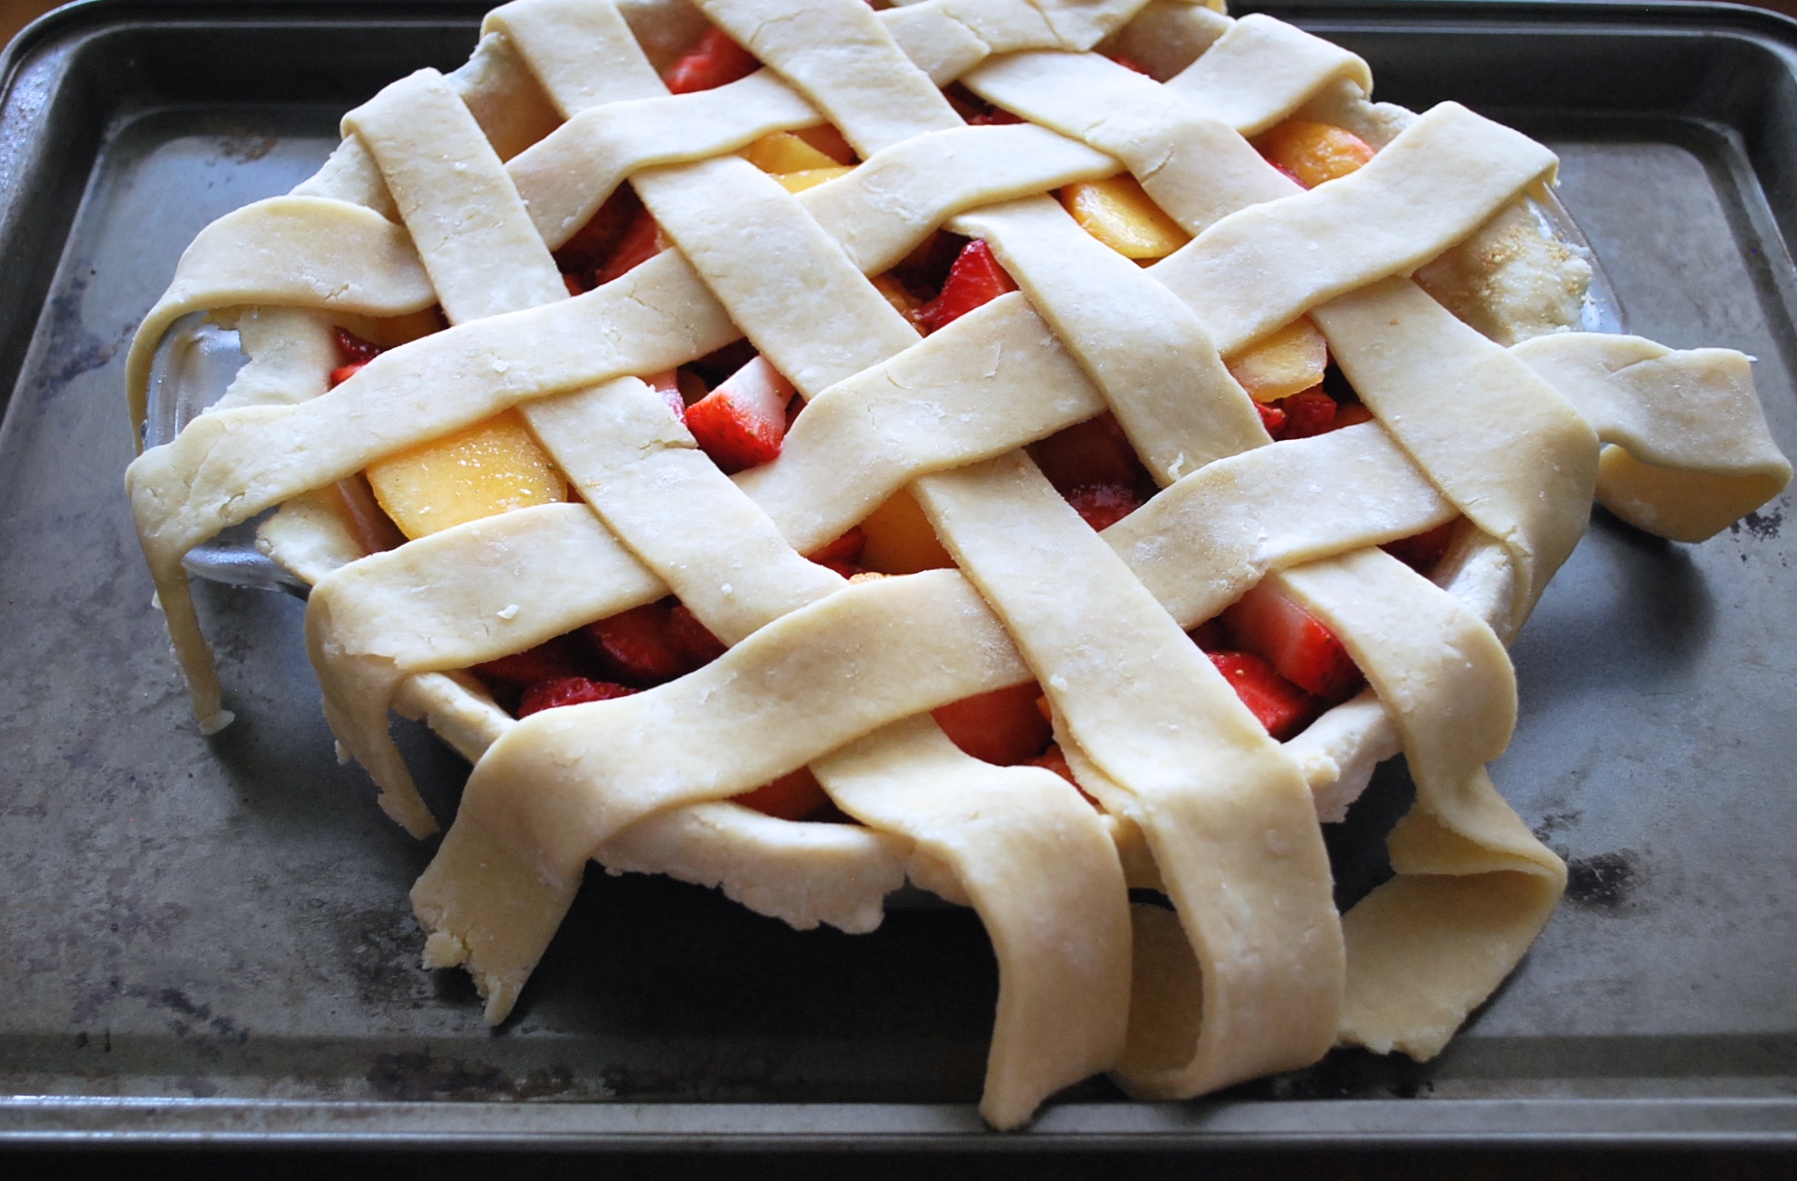
Classic and pretty, the lattice crust is the most recognizable way to decorate a pie. To make it, prepare a double-crust recipe. Line the pie plate with your bottom crust and fill the pie.
Roll out the other half of your pie dough on a lightly floured surface. Using a knife, slice strips of dough into even widths. Place strips vertically across your pie, making sure to space them evenly. Now, peel back every other vertical strip. Starting at the top of your pie, place a strip of dough horizontally. Fold the vertical strips down to just cover the horizontal strips.
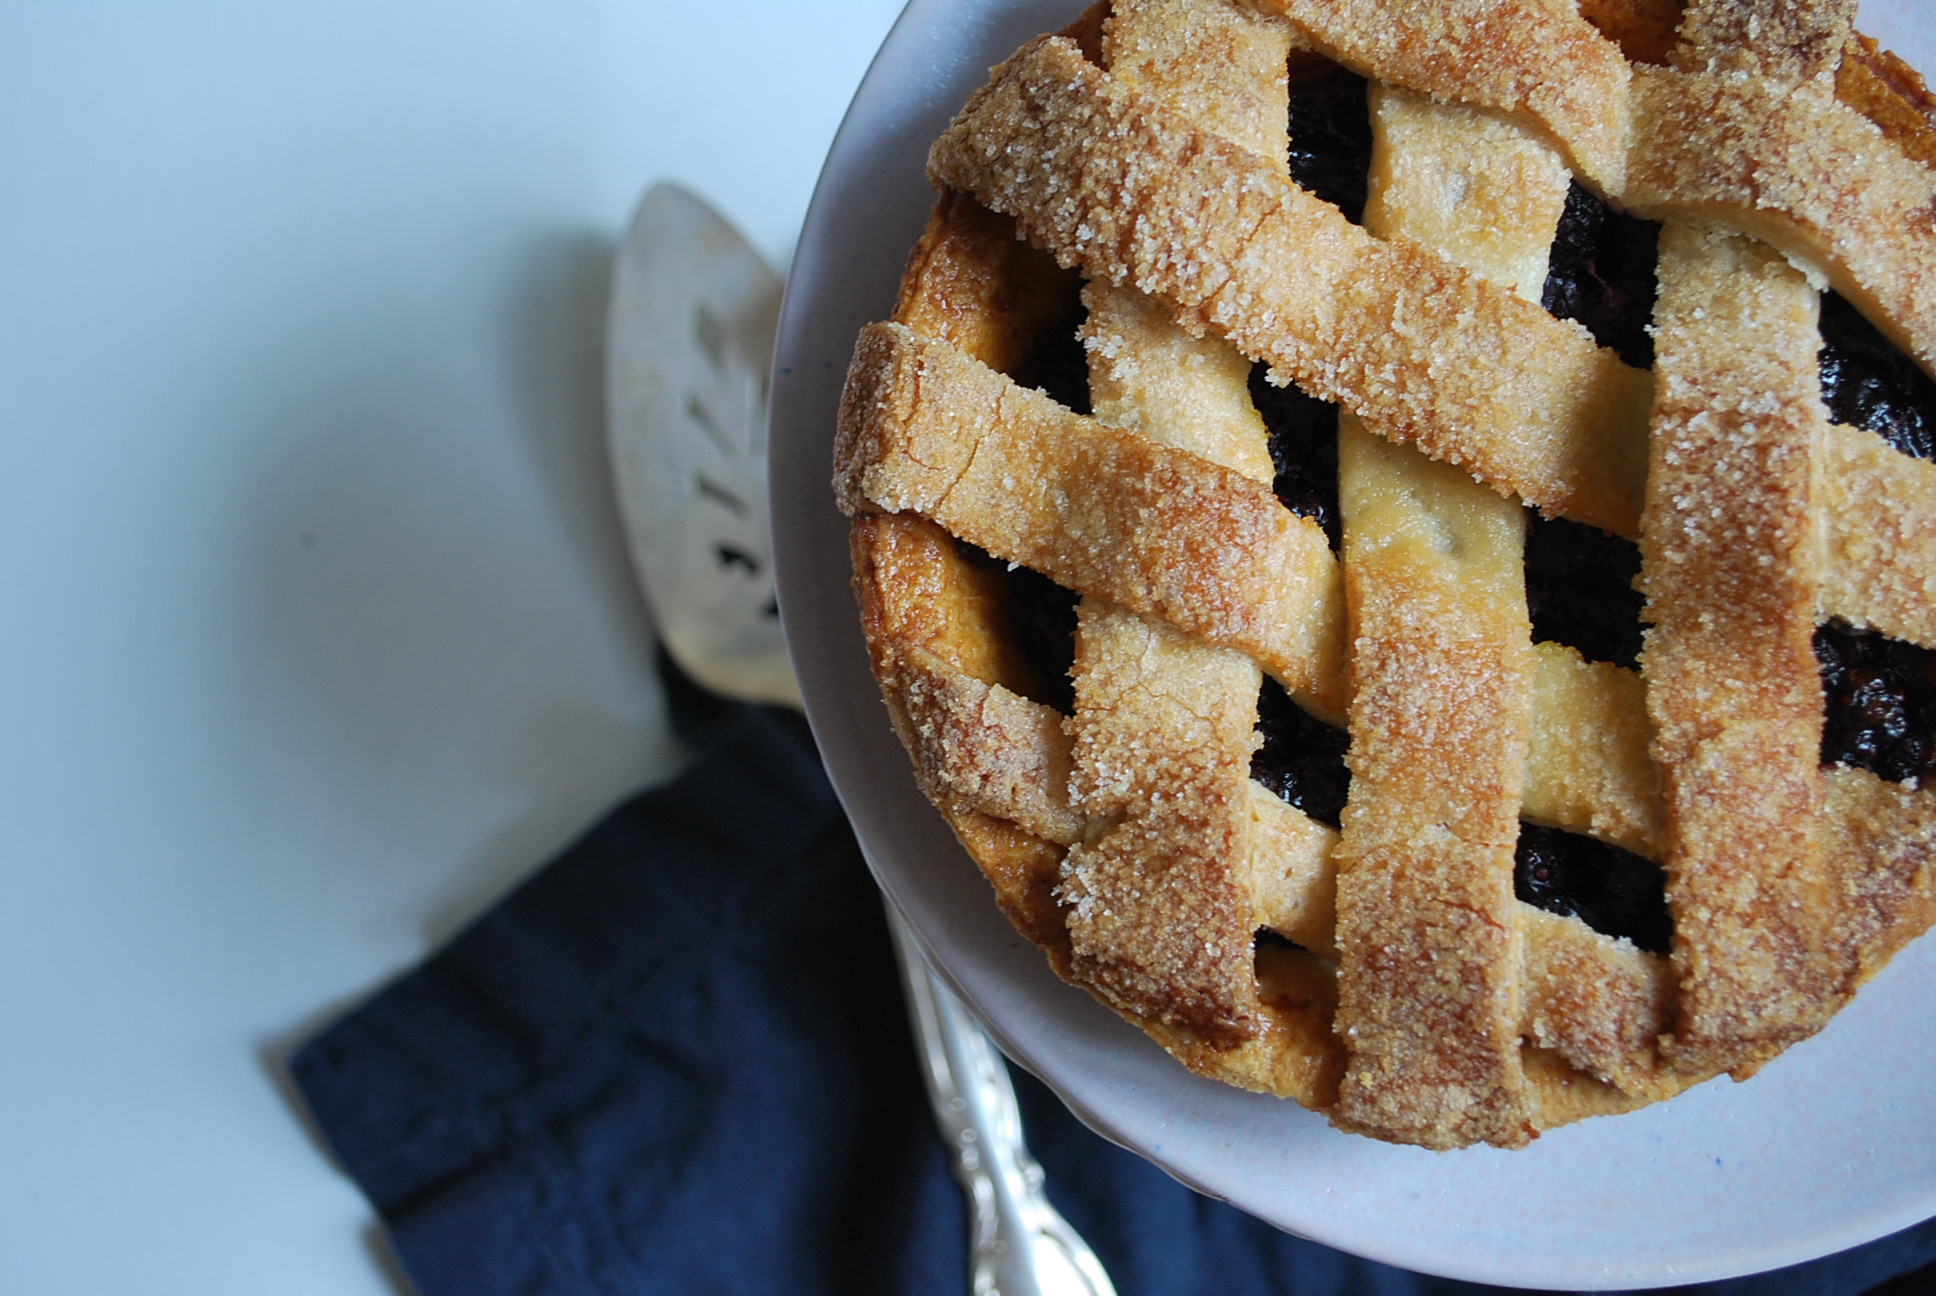
Peel back every other vertical strip, alternating from the ones you peeled back in the first step. Place another strip horizontally, fold back the vertical strips, and continue in this fashion until your pie is covered.
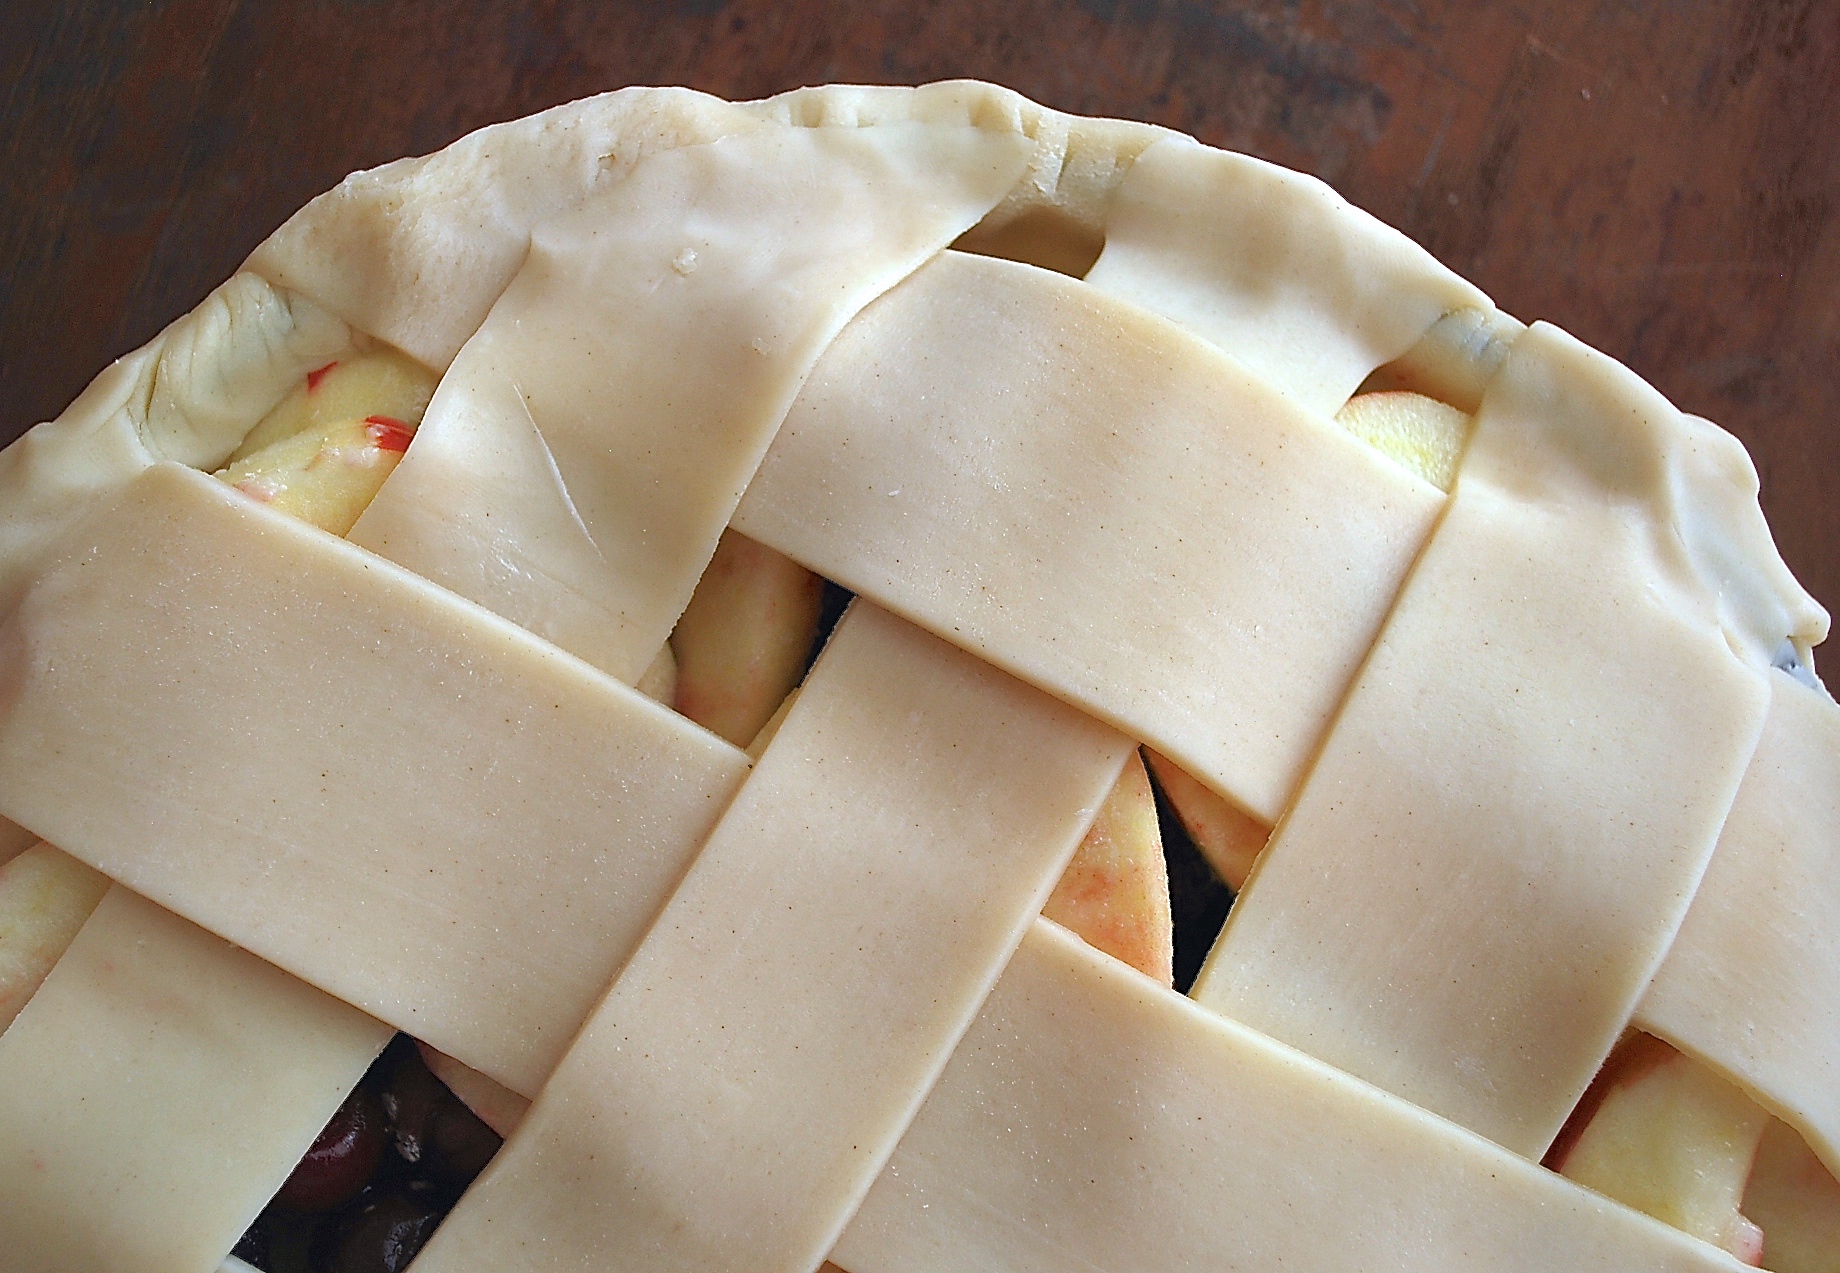
Once you've mastered the basic lattice (practice it with our Best Apple Pie recipe), you can think outside the box. Try a miniature, tightly woven lattice by making your strips very thin and placing them quite close to one another. Or make the strips extra wide to create a "fat" lattice effect.
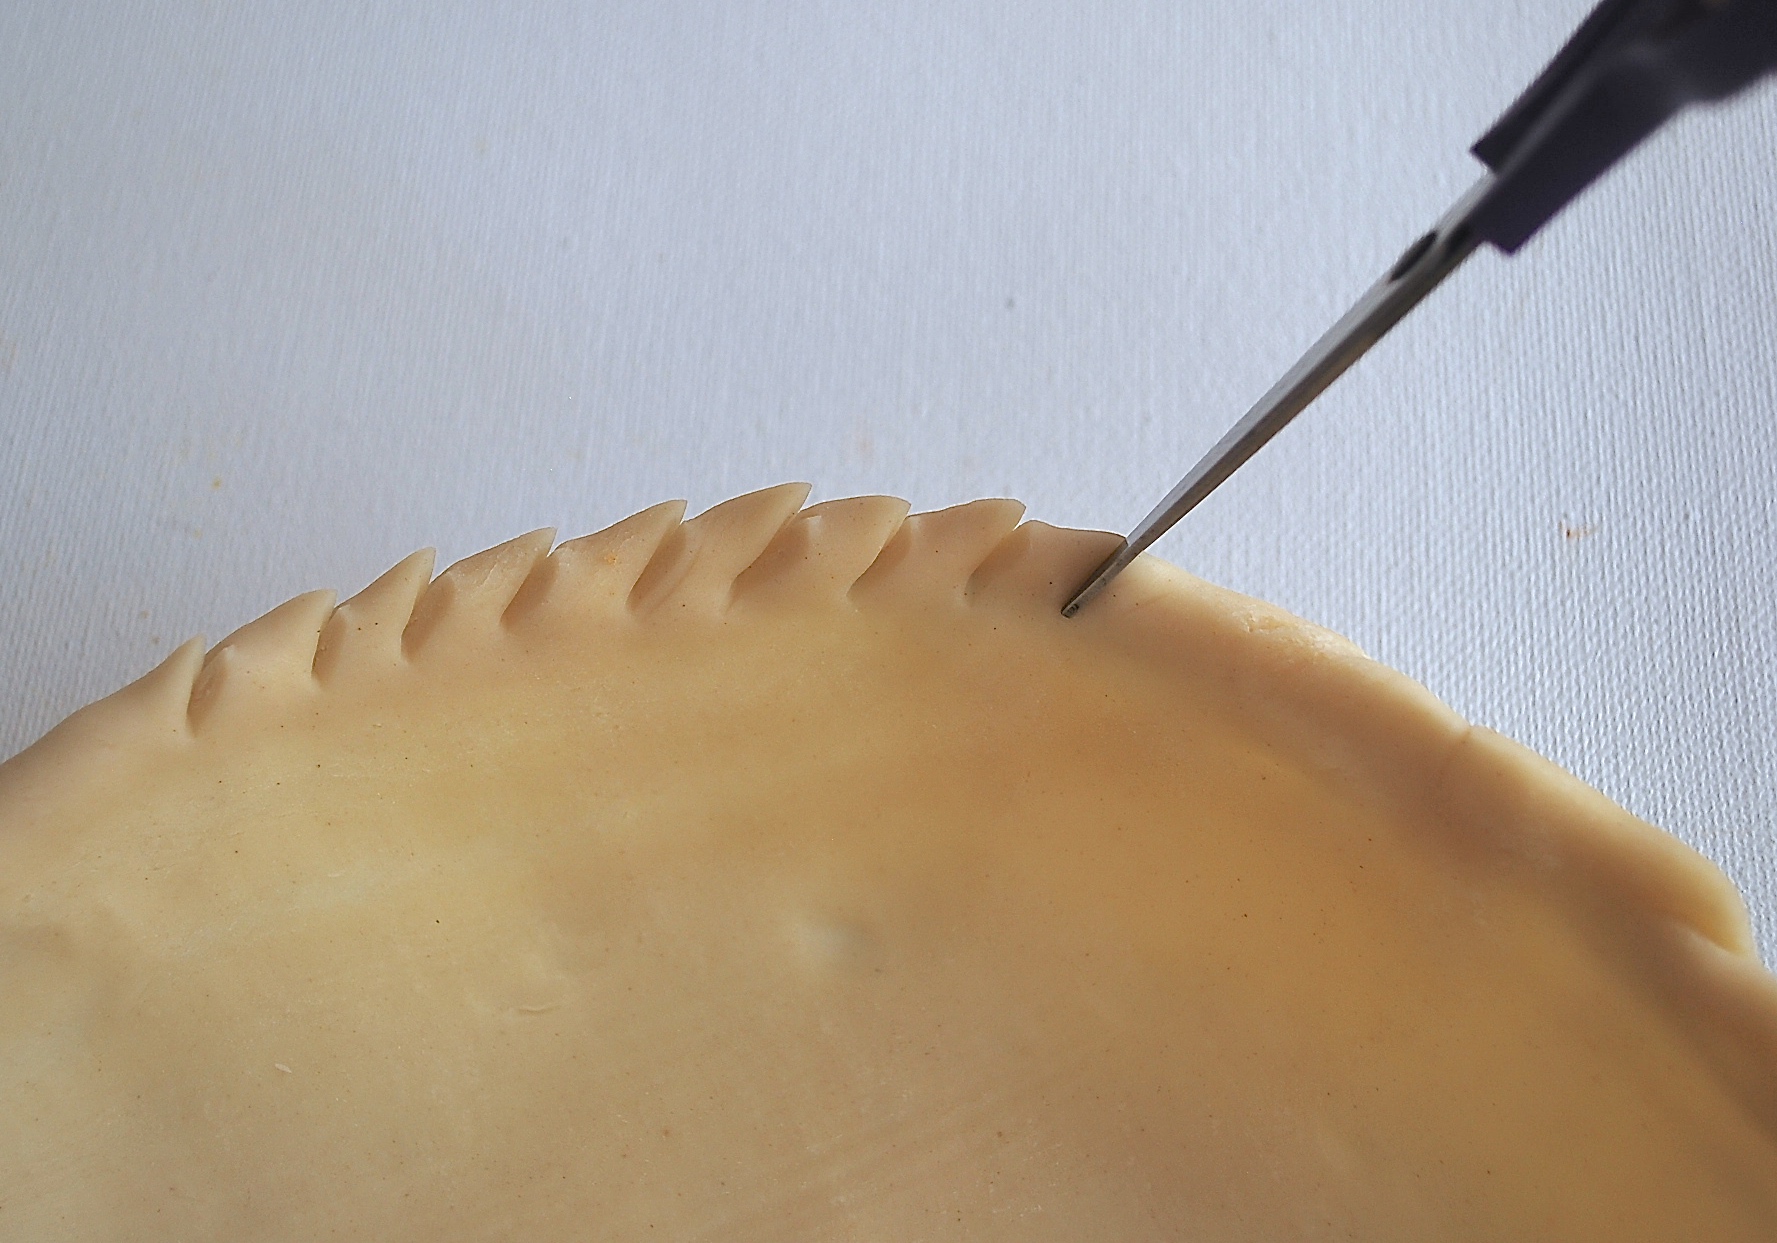
This foolproof technique requires no special pressing or folding, just a pair of kitchen scissors! Prepare your pie crust, and fold any overhang underneath the edge of the pie place. Using a pair of scissors, make a series of small diagonal cuts around the entire edge of the pie.
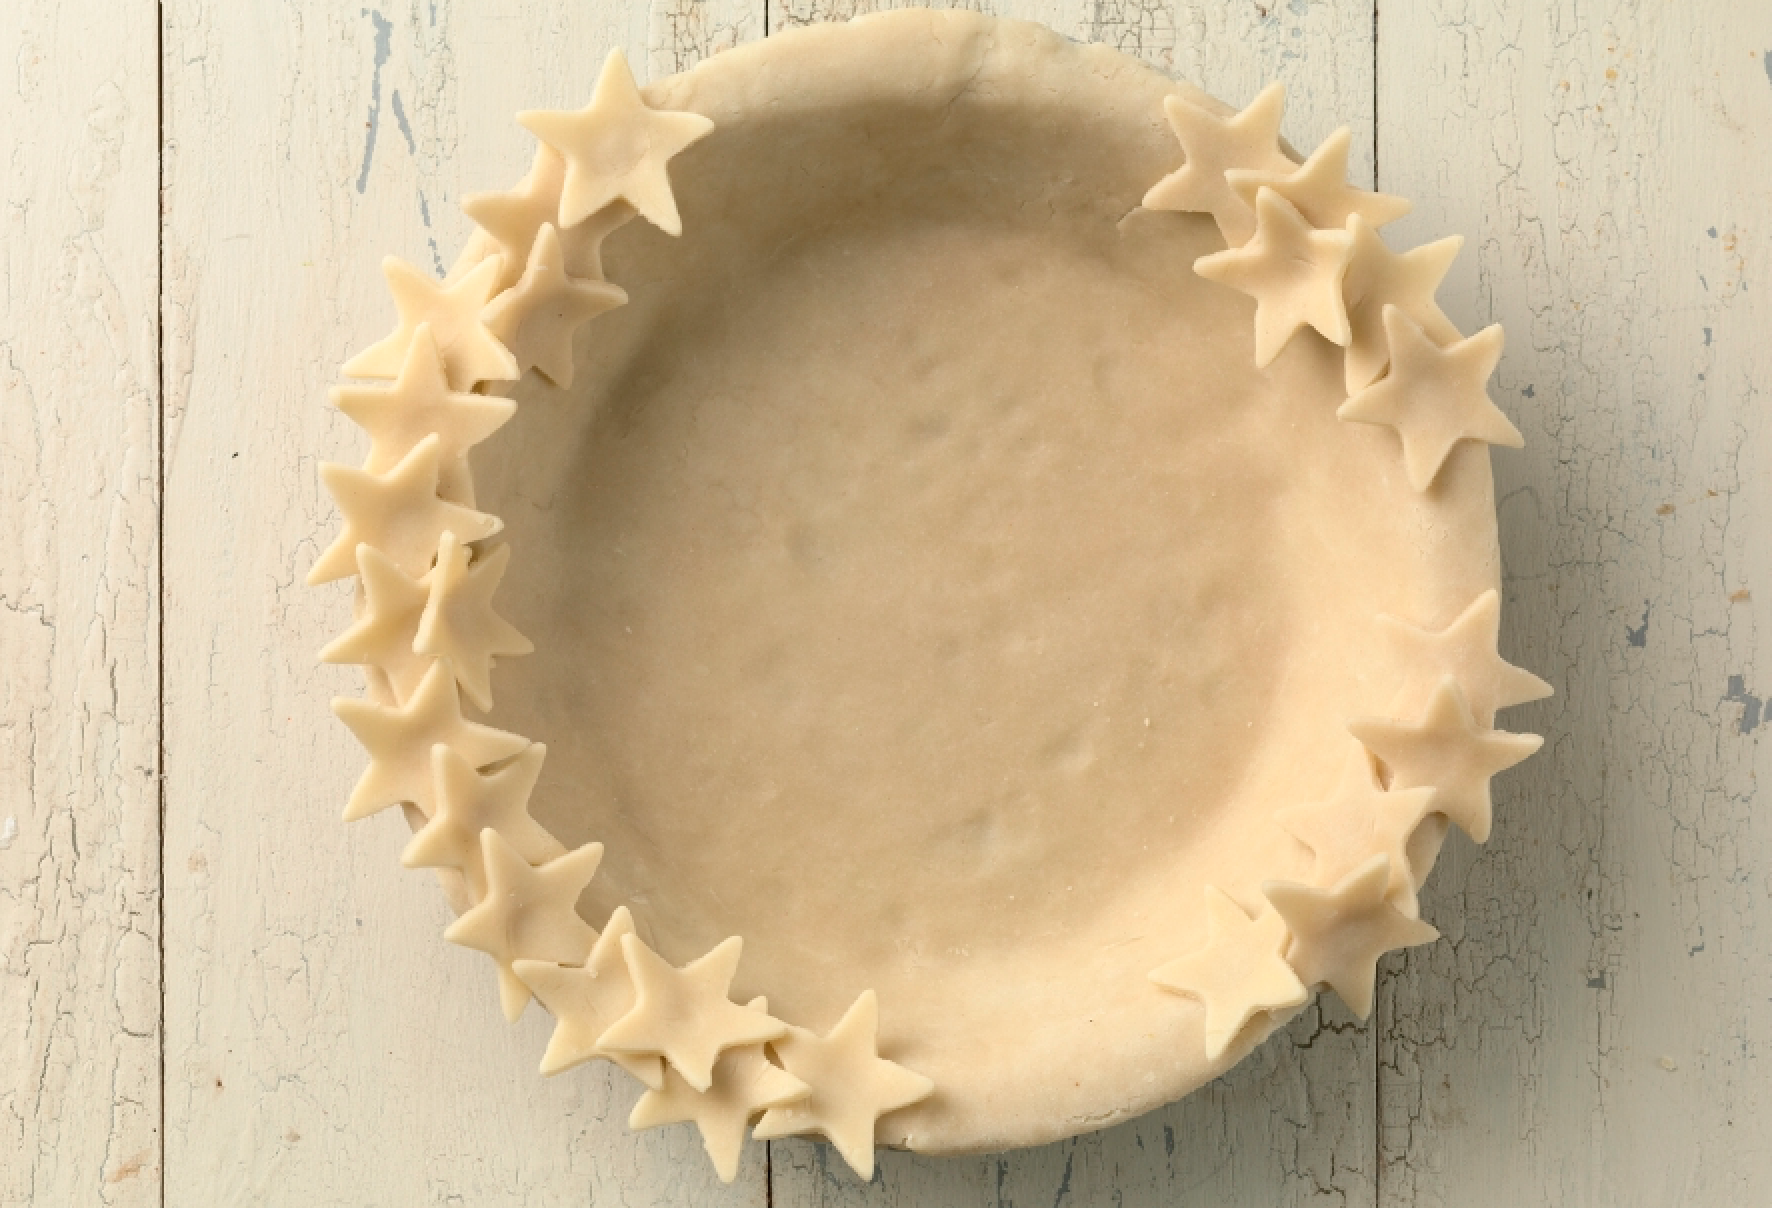
Now for the creative part! Cutout crusts are so simple but they have a stunning effect when baked. You're treating your dough (make sure to make a double-crust recipe) like a rollout cookie, so pull out your favorite cookie cutters for this technique. You'll want to use smaller shapes, in the 1" to 2" range.
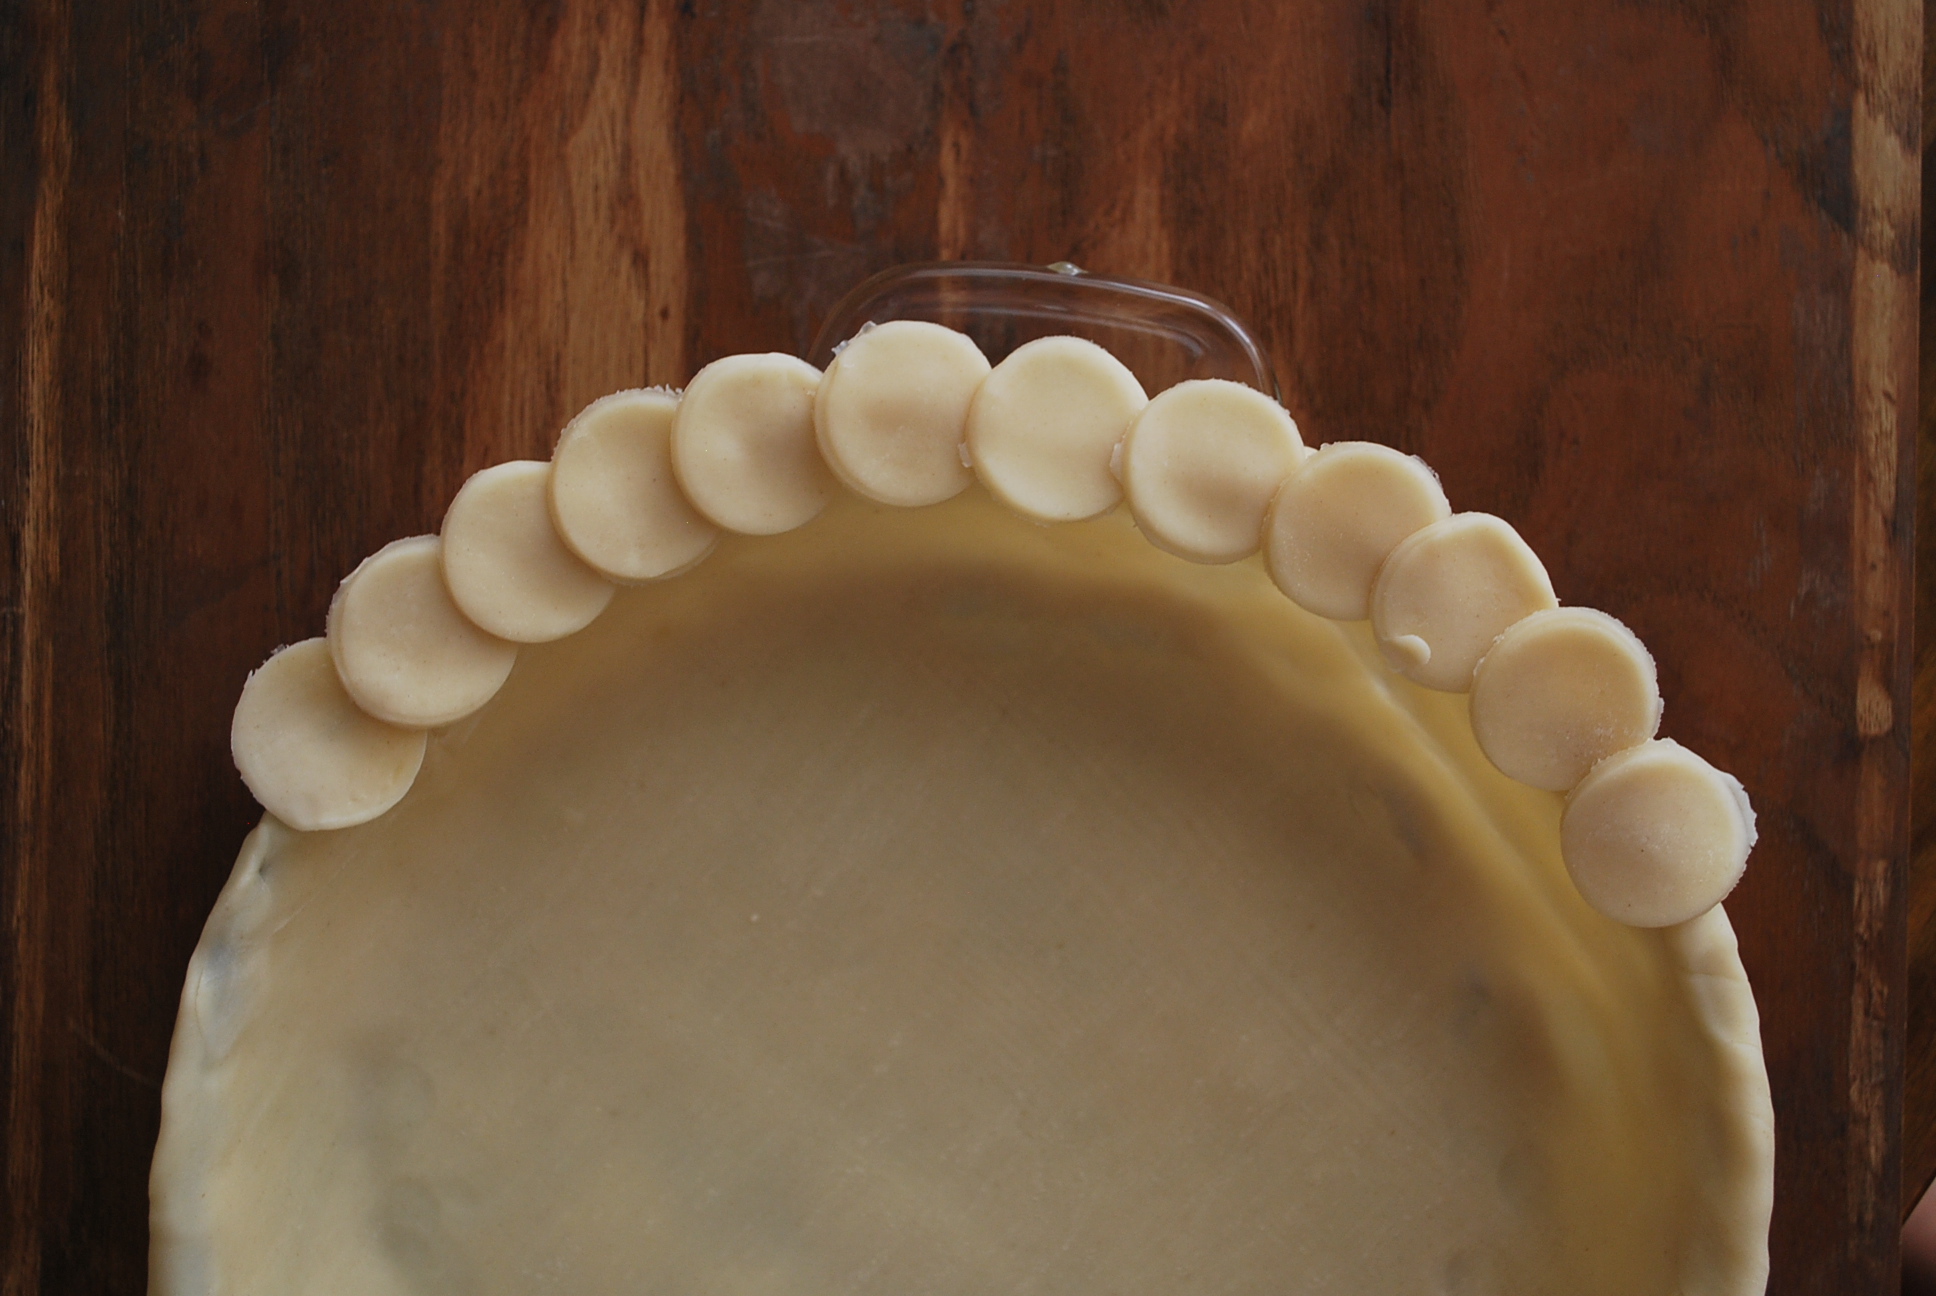
Place your bottom crust in the pie pan. Roll out the second piece of the dough on a lightly floured surface. Using a small cookie cutter (or, if you want to do circles, the top of any jar or bottle in your pantry), cut out shapes. Press the shapes gently to adhere around the edge of the entire pie crust.
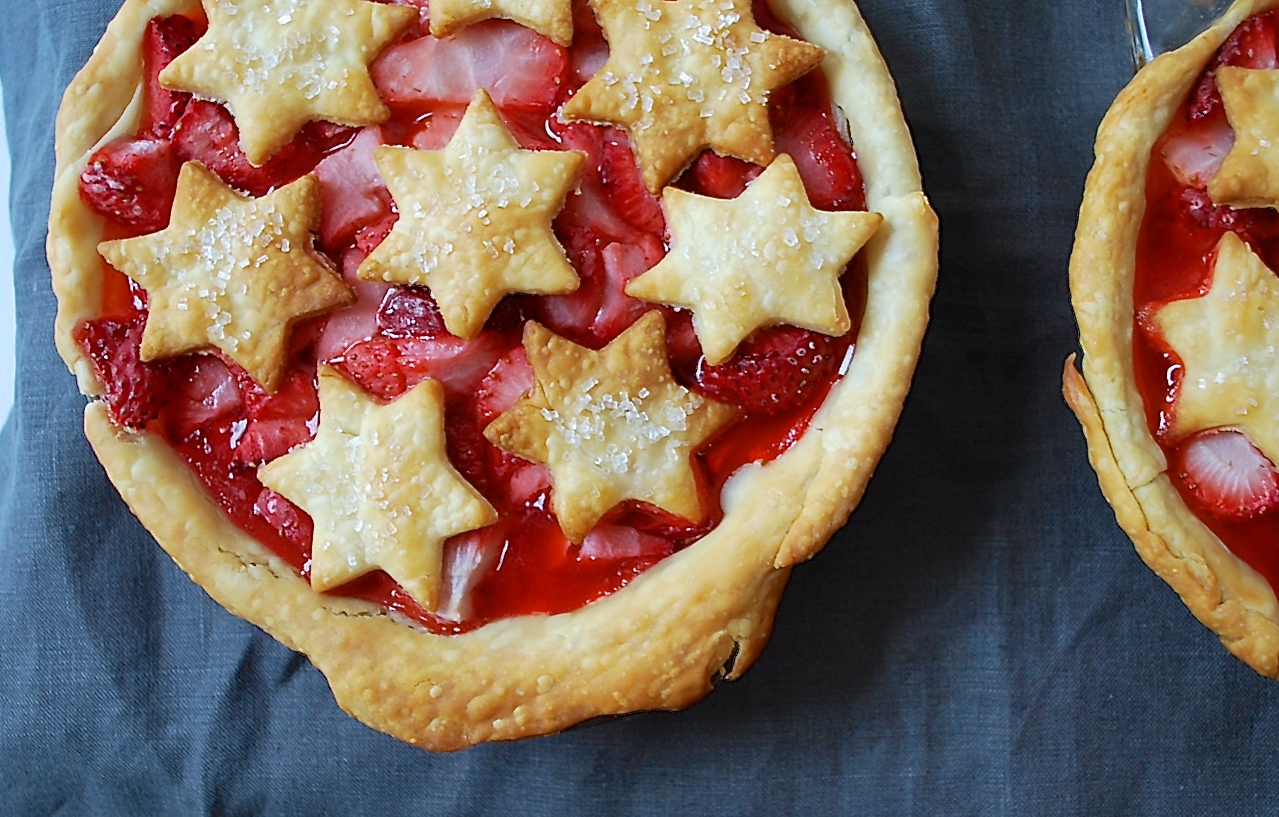
You can also leave the edge of the pie crust plain and place your cutouts over the top of the entire pie.
Try it out for yourself with our Strawberry-Rhubarb Pie recipe.
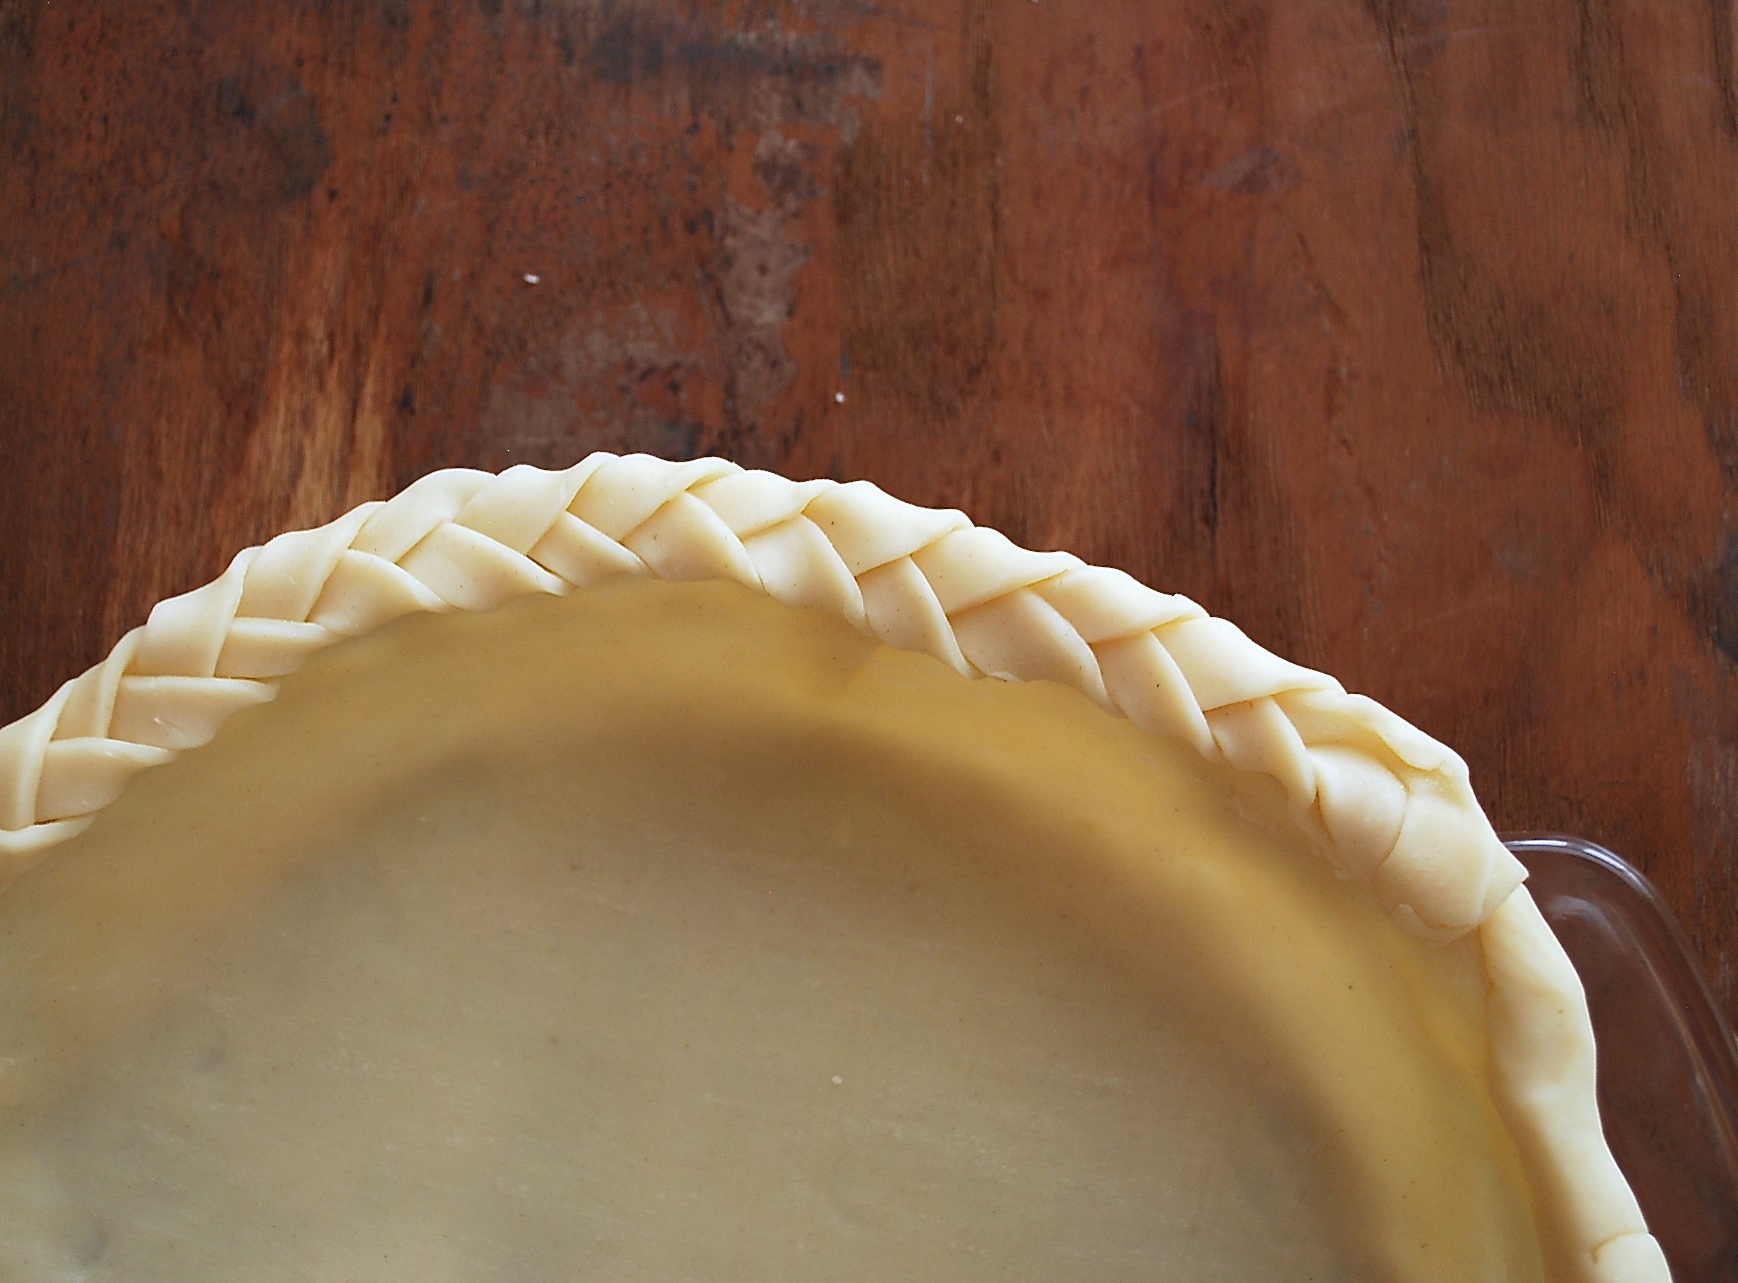
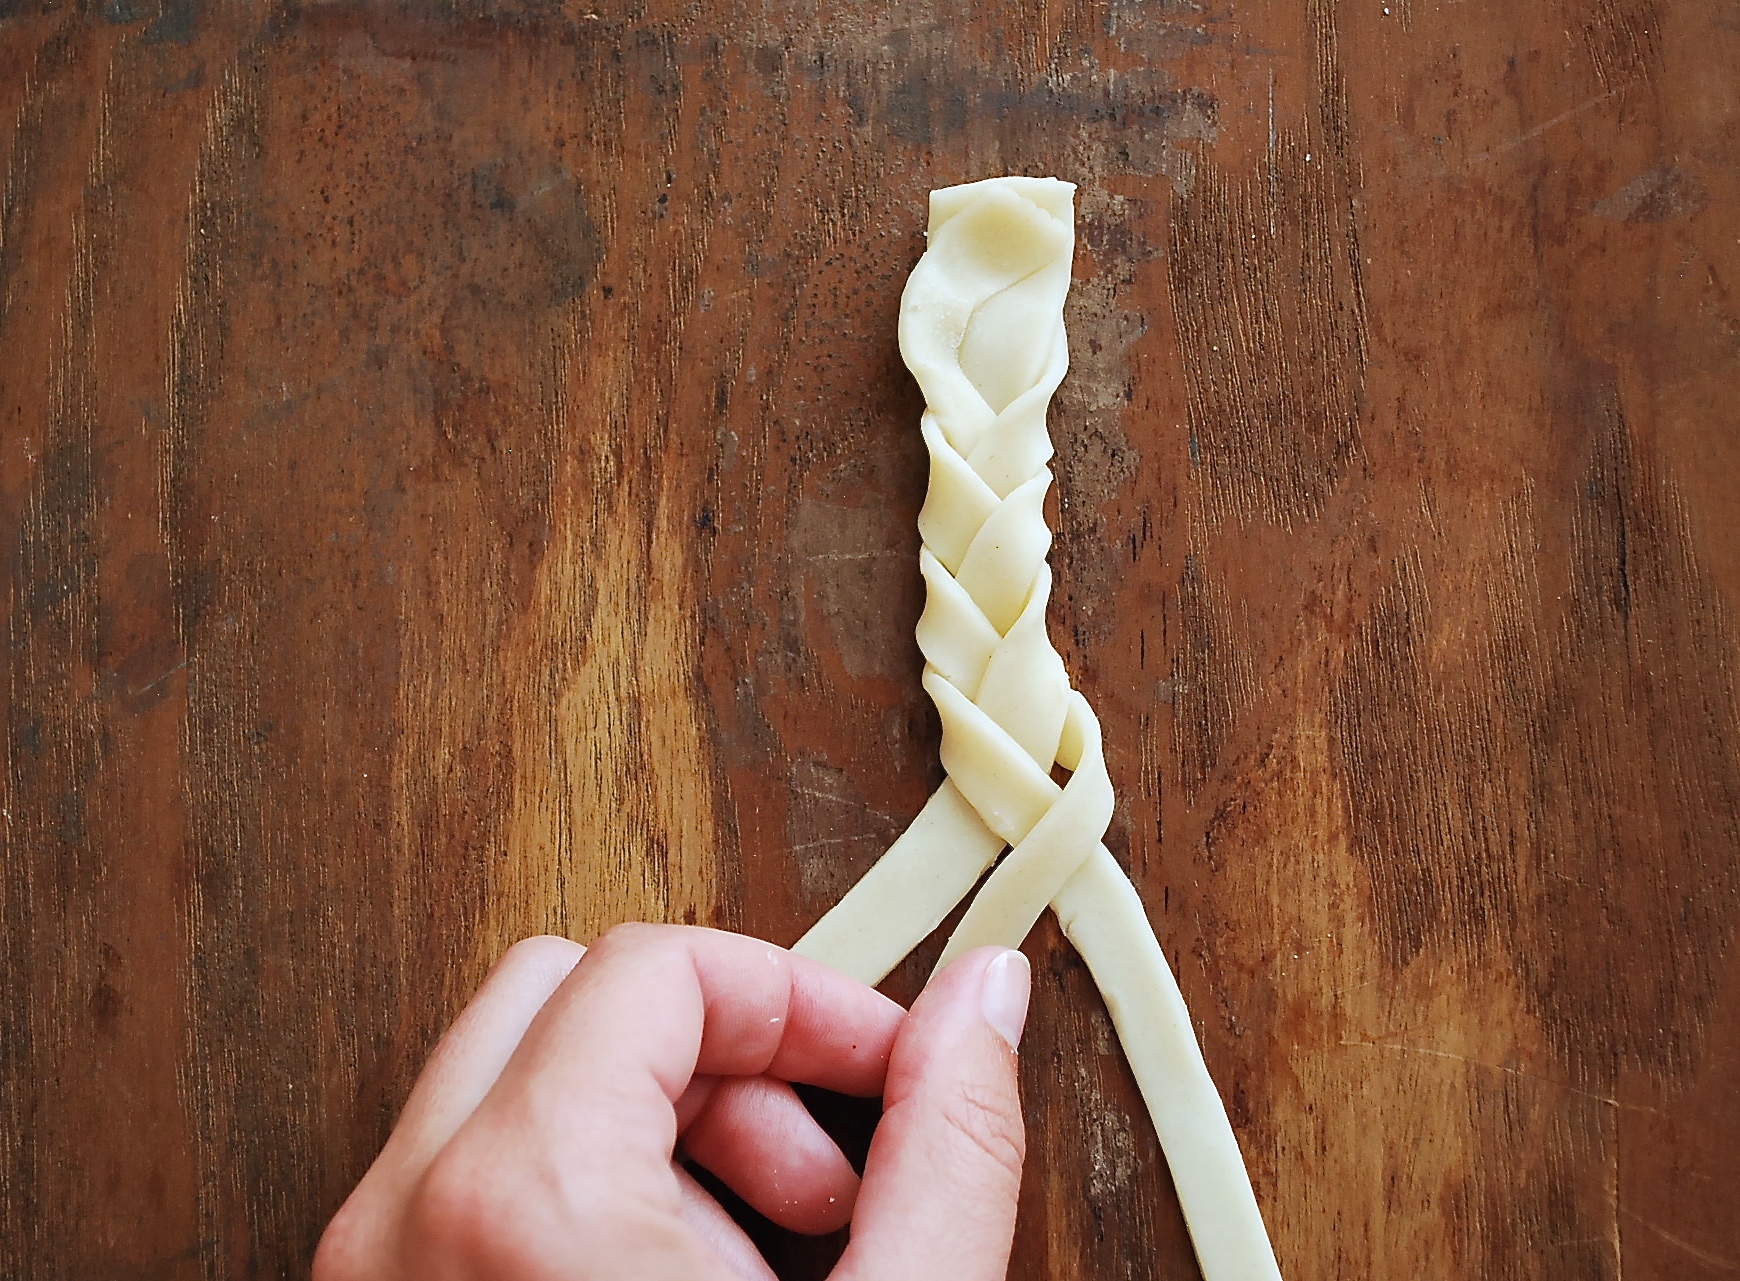
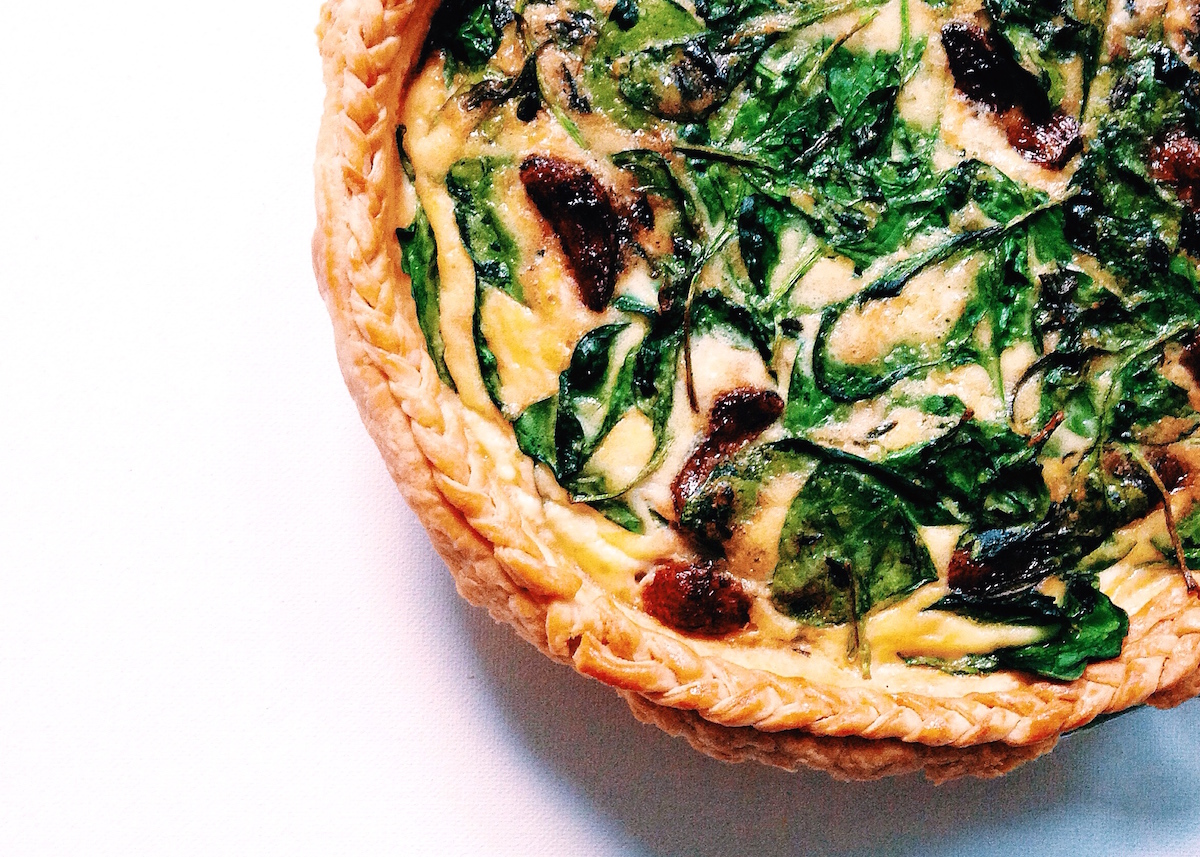
A braided pie crust looks complex, but don't be intimidated! You likely know how to braid ribbon, and it's exactly the same (it just requires a gentler touch).
Prepare your bottom crust. Roll the top crust out on a lightly floured surface and cut three long thin strips out with a knife. Press the top of all three strips together gently. Using a light touch, braid the three strands together.
Transfer the braid to the edge of the pie plate and press gently to adhere. It's easier to make the braided crust in a few separate sections, rather than try and make one long braid to fit the entire crust.
Now that you have all the tips you need, go forth and decorate!
For more pie-baking tips and how-to's, check out our comprehensive Pie Baking Guide!