Daunted by piping bags and overwhelmed by sticky sprinkles? Don’t be! Using a simple glaze and a few tricks, I’ll walk you through some basic cookie decorating techniques that can be used for all kinds of creative designs. Your cookie platter will be the hit of the office Ugly Sweater Party!
To start, have your cutout cookies baked and ready. They should be cooled completely before you begin to decorate. Use a dry pastry brush to remove any loose crumbs or flour from your cookies.
Make your favorite icing recipe and decide on the colors you’d like to use. My favorite icing to decorate cookies is our Simple Cookie Glaze. It’s an easy blend of confectioners’ sugar, corn syrup, and milk, and can be flavored as desired with extracts or flavors. It stirs together with just a spoon – no mixer required! Compared to royal icing, I find it’s very forgiving:
You may certainly use royal icing for any of these techniques. It’s a matter of preference for each decorator (or cookie monster)! For more tips on mixing and using royal icing, visit our cookie decorating guide.
For the following techniques, I like to use glaze that’s a bit thicker than molasses – it creates fine lines and also smooths out nicely when filling in large areas. You may choose to put the glaze in a pastry bag with a coupler so you can control the flow by using different size pastry tips, but I’ll be using just a pastry bag (no coupler, no tip) with a small hole cut from the end.
Got cookies? Check. Got icing? Check. OK, let’s decorate!
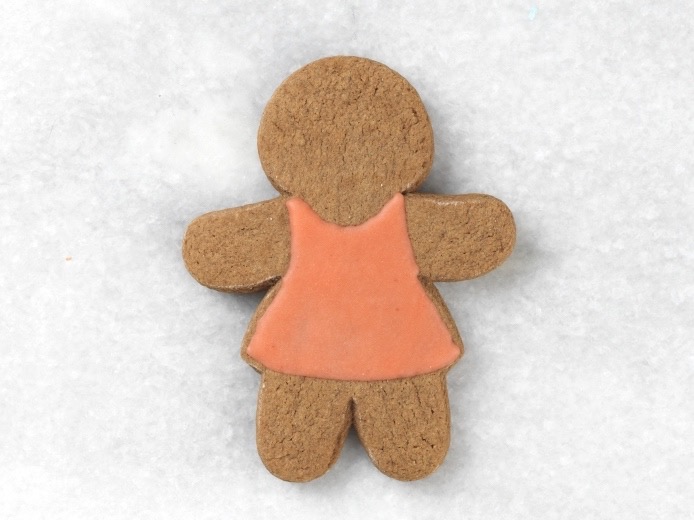
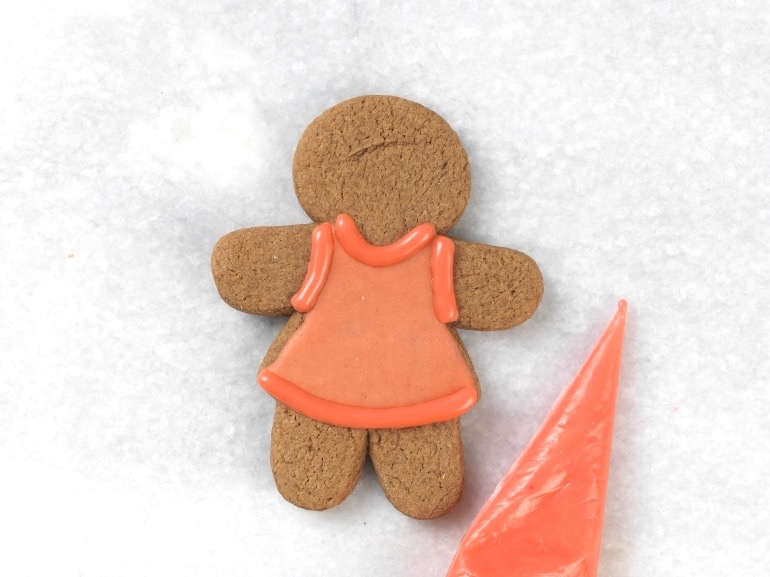
Flooding is one of the most basic techniques and can look great on its own, as well as combined with other techniques; so let’s start here. We’ll create a nice smooth white base for the jaunty plaid on this gingerbread man’s sweater.
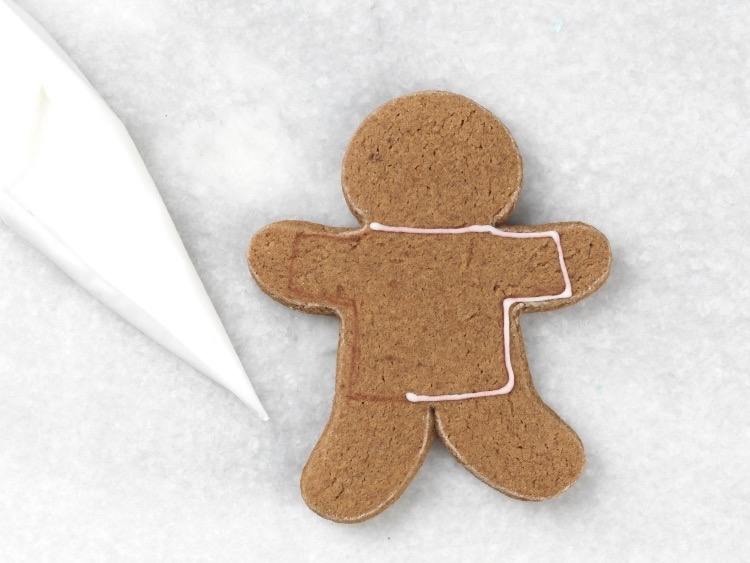
Let dry for a few minutes. This will act as a “dam” for the “flood” of icing you’ll add in the next step. You may pipe a few cookies at a time while the icing sets a bit.

I like to start from one side and slowly work across the cookie. It helps reduce air bubbles, which can leave dark spots and pits in your icing.
Use a toothpick to help guide the icing into tight spaces and to pop any air bubbles.
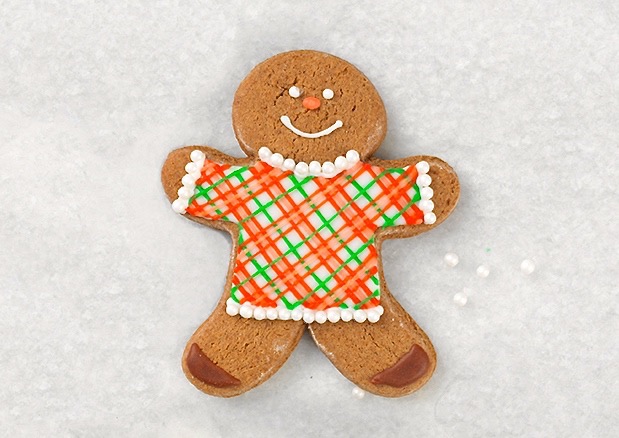
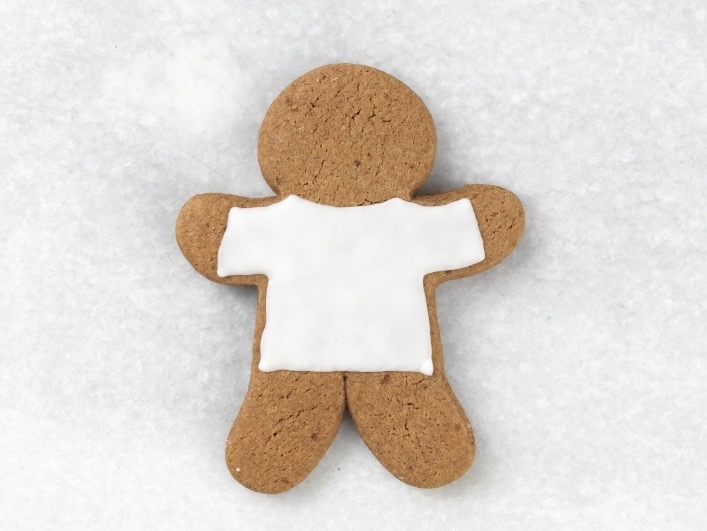
You can let it dry for several hours and add designs on top, as I did for the sweater in the final image. Or you can move on to the marbling or flocking techniques while the icing is still wet.
See our video tip: How to flood a cookie.
Marbling is a really snazzy technique for adding pattern to your designs. We’ll use it to make a knit-like texture for the polar bear’s sweater, and a snowflake design on the sweater’s bands and cuffs. It’s important to work quickly while the icing is wet, so make sure you have all of your icing and tools ready before you begin.

I did all four bands at once in the example, but I’d recommend just doing one area at a time until you get the hang of it.
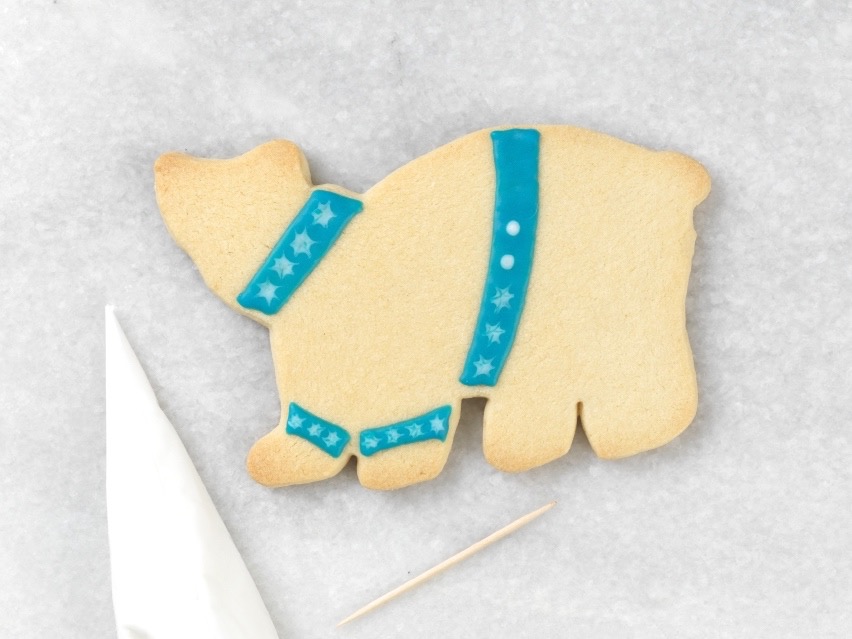
Using a toothpick or skewer, drag from the center of the white dot out into the blue. Wipe the pick, then repeat from the center of the white dot. Repeat to create the six points of the snowflake. Do the same for each white dot.
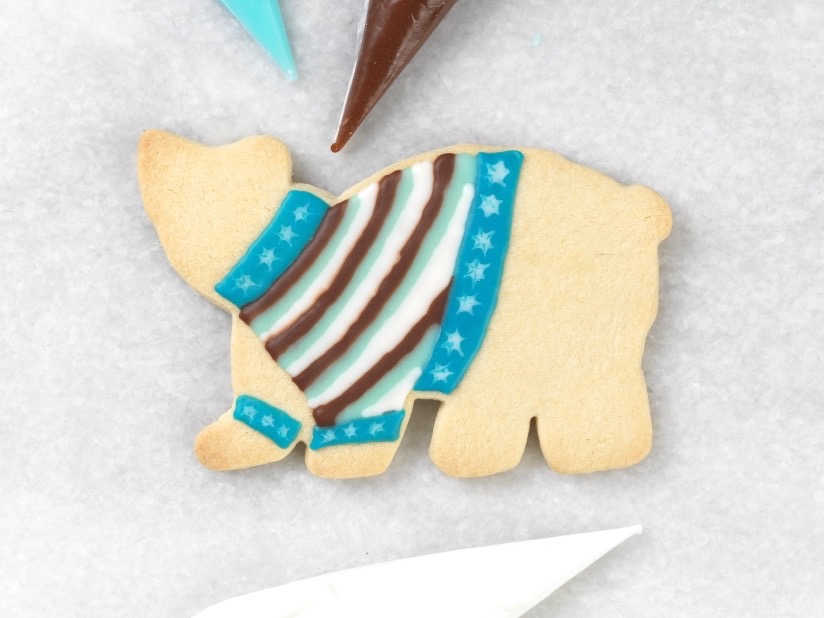
I piped thick lines of white, brown, and blue next to one another to fill the space, but you could also flood the whole area with one color, then pipe lines of the other colors right onto the wet icing.
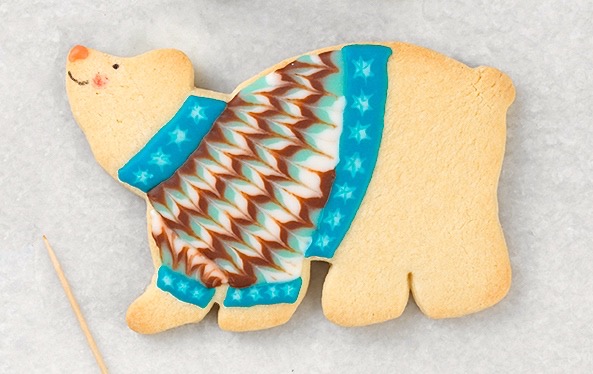
Drag your pick from the neckband of the sweater to the waistband; then from the waistband to neckband, continue across the whole sweater, alternating directions with each pass.
Ta-da! Doesn’t that zigzag design resemble knitwear?
See our video tip: How to marble cookies with icing.
OK, let’s try flocking. This technique allows you to add raised texture to your design using sugars, nonpareils, or sprinkles. We’ll use sparkling sugar on this gingerbread gal to jazz up her festive party dress.
You’ll see why in a minute. Make sure the area of the cookie that you don’t want sugar on is completely dry! I used the flooding technique for her dress and let it dry overnight.
You can achieve different results by coordinating the icing with your sugar or using a contrasting combination. I like the way our sparkling sugar allows the icing color to show through.
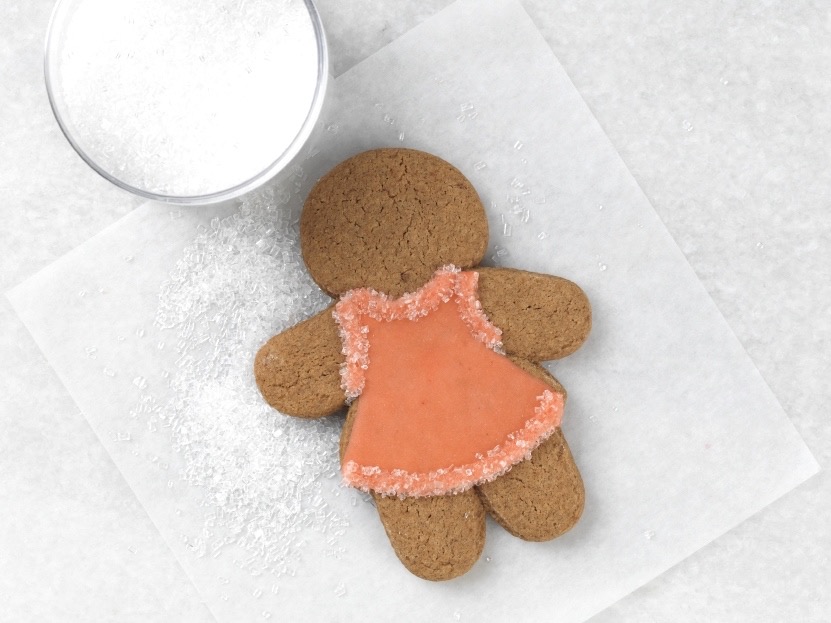
Don’t be stingy, you want to completely cover the wet icing. Gently tap the cookie on the work surface to remove any excess.
Here’s where that clean piece of parchment comes in handy: use it to funnel the excess sugar back into the jar. How’s that for easy cleanup?

A jolly reindeer and some red shoes complete her party-ready look.
See our video tip: How to flock a cookie.
Quilting uses the flooding technique to create a three-dimensional design that looks like it’s pieced together, instead of a smooth flat surface. It’s fun in red and green for this funky holiday sweatshirt, but it’s just as effective when used with a single color (think orange ribs of a pumpkin).
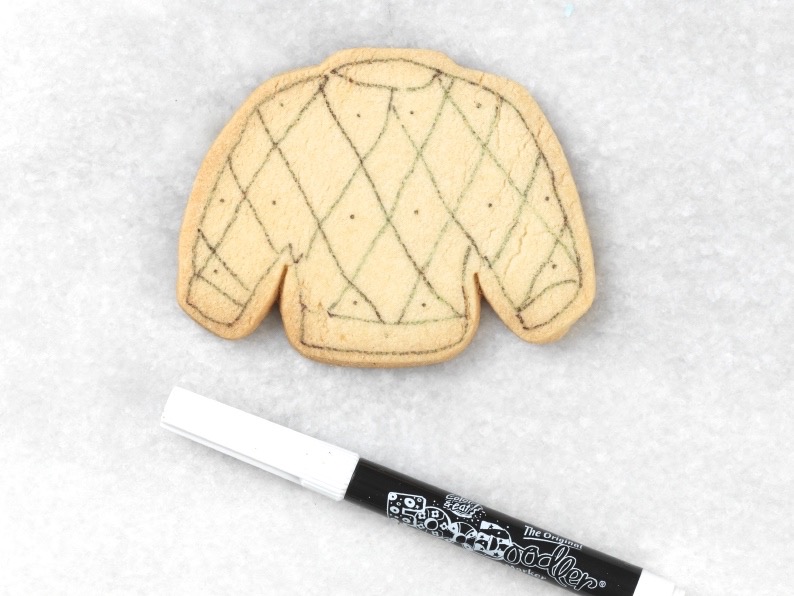
If you have a complicated design, it really helps to use a food-safe pen to sketch a guide onto the cookie. Don’t make the same mistake I did – use a light color or a color that matches your icing so that it won’t show through!
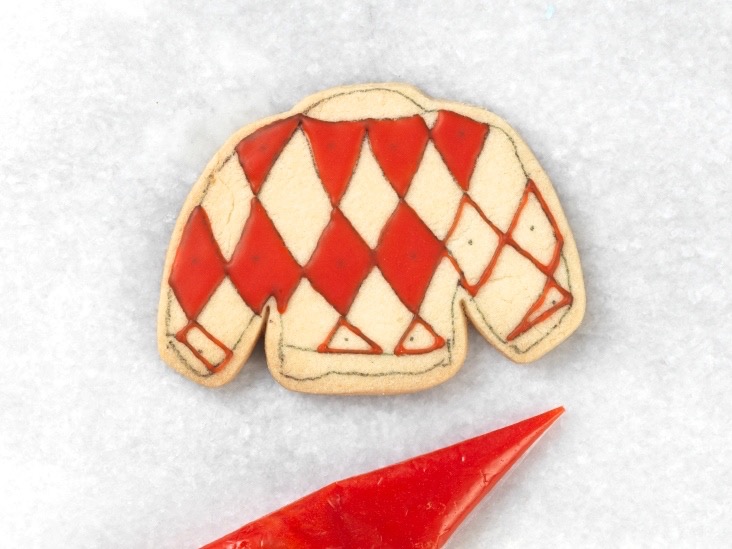
I started with all the red areas of this checkerboard design. Let dry to the touch.
Since the edge of one of the green patches touches part of the waistband, I let the green patches dry before outlining and flooding the waistband. That way it won’t flow together.
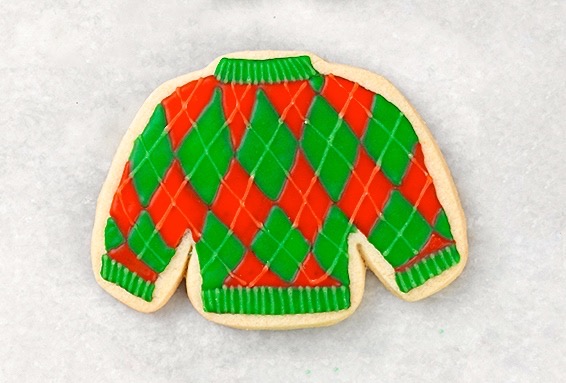
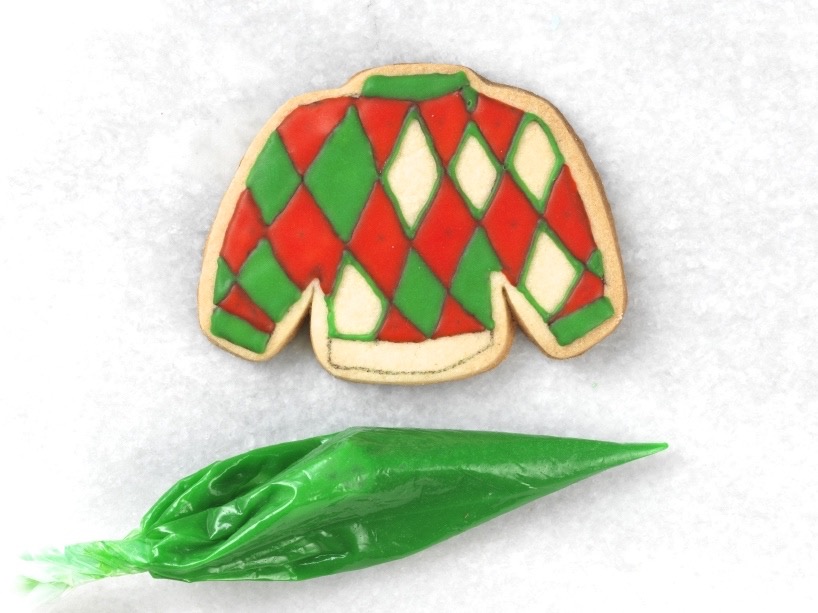
I added lines of coordinating icing to give it an argyle pattern, piping from bottom right to top left; then from bottom left to top right. I also added lines to give a ribbed texture on the neckband and waistband.
See our video tip: How to quilt cookies with icing.
Once you get the hang of these simple techniques, you can mix and match to your heart’s content. There are endless possibilities in sugar and sprinkles for your holiday gifts or parties.
Looking for more ideas? Check out our cookie decorating guide; and our video tip, How to decorate a cutout cookie with piped icing.
Happy baking!