Elaborately decorated pies might seem like an impossible feat for the home baker, but today we're showing you just how to create them. Creating a stunning decorative pie crust is easier than you think, and requires a few simple techniques. Once you practice and master each method, like the lattice, braid, or leaf, you can mix and match them in any combination to make edible works of art.
We turned to expert Toronto baker, Samantha Chiu (of Instagram fame!), for inspiration and her best tips on pie crust perfection. She shows us her techniques for making three different decorative pie crust patterns, plus ideas for how to put them all together, just in time for your Thanksgiving pie baking. Let's get started!
To create the perfect pie, start with the right recipe. You can use your favorite pie crust recipe to create these designs, or use one of our best-loved and most reliable recipes for a Classic Double Pie Crust or an All-Butter Pie Crust. Always be sure to start with very cold dough before rolling it out and making your designs.
For maximum flakiness in your crust, refrigerate your pie for 30 minutes before baking, after having created your decorative top crust.
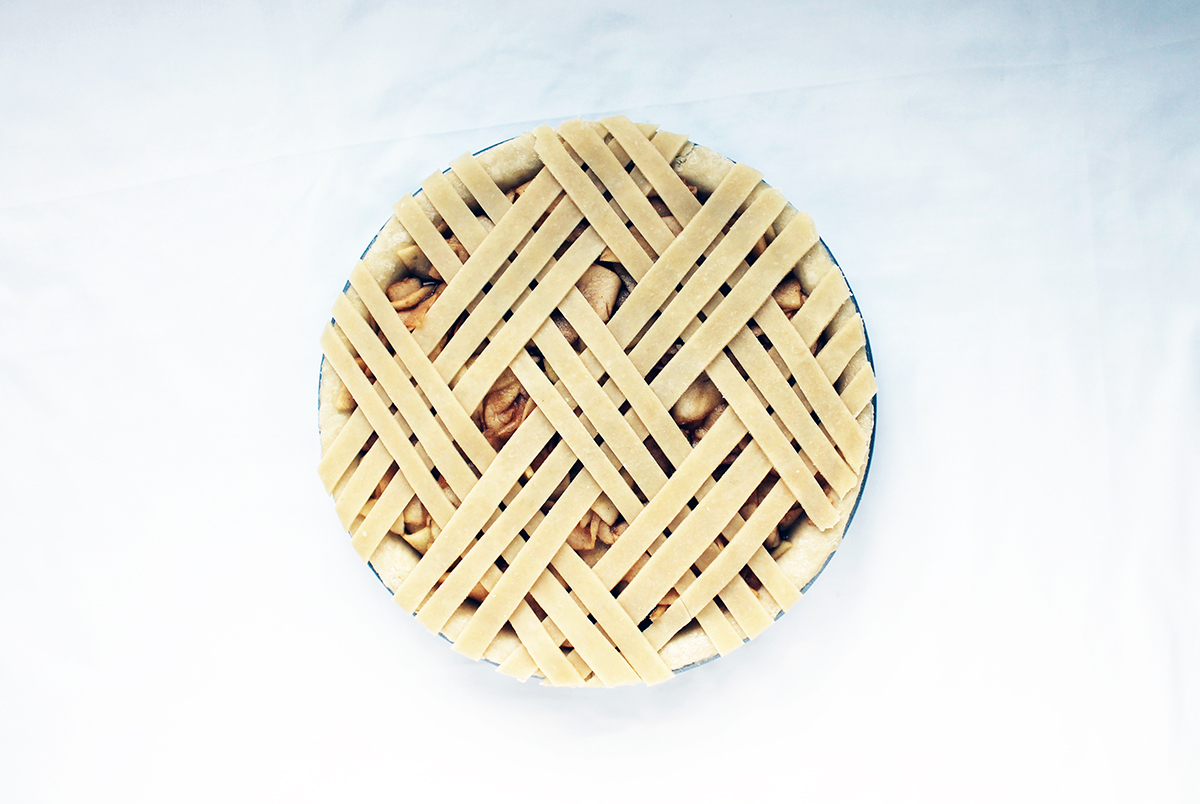
Start with very cold, refrigerated dough. Your pie should be prepped up until the step of adding the top crust. Roll out dough for the top crust to about an 11" circle. Use a knife and ruler (optional, but it will help keep your strips straight and even) to cut out 18 strips that are 1/2"-wide each.
Lay out three parallel strips of pie dough on top of the filling, leaving about 2 to 3 millimeters of space between each strip. Fold back each strip. Place three strips of dough diagonal to the parallel strips, creating an "X" in the center of the pie.
Continue placing strips of dough, three at a time, onto your pie, folding back and forth until all strips have been used up. To make the pie look fancier, apply an egg wash using a pastry brush to the surface of the pie and sprinkle with sparkling sugar.

Start with very cold, refrigerated dough. Your pie should be prepped up until the step of adding the top crust. Roll dough for the top crust into a thin rectangle. Cut out thin, 1/2-centimeter wide strips (you'll need to cut about 33 to 36 strips).
To start the braid, take three strips and pinch the ends together. Start bringing the side strips into the center and continue until you reach the bottom. Secure the braid by pinching it once more at the base.
Continue making the same braids with the dough until you run out of dough. Place the braids on top of the pie as close or as far apart as you like. To make the pie look fancier, apply an egg wash using a pastry brush to the surface of the pie and sprinkle with sparkling sugar.
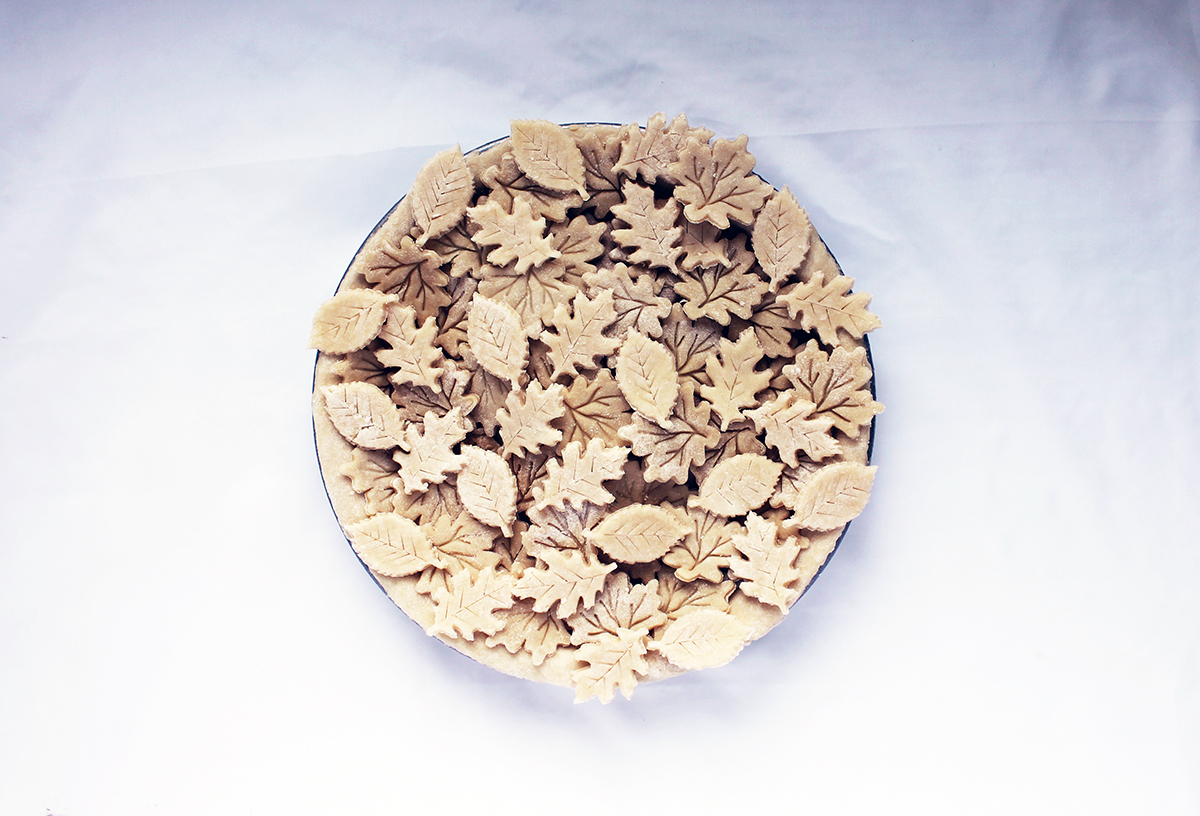
Start with very cold, refrigerated dough. Your pie should be prepped up until the step of adding the top crust. Roll dough for the top crust into a thin circle. Use pastry stamps or cookie cutters to cut out your desired shapes. If you want a more elaborate, intricate look to your leaves, use a knife or toothpick to lightly trace the veins of each leaf.
If you don't have pastry stamps or cookie cutters, you can create your own leaf templates by drawing your desired shape onto cardboard or heavy, thick paper, then cutting the shape out and using it as a template to trace your dough, cutting around it with a sharp knife.
Once all shapes are cut out, start placing them on top of the pie in whatever pattern you like. You can cover the entire pie with the leaf cutouts, or simply place them around the edge. To make the pie look fancier, apply an egg wash using a pastry brush to the surface of the pie and sprinkle with sparkling sugar.
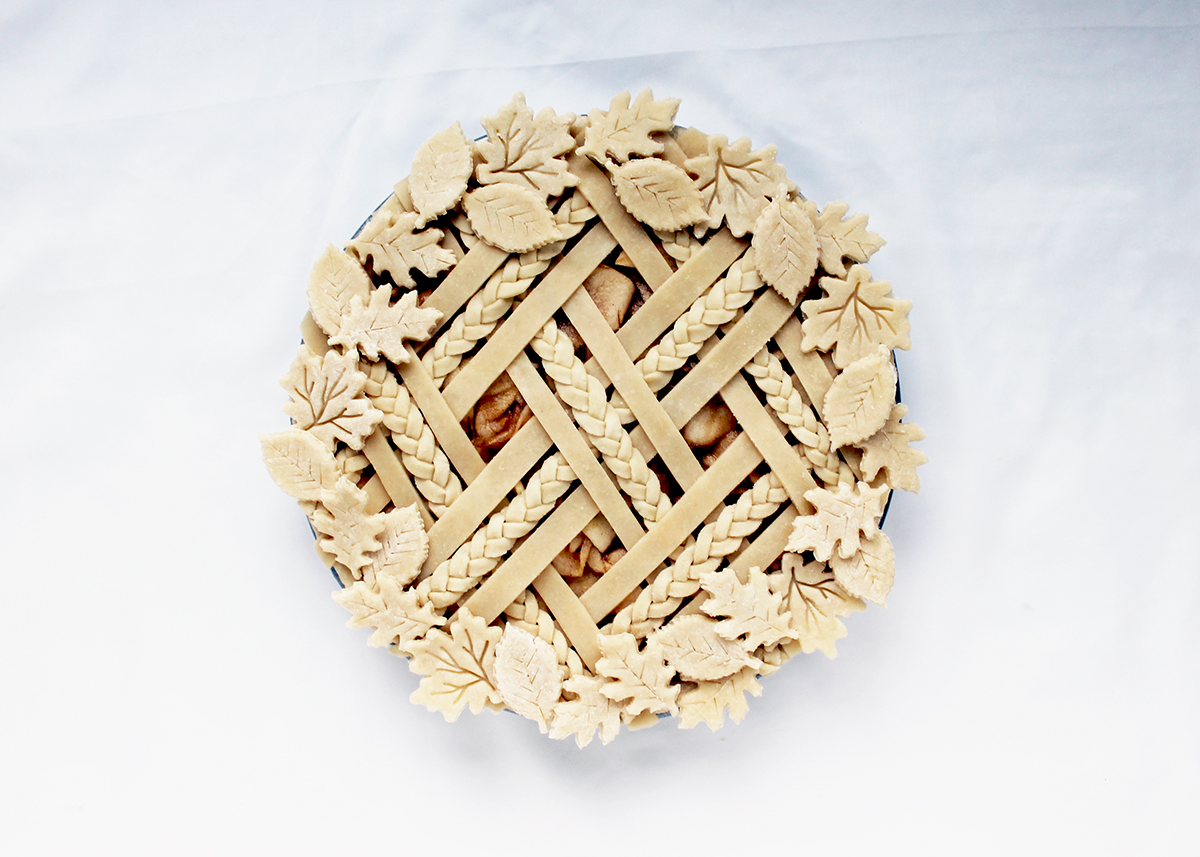
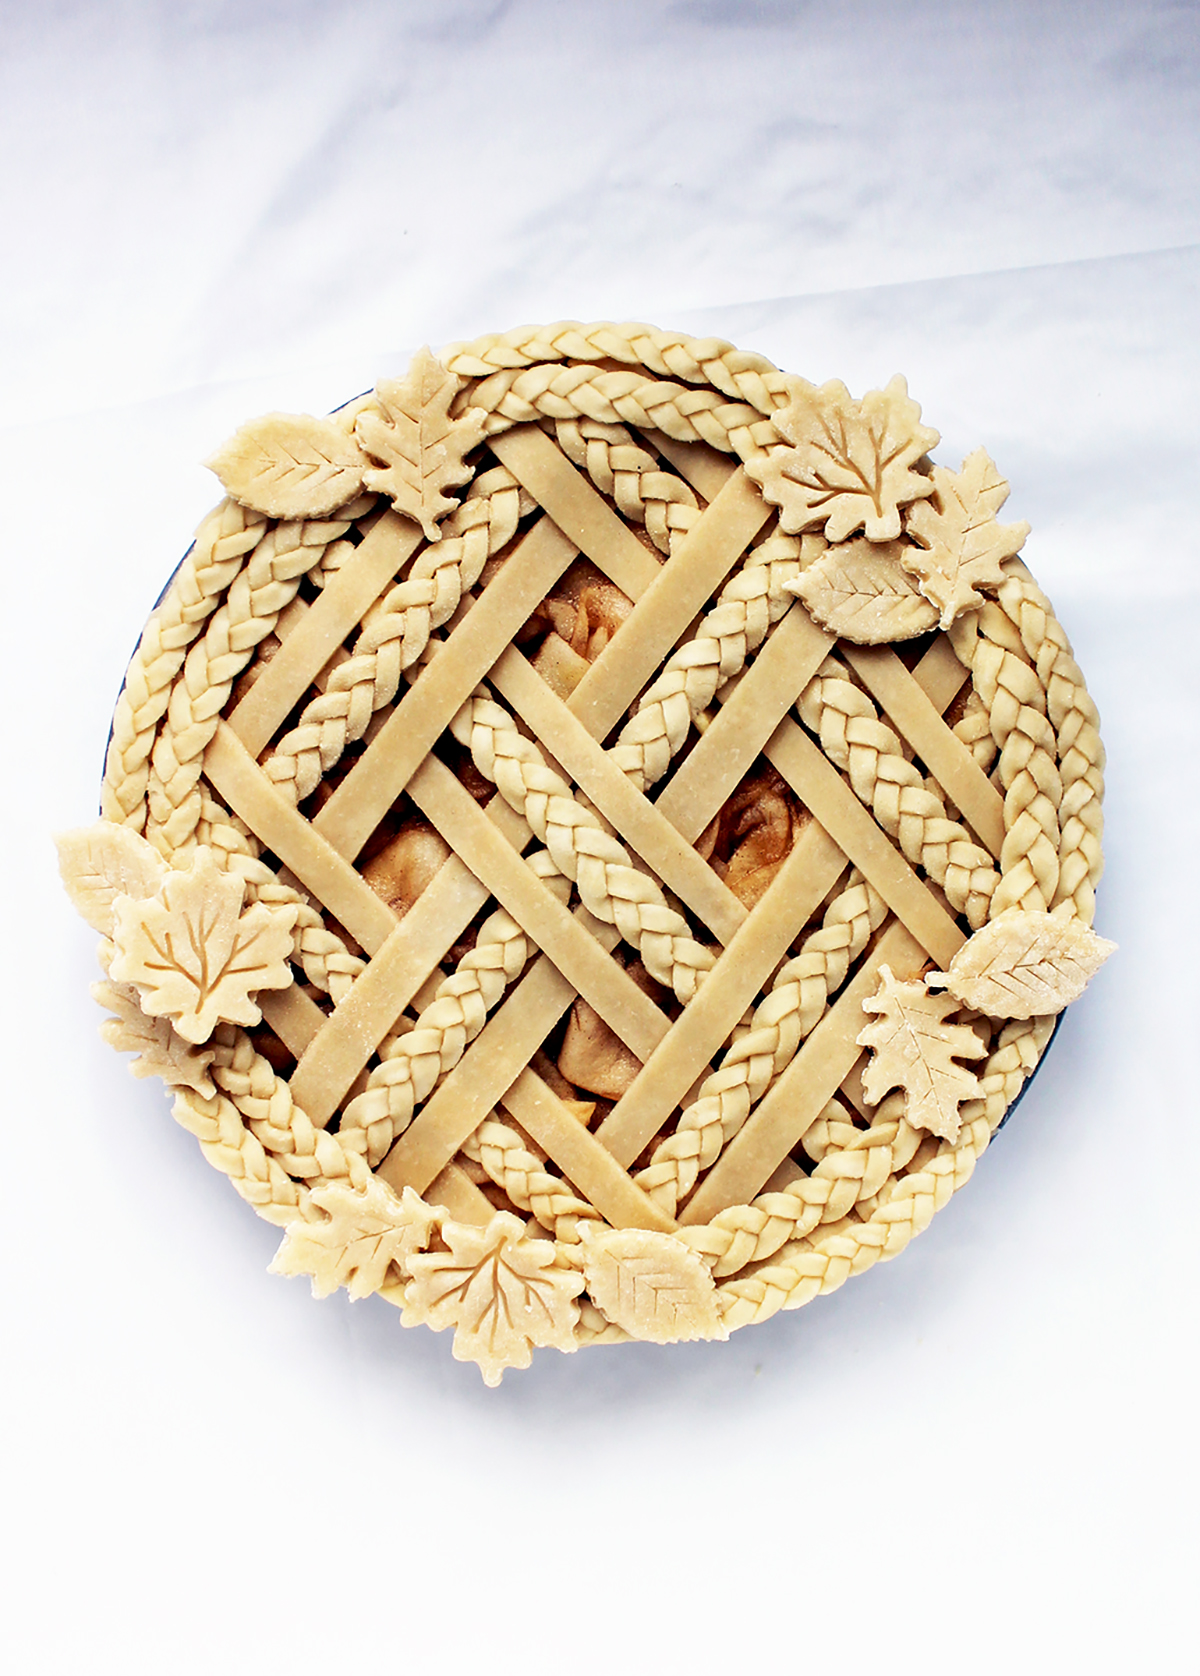
Once you've practiced all three techniques, you're ready to put them together. Divide the dough for your top crust into thirds. With one third, cut out simple strips of dough as you would for the lattice technique. Roll one third into a rectangle, cut out long, thin strips, and make a few braids. Roll the remaining third into a thin circle and cut out some leaf shapes.
Begin by placing the lattice strips and braids in a diagonal pattern, following the instructions for the diagonal lattice pie crust but substituting the braids for some of the plain strips.
Place the leaf shapes around the edges of the pie, pressing down gently on each.
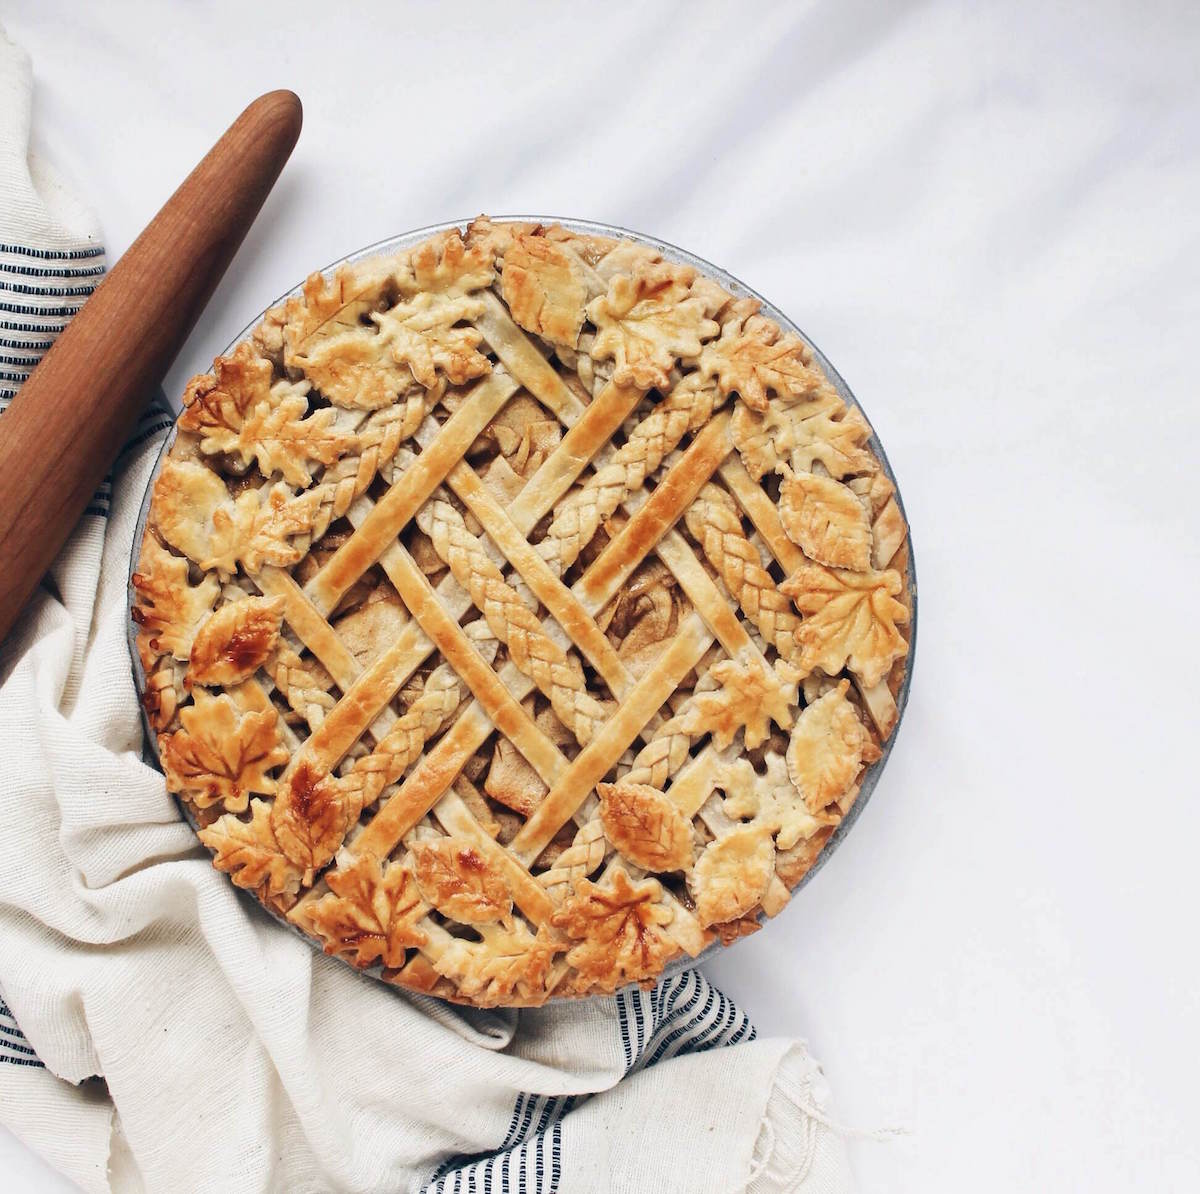
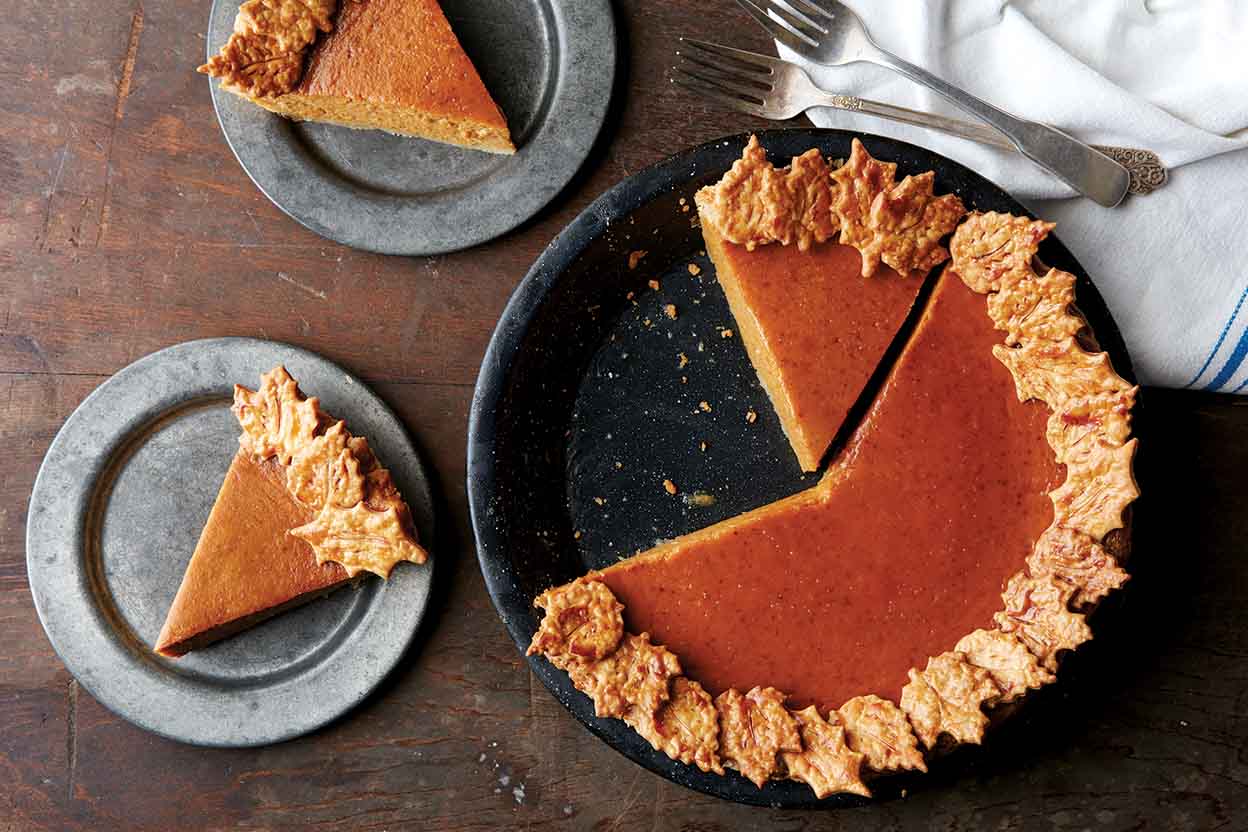
Now you have it! The most beautiful pie ever to grace your table. We love this technique with a simple apple pie (try our November #bakealong recipe for a foolproof version), but it works just as nicely with any pie recipe that calls for a double crust.
Try it yourself: Use our Pie Crust Guide for helpful hints and recipes (our Complete Guide to Pie Baking and How To: Pie playlist have even more inspiration!), and then share your results with us on Facebook, Twitter, or Instagram using #kingarthurbaking.
Happy pie-baking season!