


You know when you feed your sourdough starter and you start by getting rid of most of it, saving just a little bit? It always irritates you to throw away that excess starter, doesn't it? You've fed it and kept it warm (or cool) and watched it grow and loved it and... well, throwing away any starter feels like ditching one of your kids! So what's the solution?
In fact, there are quite a few ways you can use your "discard" sourdough starter — and none of them involves surreptitiously scraping it into a hole out back where the critters won't find it. Pancakes or waffles. Biscuits. Soft pretzels. Even carrot cake makes good use of "unfed" sourdough starter.
But we particularly like it in sourdough pizza crust, where its flavor beautifully complements both tomato sauce and cheese, while helping to ramp up the taste of milder toppings like peppers and mushrooms.
Now, I know some of you are wonderful sourdough "parents," and some of you... well, not so much. I'm the same way; I have one starter I feed regularly, and another (an emergency backup) that tends to get lost in the chaos at the back of the fridge.
I decided to use both of them in pizza crust, to see if the pampered starter responds better than the one suffering from neglect.
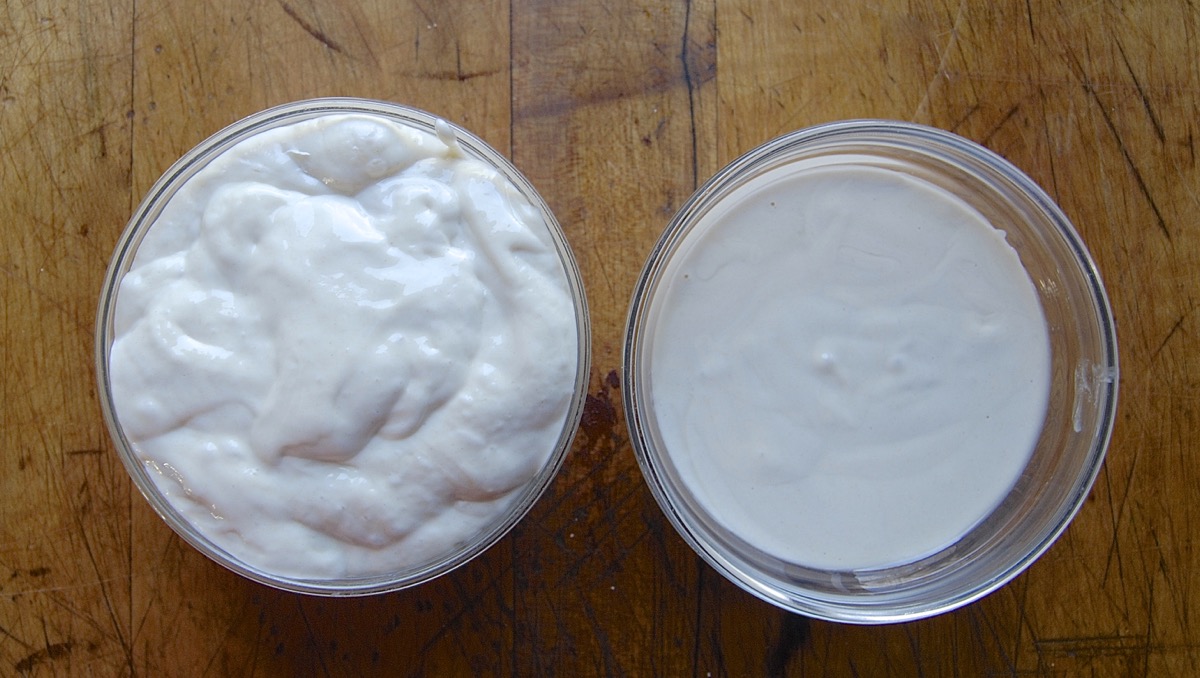
Our Sourdough Pizza Crust recipe calls for using starter right from the fridge — no feeding necessary. The starter on the left had been fed within the past couple of days. The one on the right — well, I'll bet it's been at least two months since it had had any attention; there was quite a bit of grayish liquid on top (alcohol), which I stirred back in.
Here's the recipe:
1 cup sourdough starter, unfed (straight from the fridge)*
1/2 cup + 2 tablespoons to 3/4 cup (141 to 170g) hot tap water
2 1/2 cups (300g) King Arthur Unbleached All-Purpose Flour
1 teaspoon salt
1/2 teaspoon instant yeast
4 teaspoons Pizza Dough Flavor, optional but delicious
*Need sourdough starter? Read how to make your own.
I mix two batches of dough, one using the more active starter, one the sleepier. I end up using 1/2 cup + 2 tablespoons water in each batch of dough. Your goal is dough that's soft, but not unbearably sticky.
I put each ball of dough in a bowl, cover the bowl, and let the dough rise.
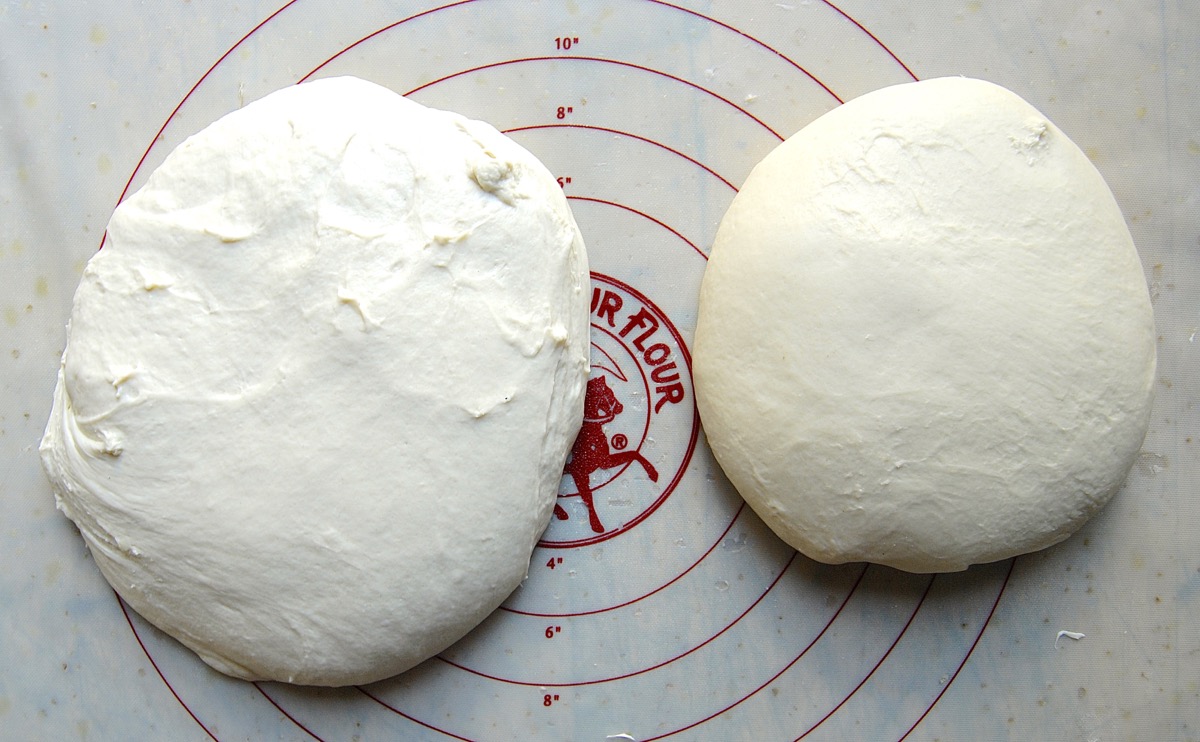
After 2 hours, the dough made from the more recently fed starter (left) has definitely shown more growth.
I decide to track their respective growth more closely, and put the dough into measuring cups.
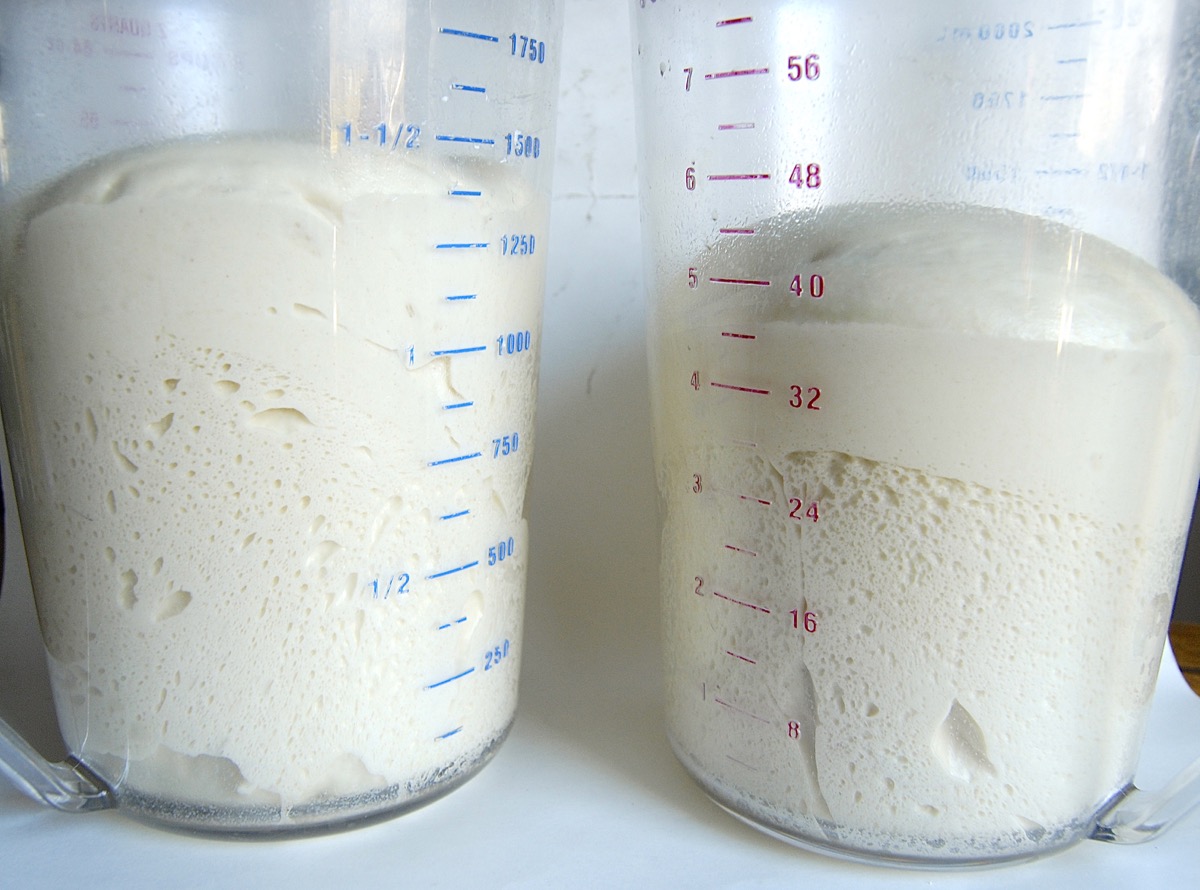
After another hour, the happier starter dough is still ahead, but the neglected starter dough is starting to catch up. Both are showing good activity, as you can see from the air bubbles.
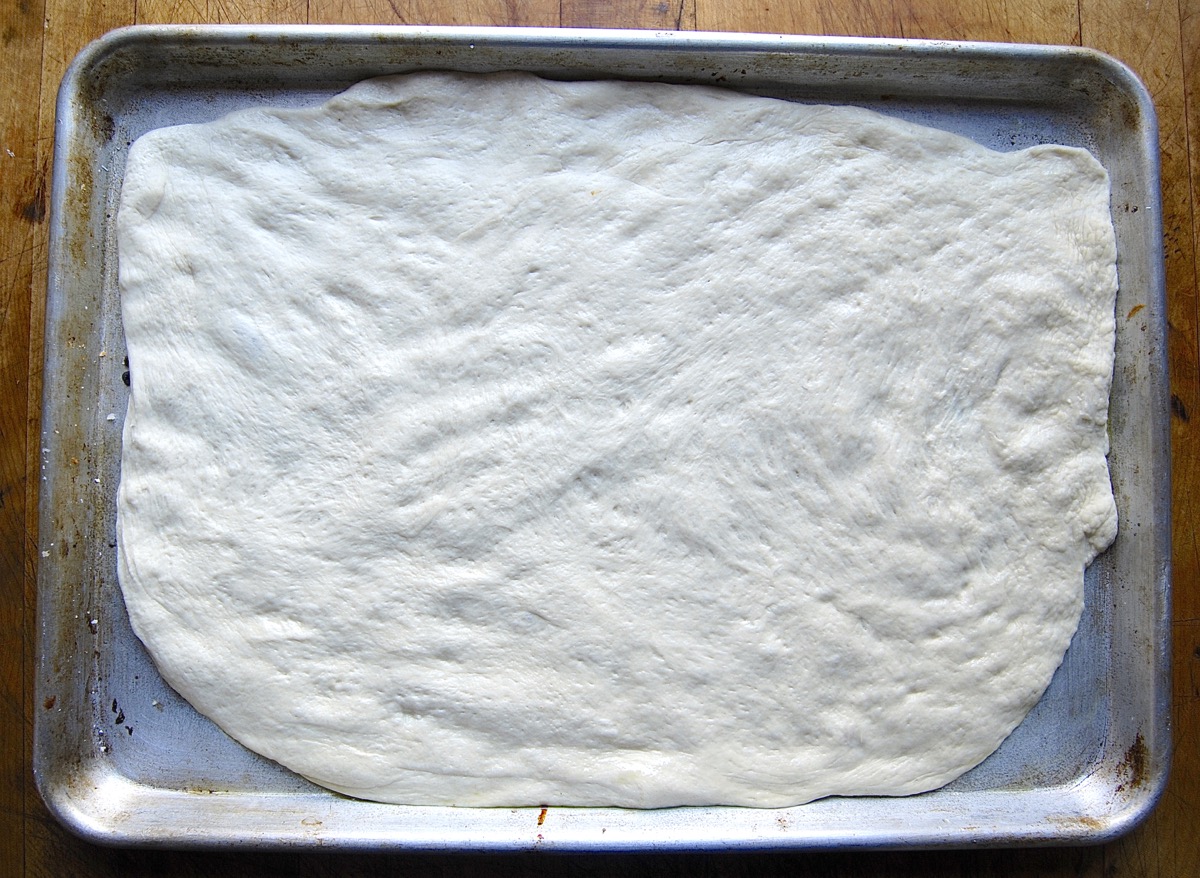
After a total of four hours rising, I pat each crust into a half-sheet pan — which I've first greased with non-stick spray, and then drizzled with olive oil.
I'm making thick Sicilian-style pizza here. You can make two 12" round thin-crust pizzas out of each batch of crust, if you prefer.
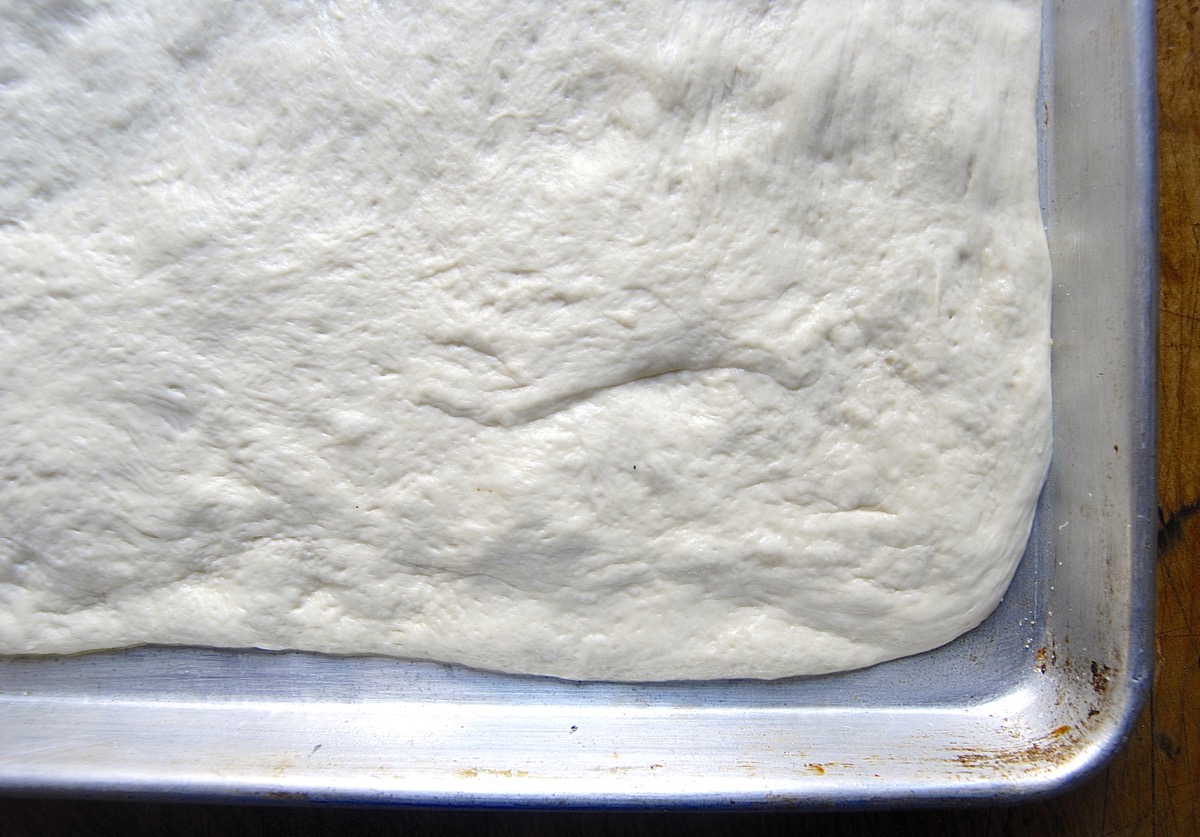
This is the crust made from the regularly fed starter.
 And here's what it looks like two hours later. It's not a frenetic riser, but the dough does puff up and spread into the corners of the pan.
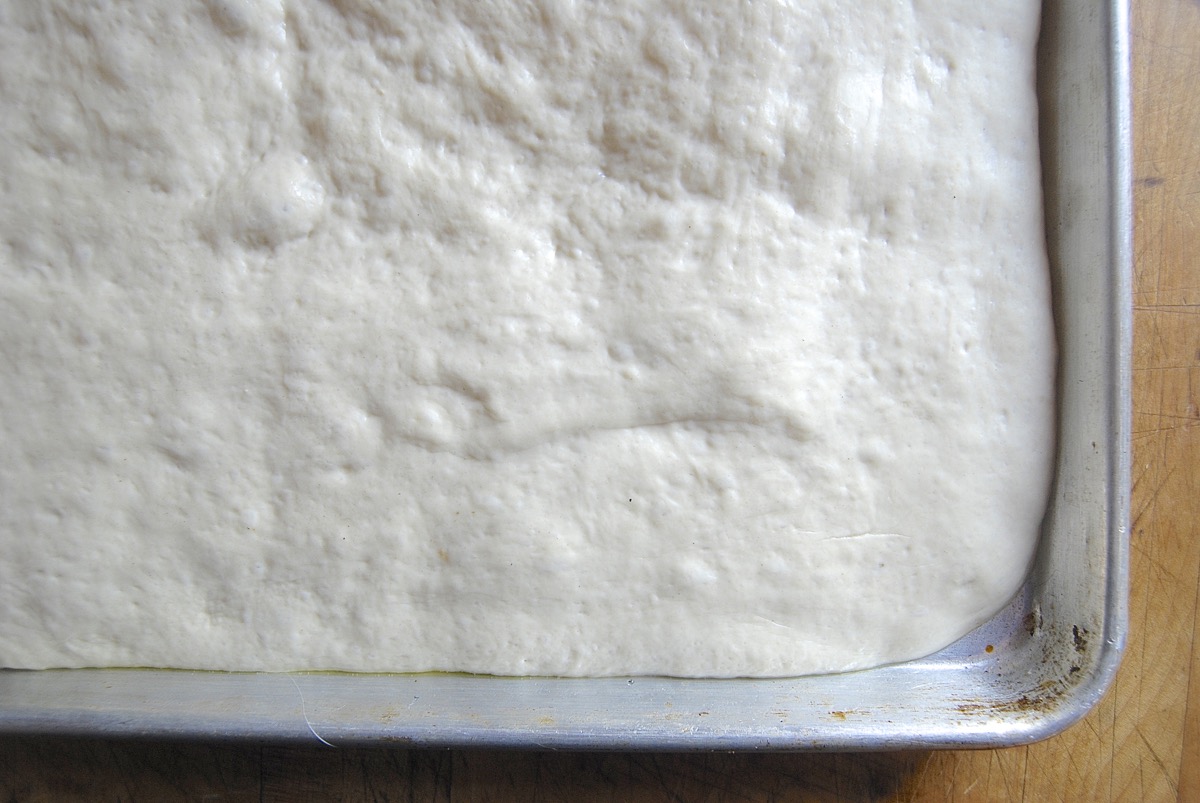
At this point, there's no need to take a comparison photo of the dough made from the neglected starter; it's totally caught up. Lesson learned: making your sourdough pizza crust with a neglected rather than happy starter is just fine.
OK, we're about ready to bake. Let's preheat the oven to 450°F. I'll set my pan of dough on a pizza stone, which lives full time on the bottom of my oven. If you don't want to use a stone, that's fine, too — you'll just set the pan on your oven's middle shelf.
I like to bake my thick-crust pizzas partway before topping. This partial bake accomplishes several things:
Thin-crust pizzas don't need pre-baking, but if you're making a thicker sourdough pizza crust, bake it for about 8 to 10 minutes without toppings, until it's set. It'll lose its raw-dough "shine," and will appear solid, not fragile.
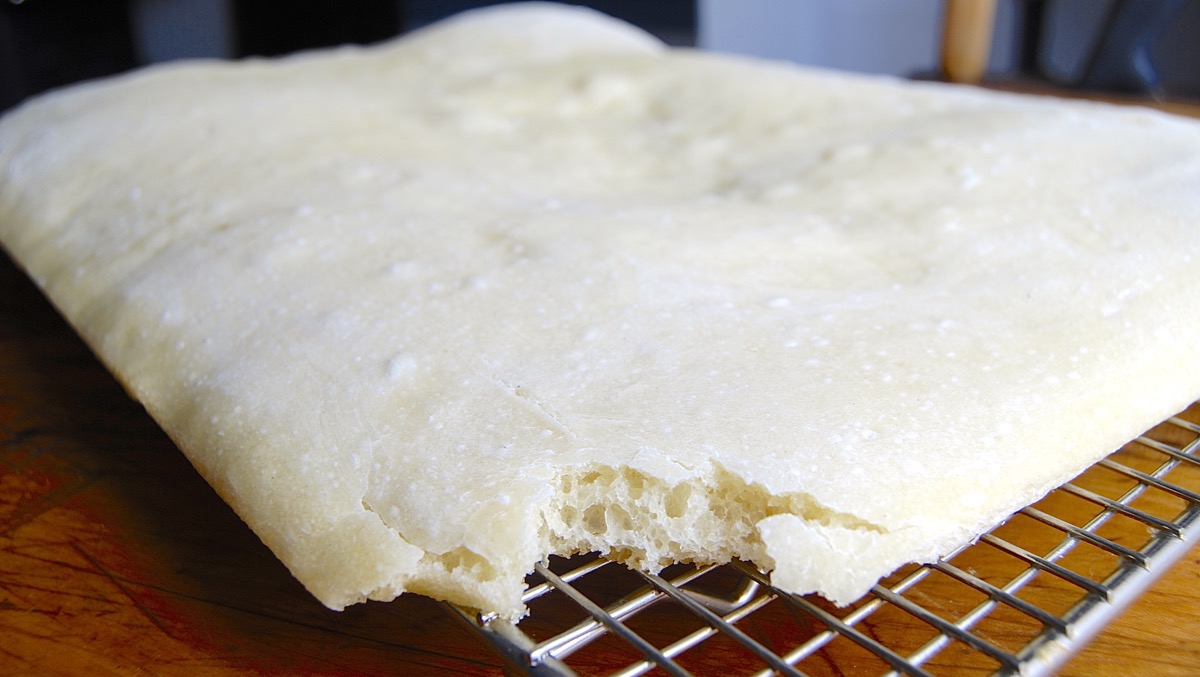
Notice the crust is baked all the way through, but not browned. Sourdough crusts don't generally brown as readily, so don't panic; it'll look fine by the time you've topped and finished baking it.
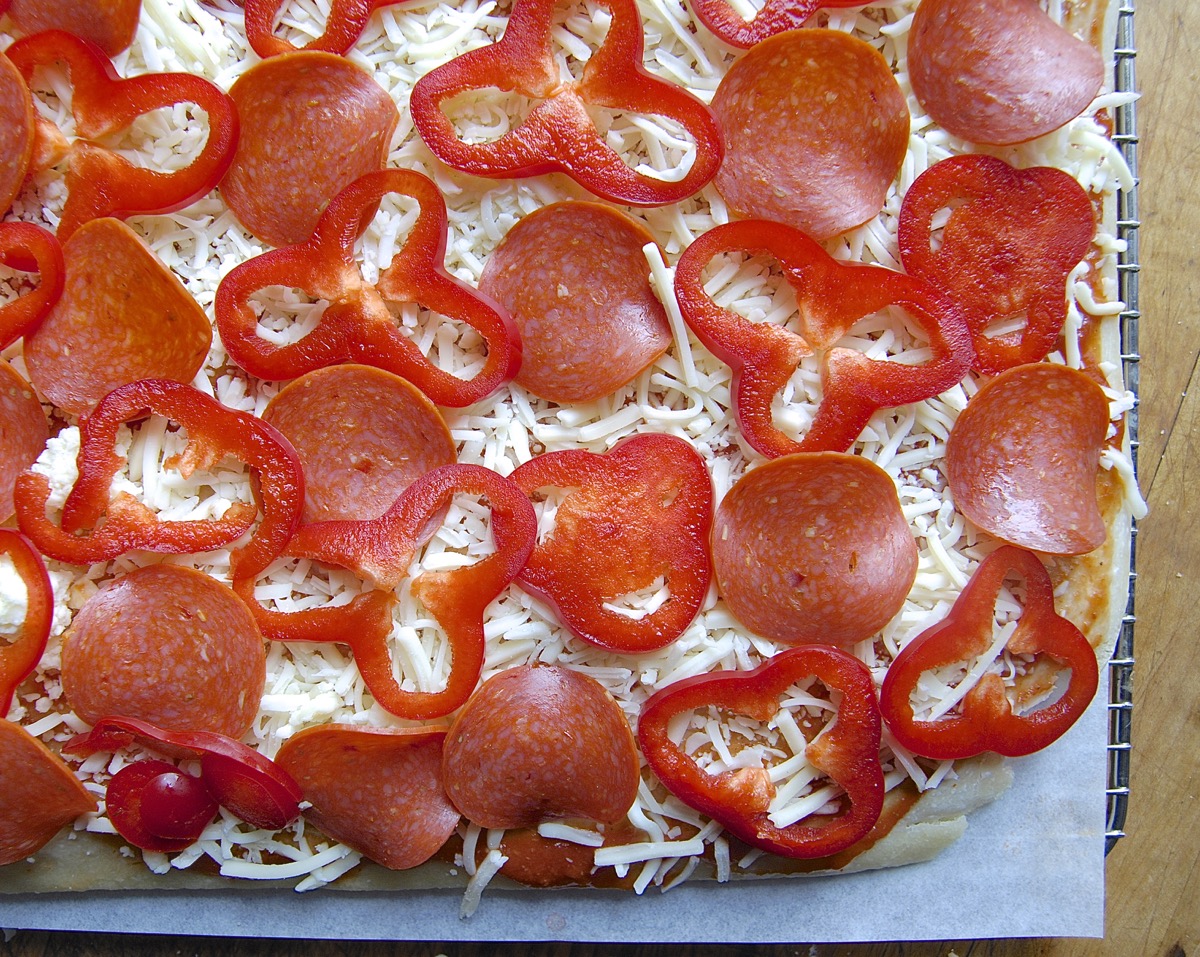
I'm going with red toppings here: tomato sauce, followed by cheese, red peppers, and turkey pepperoni.
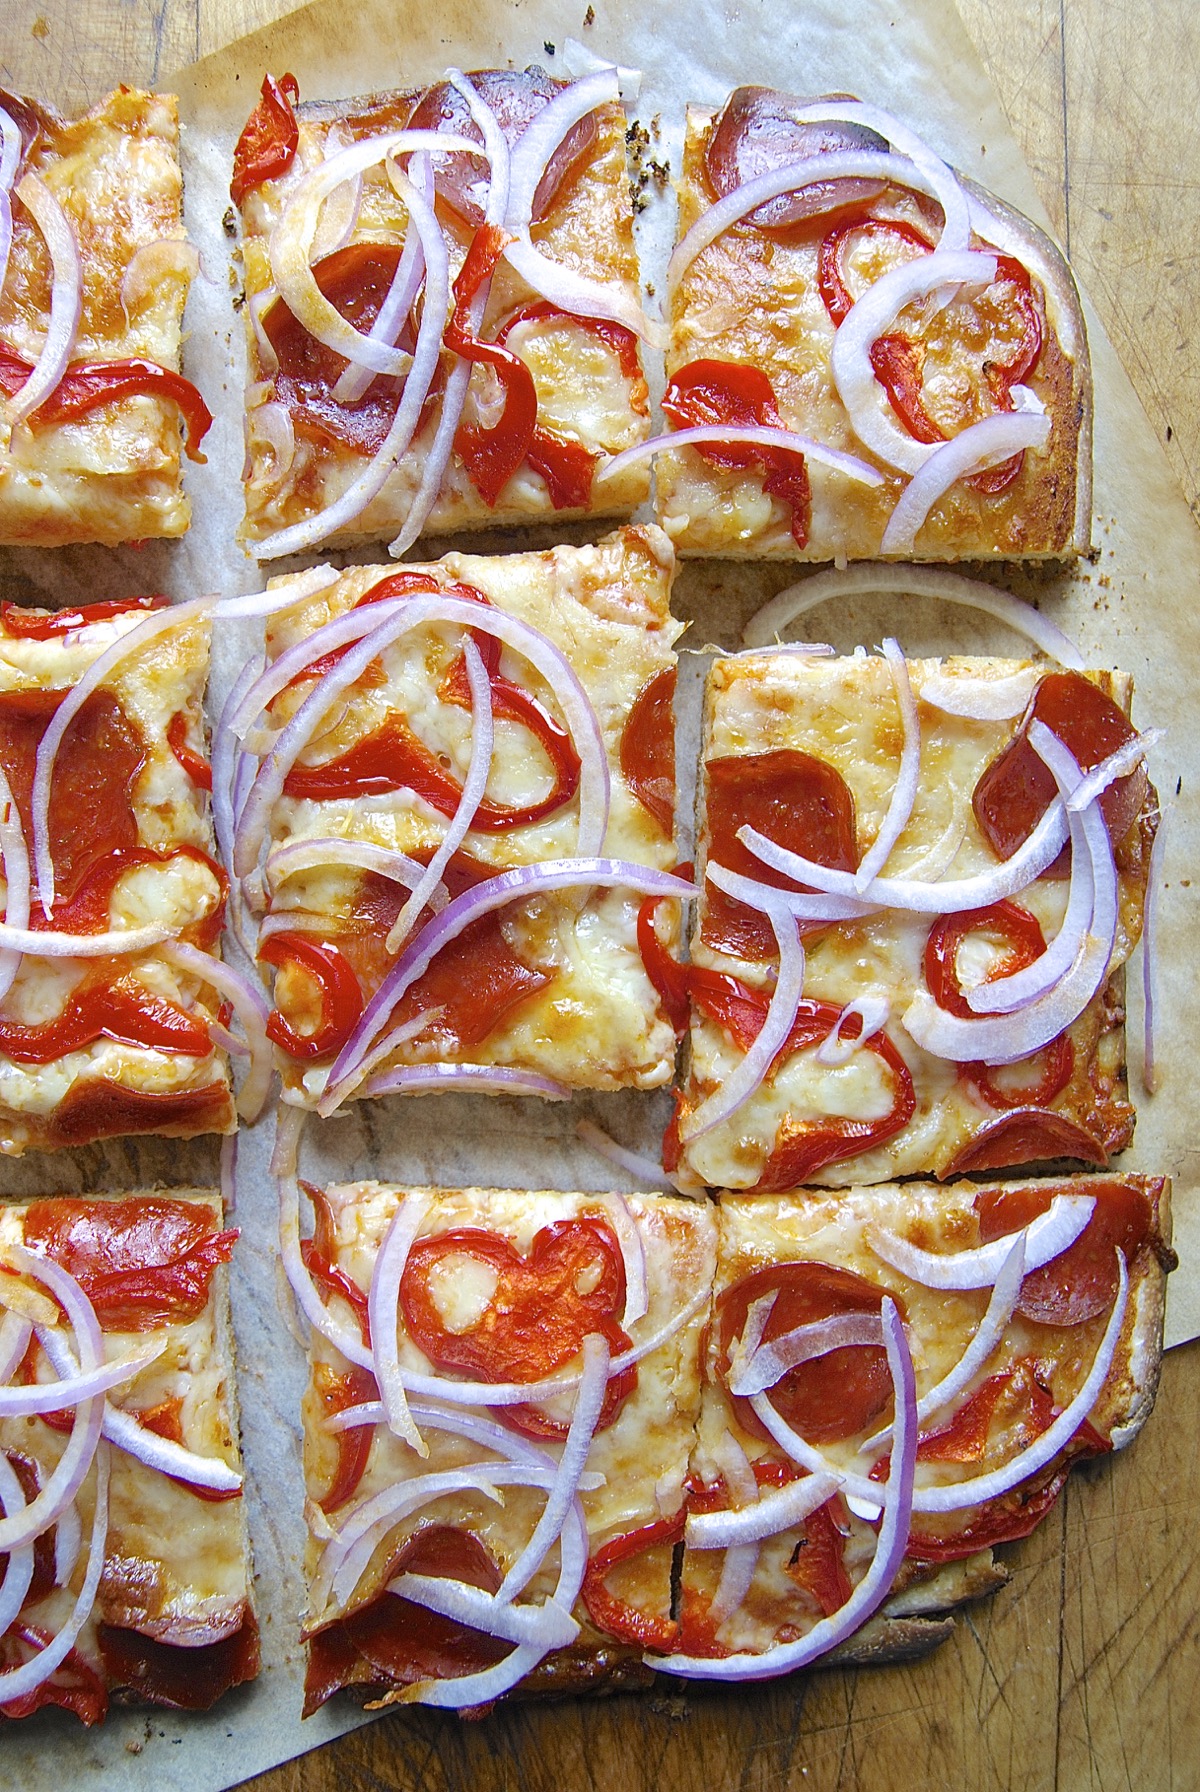
I bake the topped pizza for an additional 10 to 15 minutes, then take it out of the oven and sprinkle with thinly sliced red onion — to complete the red theme.
So, "discard" sourdough starter? Put to good use.
Dinner? Made.
Everybody? Happy.
Sounds like a win-win-WIN.
For complete instructions, see our Sourdough Pizza Crust recipe.
And tell us your favorite thing to do with "discard" sourdough starter — please share in comments, below.
