


How often do you make popovers? Once a week? Once a year? Never?
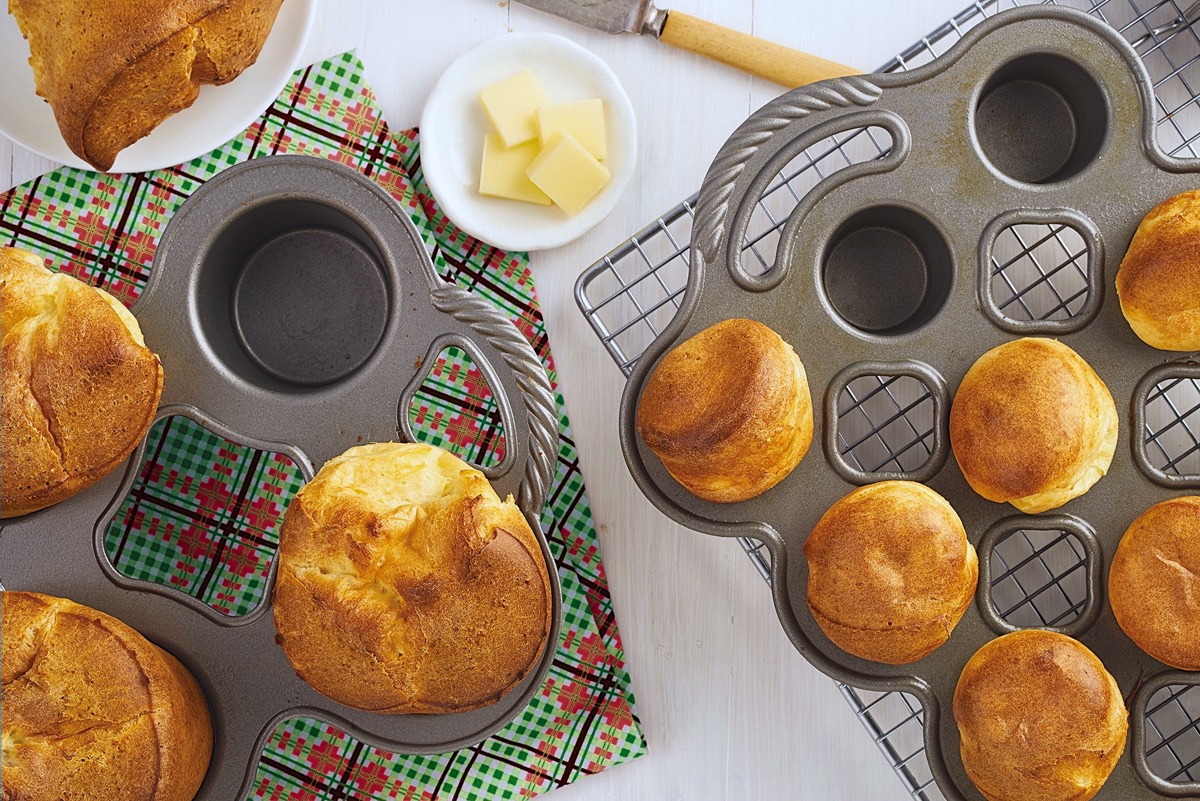
If you seldom (or never) make popovers — well, why not? These light-as-air breads feature a soft, rich interior surrounded by a crisp shell. High-rising and golden brown, they’re as much a feast for the eyes as the tummy.
And easy to make? With just five ingredients and half an hour in the oven, they couldn’t be simpler.
So you seldom make popovers because… you’re afraid they won’t pop. Am I right? Popovers just seem fussy and a bit scary, like maybe they’ll turn out great, but maybe they’ll sit there in the pan, recalcitrant dough blobs — and you’ll never know what went wrong.
Well, I’m here to tell you that it’s virtually impossible to goof up popovers — so long as you follow a few key bits of advice. I’ll even go so far as to call them rules.
Dedicated rule-breakers, popovers probably aren’t for you; choose some other recipe in which to exercise your rebellion against authority. But for those of you willing to fall in line, here’s what you need to remember about popovers.
What makes popovers pop? Unlike cake or bread, popovers use neither baking powder/baking soda nor yeast to provide leavening. Steam is the engine that makes them rise — and rise, and rise!
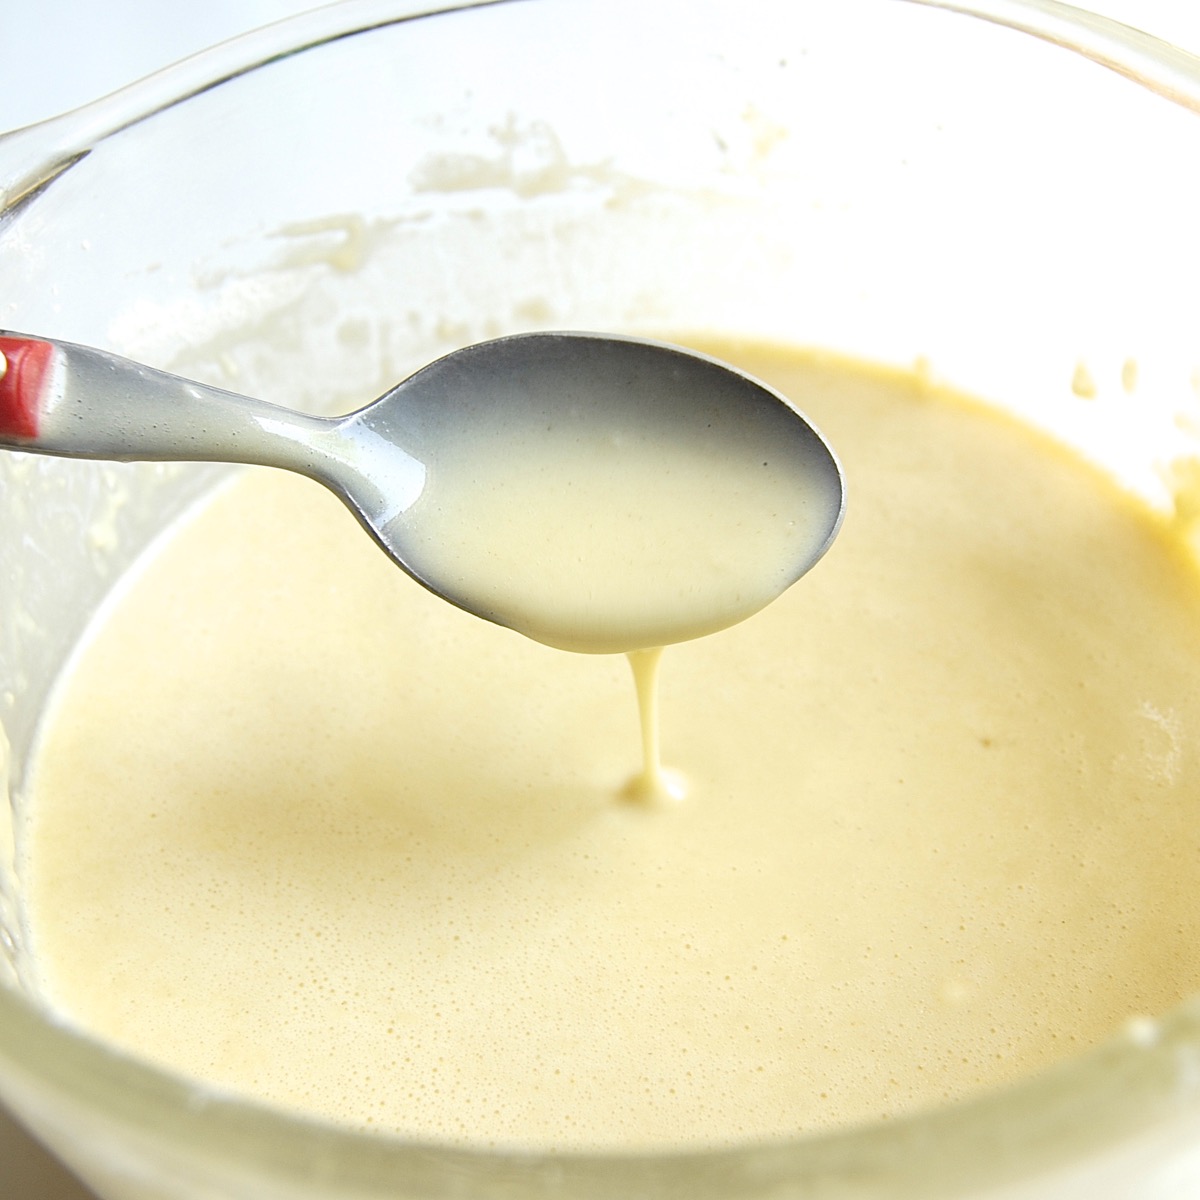
Thus it’s important that your popover batter is very thin, signaling there’s enough liquid to produce the requisite amount of steam necessary for perfect popping.
But that’s not the end of the story; in order to make popovers that not only pop but stay popped (no falling flat, please), the amount of liquid has to synch up with the amount of flour. This liquid-to-flour ratio is called hydration.
Yeast dough for a typical sandwich loaf, the kind of dough that readily forms a ball as you knead, has a hydration of around 62% — that is, the weight of the liquid is just 62% that of the flour.
Now think of pancake batter: much runnier, right? Its hydration is around 182%, meaning there’s nearly twice as much liquid as flour.
Contrast those with the typical popover batter, where the hydration can be 250% or higher: the weight of the liquid is 2 1/2 times that of the flour. Popover batter is very runny indeed; its consistency is comparable to that of heavy cream. With that kind of hydration, you’re going to have a lot of steam.
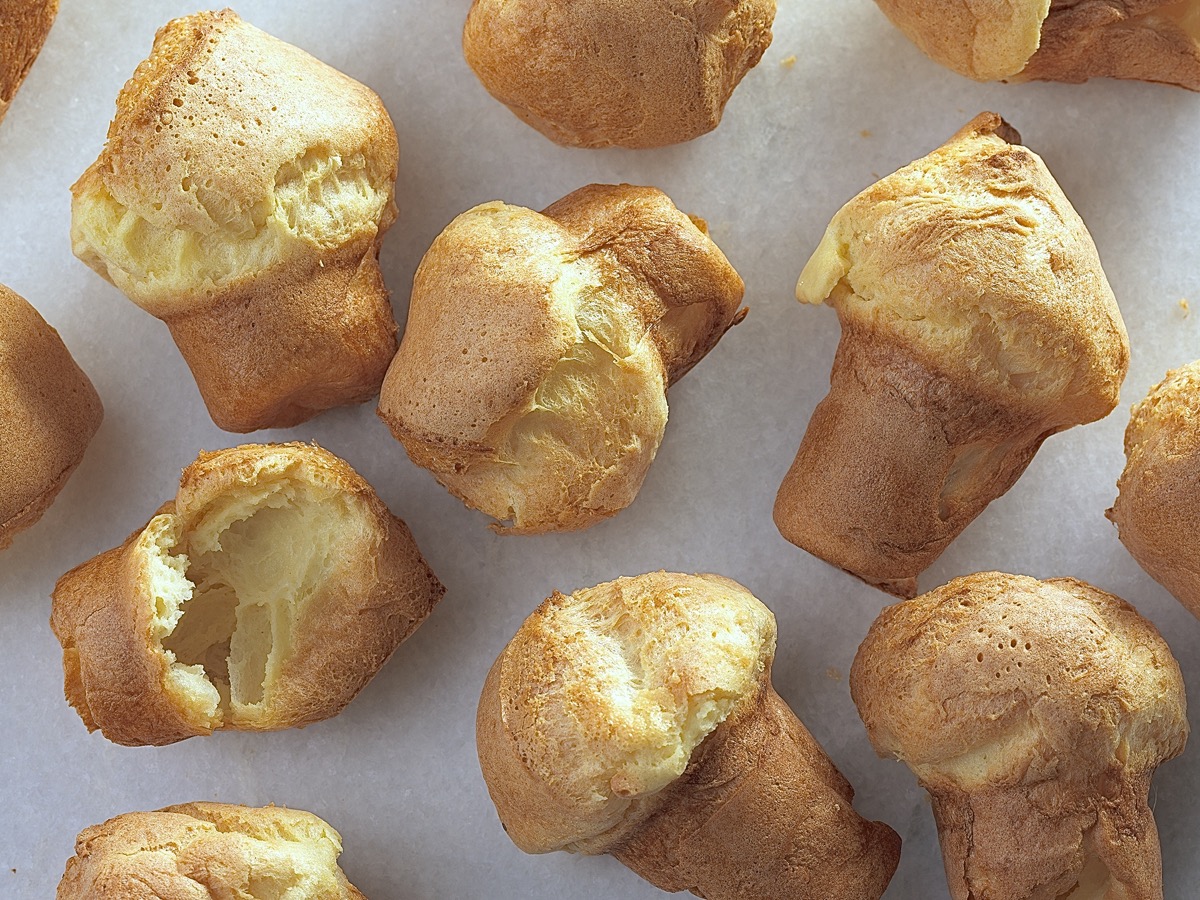
Lots of steam is a good thing, but you need something to trap that steam — which is where flour and eggs come in. The gluten in flour (and protein from the eggs) create the structure that traps steam in rising popovers. Without this structure, steam will escape like air from a punctured balloon, and your popovers will puddle, not pop.
Since popovers are noted for their delicate, tender texture, wouldn’t it follow that using a lower-protein pastry or cake flour would be ideal? The less protein, the less gluten (with its potential toughness), the more tender the popover, right?
Not quite. Popovers, which are mostly air, rely on a very thin crust to contain those voluminous amounts of steam. So that crust had better be strong enough to stretch without breaking, then to set without developing any leaks.
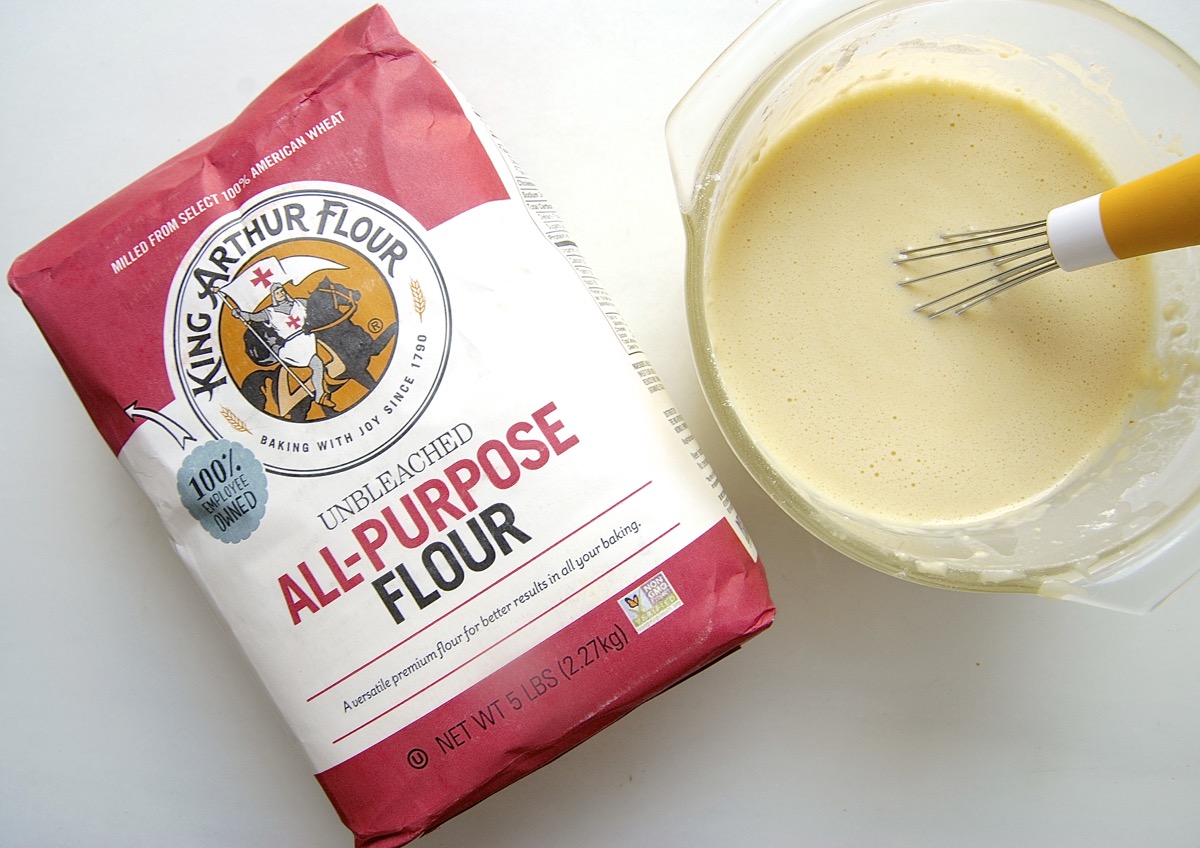
We find that our all-purpose flour with its medium protein level (11.7%) works best, yielding the perfect compromise between popovers that are too fragile (cake/pastry flour) and too tough (bread flour).
Now, all of that said — if you're baking gluten-free, we do have a popover recipe for you! You'll find it down at the bottom of this post.
Preheating your oven to the correct temperature is probably the most important thing you can do to ensure popover success. The hotter your oven, the higher your popovers will rise. Which makes sense: the faster liquid in the batter turns into steam, the more chance your popover has to expand before its crust sets.
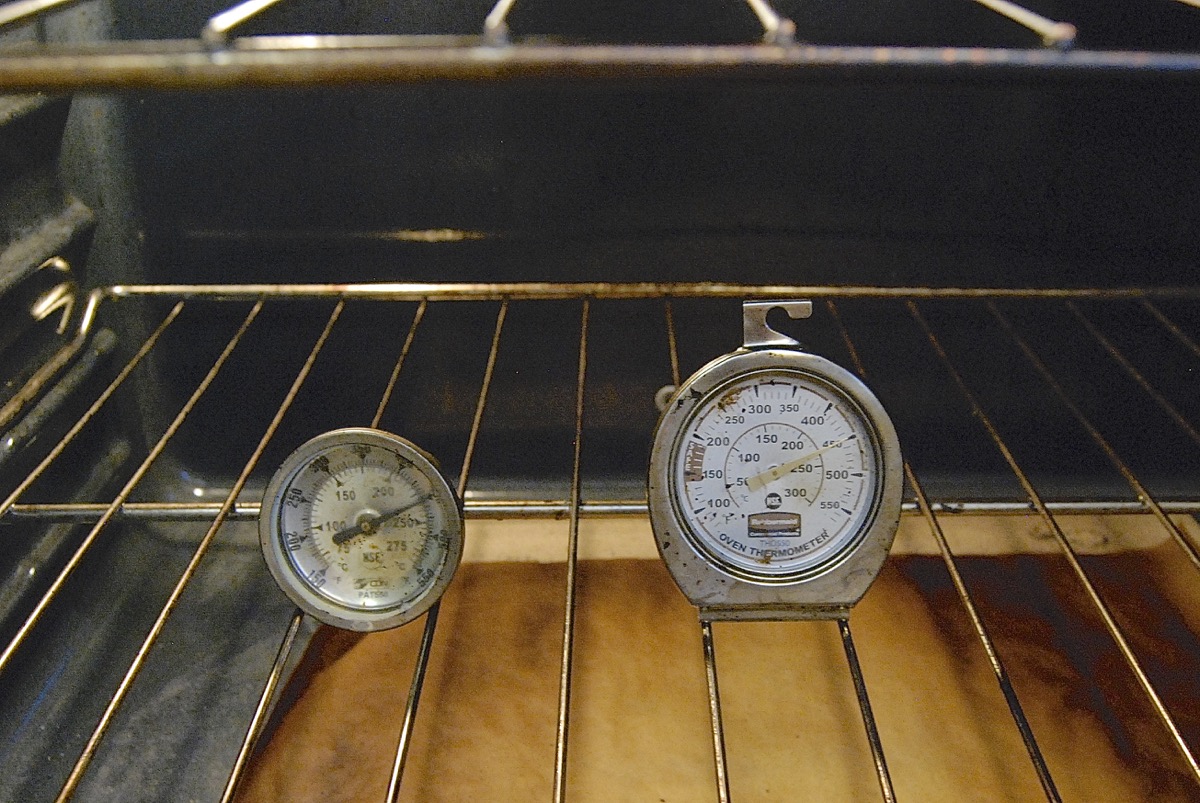
We've found that 450°F is the optimum temperature for baking popovers: hot enough to make them pop, but not so hot that they burn before they're baked through.
Don’t rely on your oven’s built-in gauge to assess readiness. Every oven I’ve ever owned signals it’s sufficiently preheated before it actually is. I recommend placing an independent oven thermometer (or two) inside to determine when your oven is up to temperature. In the absence of another thermometer, preheat your oven for a good 30 minutes before baking popovers.
Popovers are a fleeting pleasure. As soon as they emerge from the oven they start to settle a bit, and as they cool the steam migrating through their softening crust can make them a bit tough and leathery.
The solution? Enjoy popovers hot, direct from the oven. Which means no baking popovers the day before, then rewarming. Rewarmed popovers are inevitably hard and dry, a far cry from their just-baked state: crisp shell and soft, rich interior.
At the end of the day (or afternoon, anyway), popovers served within 4 to 5 hours of baking will be quite palatable. Although they'll be missing the crisp crust, they'll still be wonderfully soft inside.
Now, some people like to slit a hole into the finished popovers to release steam, then return them to the oven for 3 to 5 minutes to help prevent sogginess as the popovers cool. But I've never found popovers soggy; rather, I consider their soft inner heart rich and lush, almost pudding-like in spots. If you like a drier popover, go ahead and slit them; I'm leaving mine alone.
Let's put all of this information to the test, shall we?
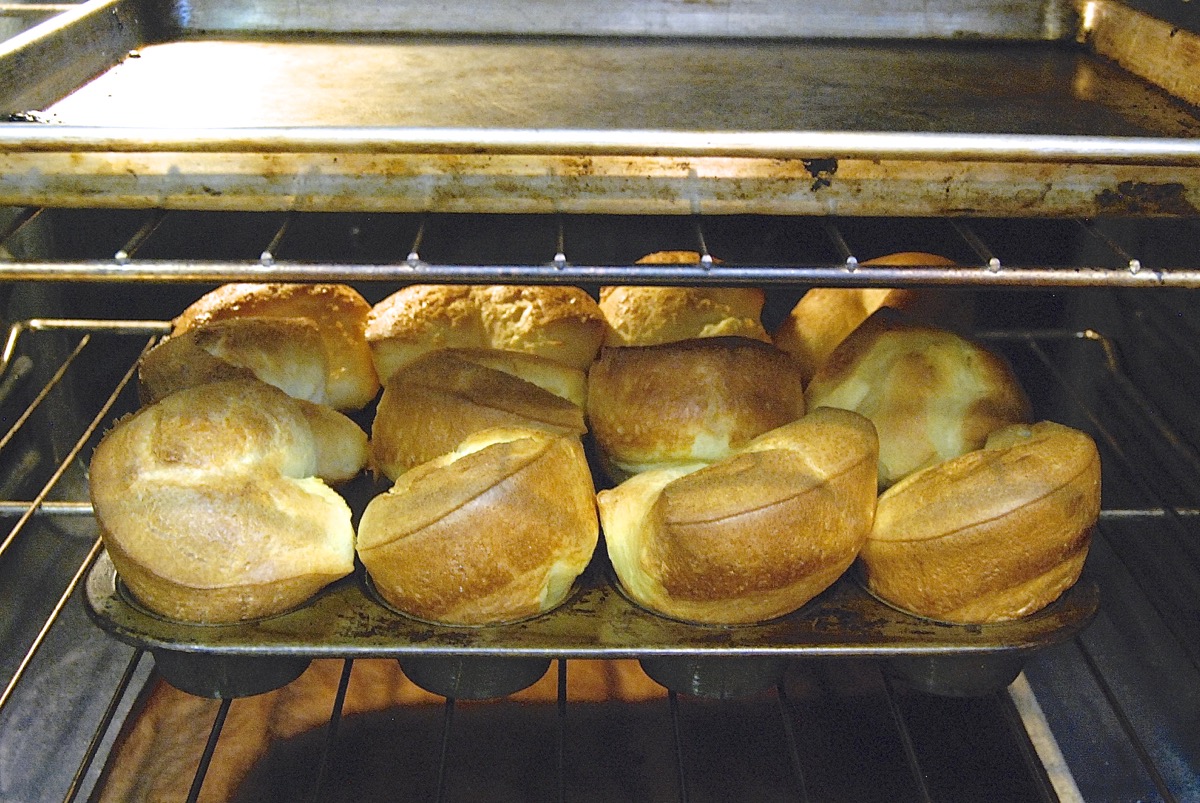
Preheat your oven to 450°F with a rack on a lower shelf. The top of the fully risen popovers should be about midway up the oven. What you don't want is for the tops of the popping popovers to be too close to the top of the oven, as they'll burn. Place a rack on the top shelf as well; you’re going to use it to hold a “heat shield.”
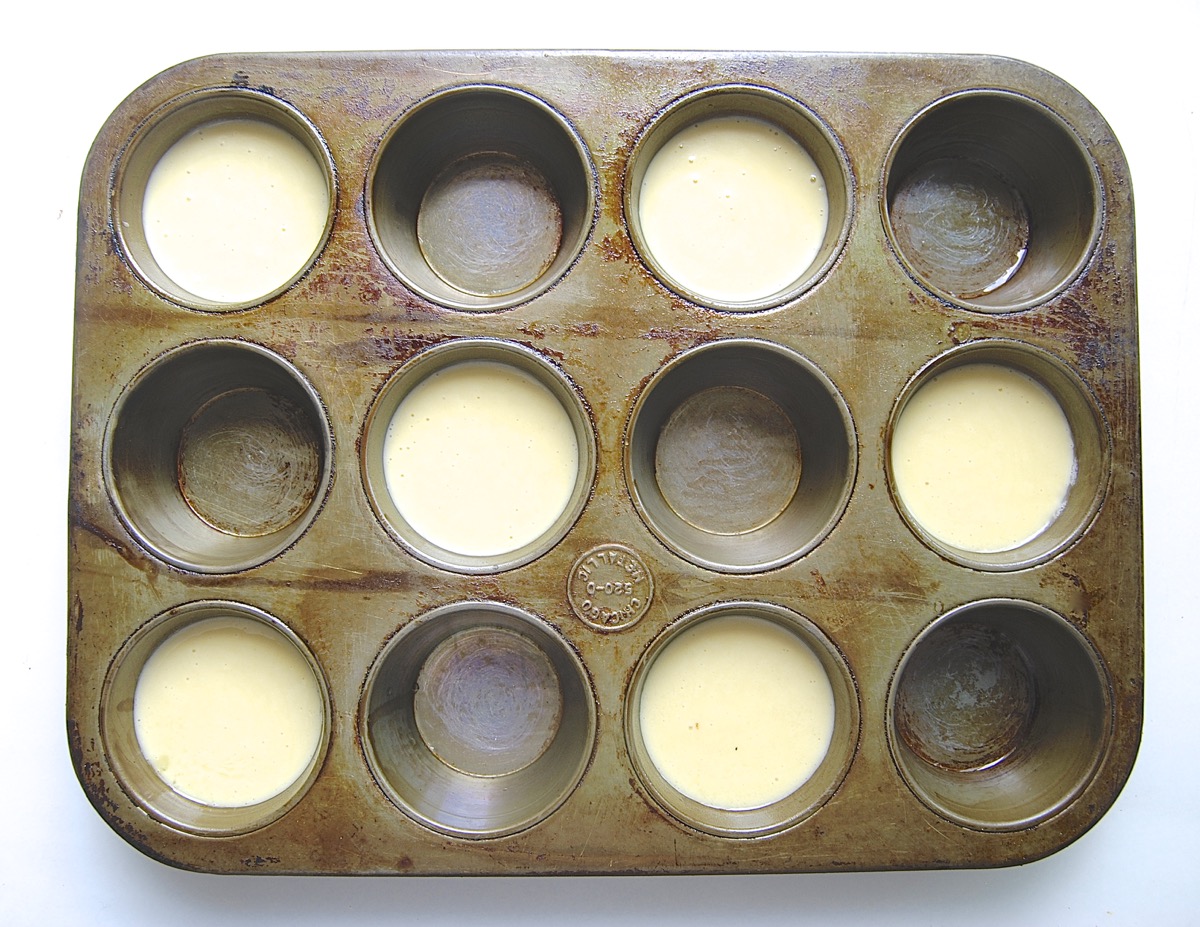
If you have a favorite popover pan, use it. If not, use a standard 12-cup metal muffin pan, one whose cups are close to 2 1/2" wide x 1 1/2" deep. Grease the pan thoroughly with non-stick vegetable oil spray, covering the area between the cups as well as the cups themselves. Make sure the oven is up to temperature before you begin to make the popover batter.
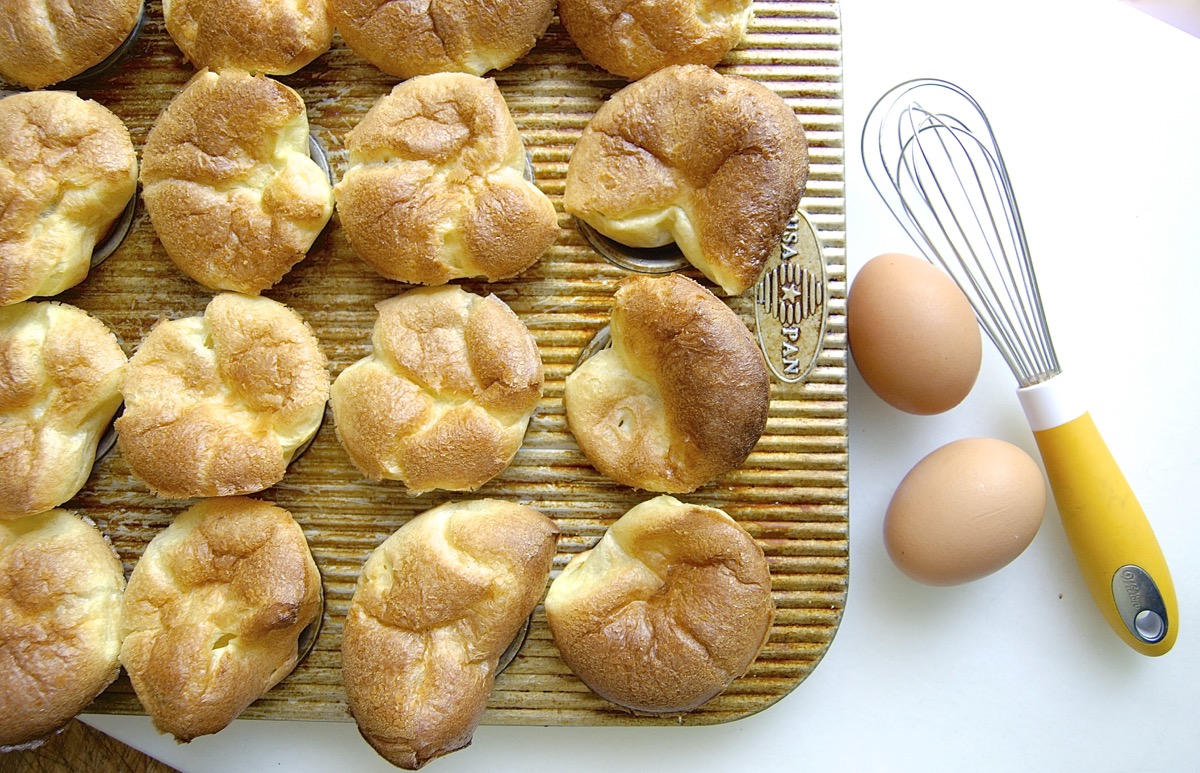
4 large eggs, warmed in a cup of hot water for 10 minutes before cracking*
1 1/2 cups (12 ounces) milk (skim, low-fat, or full-fat), lukewarm*
1/2 teaspoon salt
1 1/2 cups (6 1/4 ounces) King Arthur Unbleached All-Purpose Flour
3 tablespoons (1 1/2 ounces) melted butter
*Why pre-warm the eggs and milk? The warmer your batter going into the oven, the more quickly it’ll produce steam: simple as that.
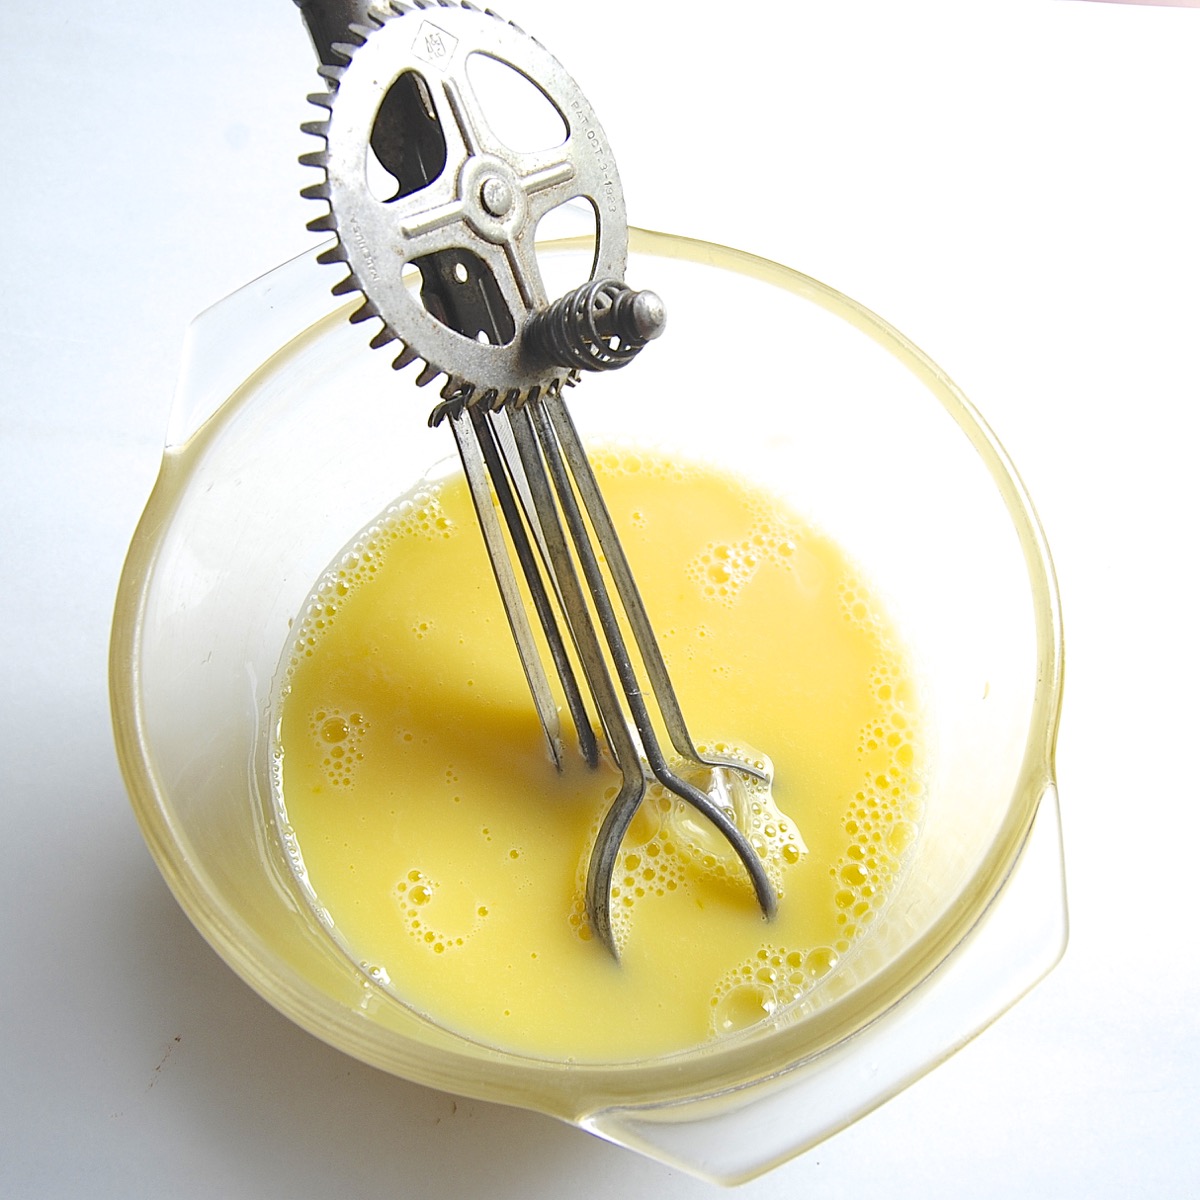
Beat together the eggs, milk, and salt until thoroughly combined, with no streaks of yolk showing. Use a wire whisk, an eggbeater, or your stand mixer using the whisk attachment.
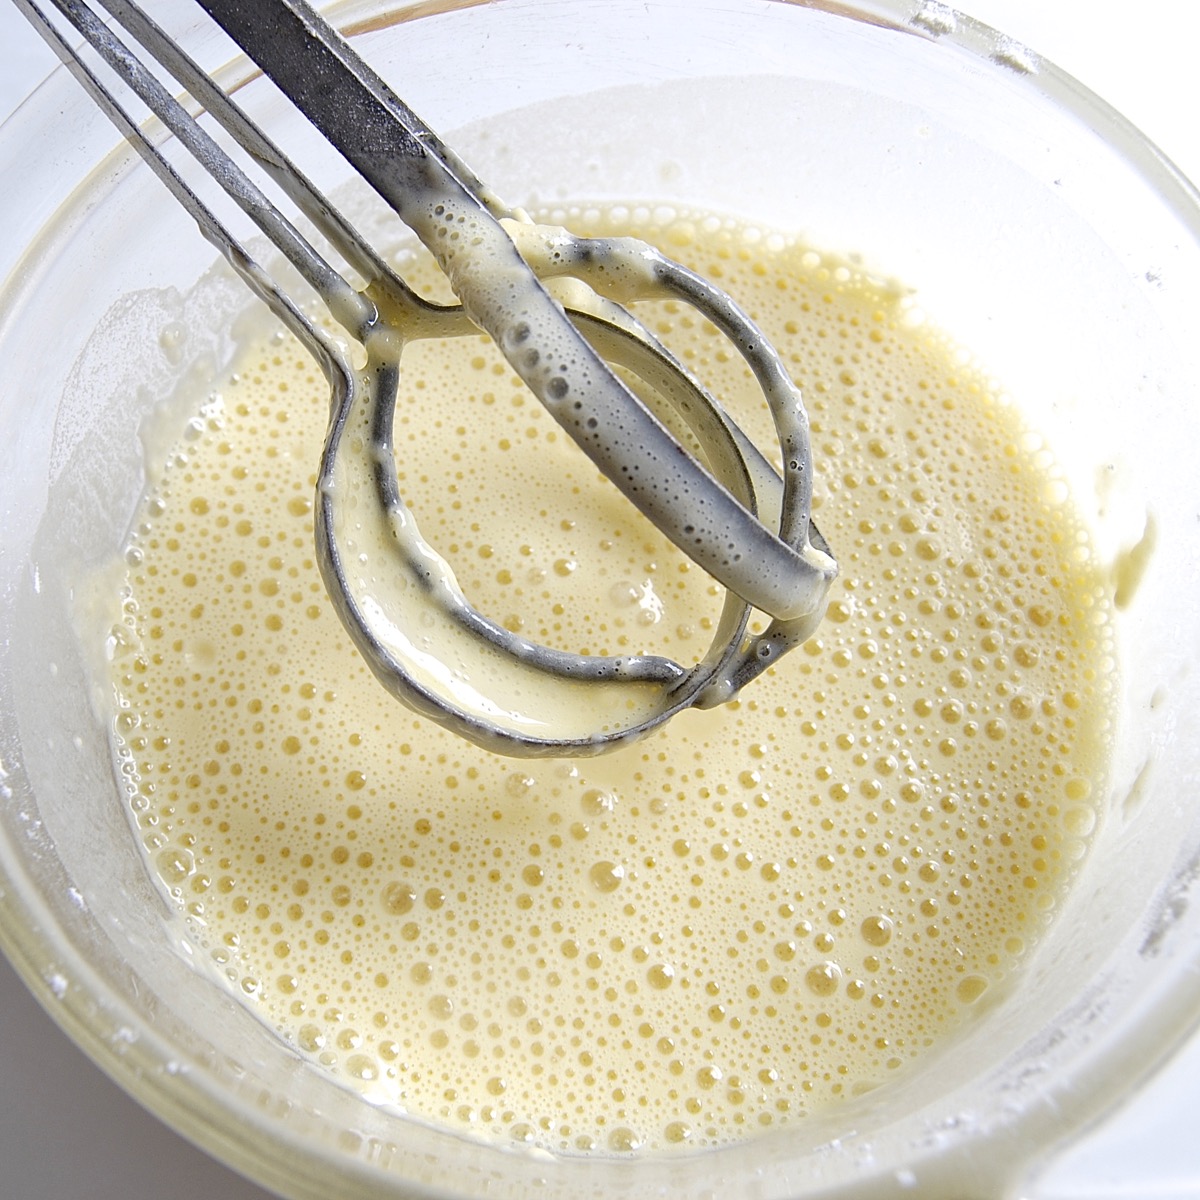
Add the flour all at once and beat until frothy; there shouldn't be any large lumps in the batter, though scattered smaller lumps are OK. Scrape the bowl and beat briefly to recombine.
Stir in the melted butter, combining quickly.
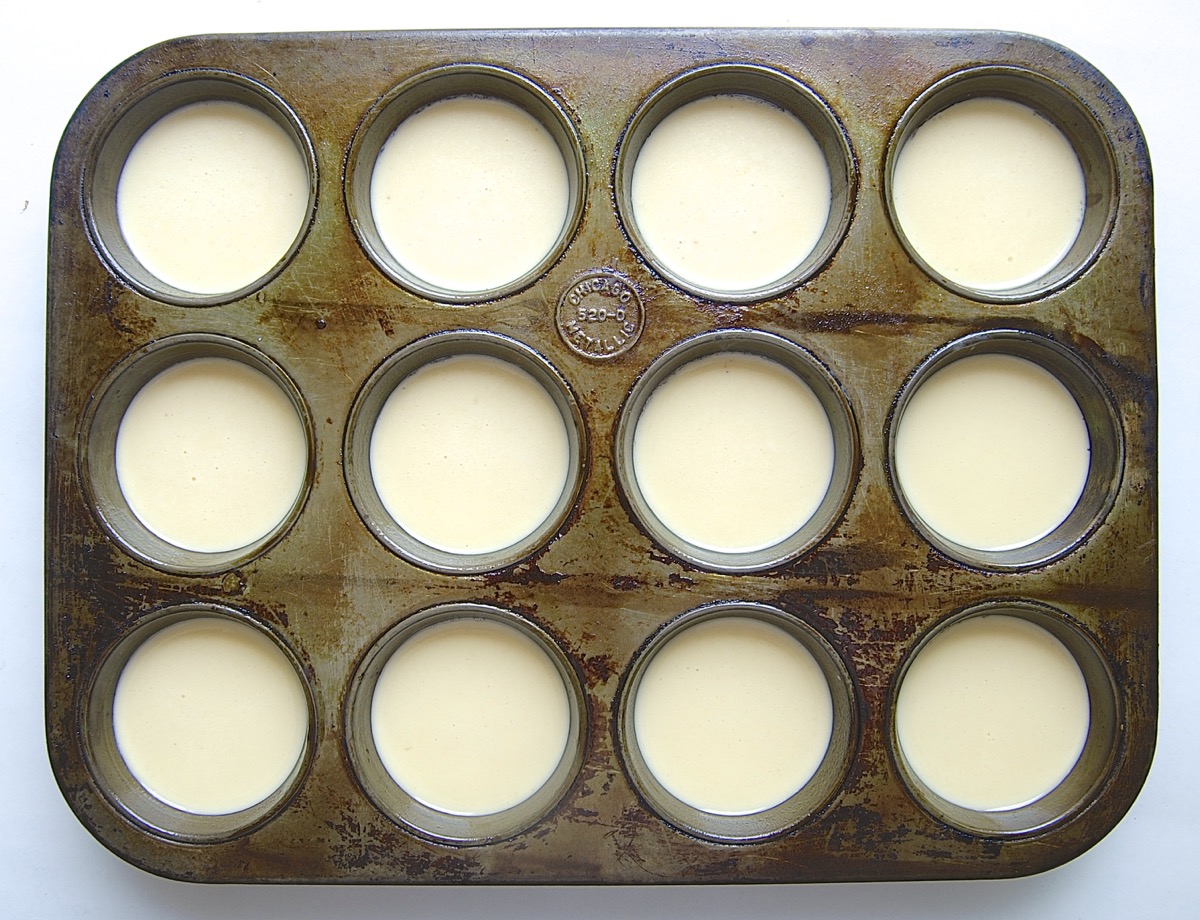
Divide the batter evenly among the muffin cups, filling them about 2/3 to 3/4 full. If you have a scale, you’ll use about 60g batter in each cup.
Make absolutely certain your oven is at 450°F. Place the pan on a lower shelf of the oven. Place a baking sheet on the top shelf, to shield the top of the popovers and prevent them from over-browning.
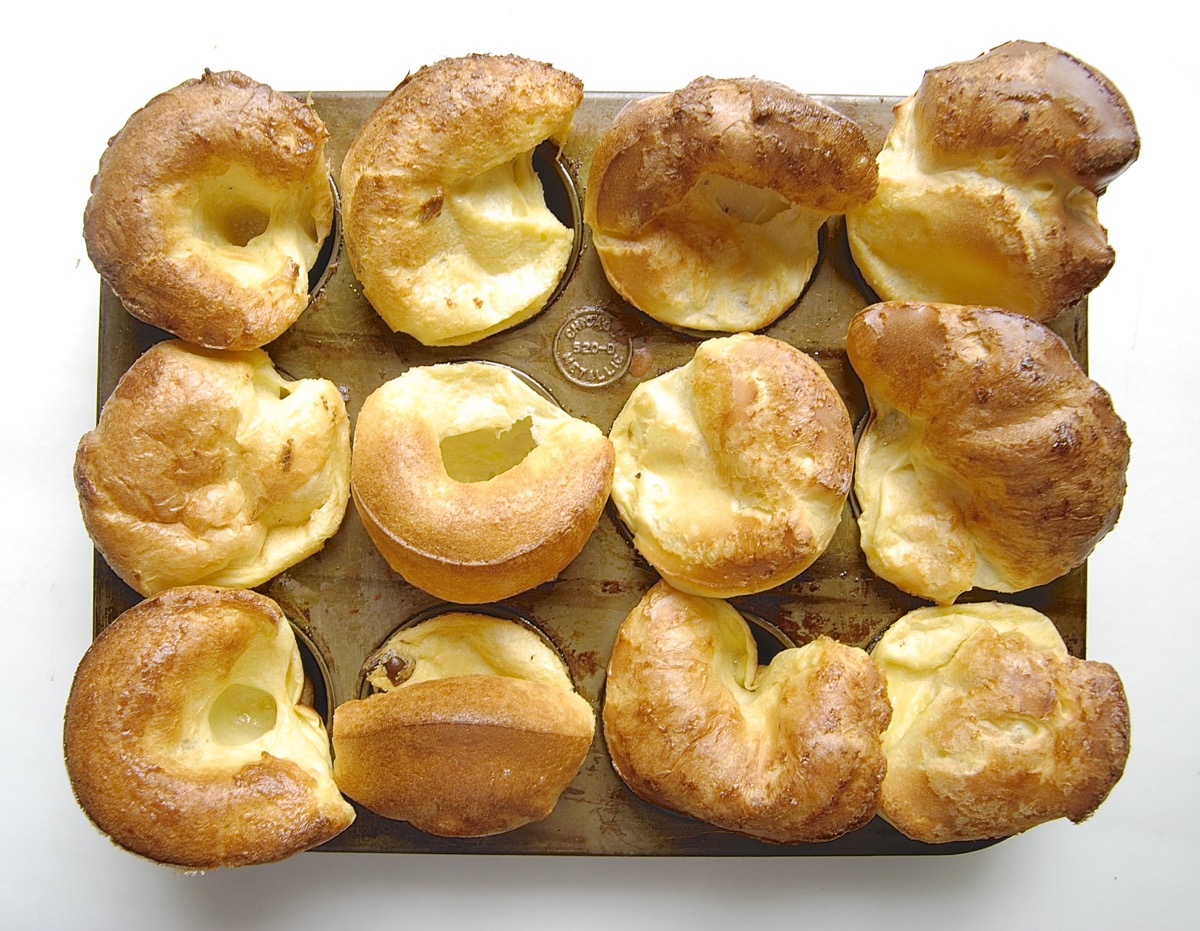
Bake the popovers for 20 minutes. Reduce the heat to 350°F, and bake for an additional 10 to 15 minutes, until the popovers are golden brown. Popovers baked for an additional 10 minutes will be quite soft, and will definitely settle more as they cool. Popovers baked the additional 15 minutes will be sturdier, though their interior may not seem quite as rich.
When the popovers are as done as you like, remove them from the oven, carefully pluck them out of the pan, and serve hot with butter. If they’re part of breakfast, add jam, preserves, honey, or flavored butter.
What if I forget to heat the eggs and milk to lukewarm — or I’m in a rush and just skip that step?
It’s OK. Your popovers will pop marginally less, and may be more likely to stick to the pan, but in the end will probably still turn out fine.
Is it really OK to use a muffin pan instead of a popover pan?
Absolutely. A popover pan will give you popovers with a taller base and a more defined “mushroom” top, but a muffin pan will bake popovers just fine.
And speaking of muffin pans, feel free to use a jumbo Texas muffin pan for six extra-large popovers; bake them for the same amount of time as standard-size popovers.
That said, be aware that the composition of your pan may affect how well your popovers pop: you want to use a material with excellent heat transfer. While some people have success with ceramic custard cups or silicone pans, we prefer to use aluminum or steel/aluminum pans. If you have an old cast iron popover pan you love, preheating it before adding the batter will yield the best results.
Can I make mini popovers in my mini muffin pan?
Mini popovers are awesome! At just a couple of bites each, they're the perfect size to serve two or three (or four) alongside scrambled eggs, or with an array of jams and flavored butters.
Make a half batch of popover batter, and portion it into a 24-well mini muffin pan. Bake at 450°F for 17 to 20 minutes, until golden brown.
Can I make the batter ahead and refrigerate it?
Yes, if you must. It may end up being less efficient in the long run, since the batter will separate and you’ll need to beat it together again. But if it works better for you, go ahead and make the batter and refrigerate it (up to overnight). For best results, rewarm before using.
Also, if you only want to make half the popovers at a time — say, six for breakfast today, and six for tea tomorrow — it’s fine to refrigerate the second half of the batter overnight. As noted above, beat to recombine (and for best results, warm to at least room temperature) before using.
Can I make a half batch — six popovers?
Sure, no problem at all. Use half the amount of all of the ingredients, but other than that the prep remains the same. Use a full-size muffin pan, spacing the popover batter as pictured above.
I’ve heard you should never open the oven to check on popovers, because they might fall. True?
Unless you abuse the privilege — say, opening the oven door wide and clomping around the kitchen while also banging pots atop the stove – it’s fine to open the oven to peek on your popovers. Just don’t do it any more than necessary; each time you open the door you’re letting some of that pop-producing heat escape.
Can I make gluten-free popovers?
Yes, but not using this particular recipe. Since popovers are extremely dependent on gluten to rise, they need special handling in the form of a recipe developed specifically for gluten-free all-purpose flour. For best results, use our Gluten-Free Popovers recipe.
Can I make vegan popovers?
We haven't tested vegan popovers, so no guarantees. If you make these with vegan butter, plant-based milk, and an egg substitute, please let us know how it goes.
Are popovers the same as Yorkshire pudding?
Same batter; different baking method. Brits pour popover batter over hot meat drippings and fat — either right in the roasting pan to make one large pudding, or into individual cups that have been prepped with a spoonful of drippings. A rose by any other name... etc.
Ready to flex your newfound knowledge? Review our recipe for Popovers, and start warming your eggs and milk; within an hour you'll have these towering treats on the table!
Judging by the reviews on this recipe, it sounds like many of you enjoy flavoring your popovers to taste (eggnog popovers, anyone?). We’d love you to share your favorite flavored popover ideas here in comments, below.
