Bulk fermentation (also called the first rise or primary fermentation) is one of the most important steps of yeast bread baking. It begins right when mixing ends and lasts until the dough is divided and preshaped. The name signifies exactly what it is: the step when the dough is fermenting in a large, single mass.
During this time, fermentation creates organic acids and carbon dioxide gases, each of which plays an important part in dough development. Organic acids are primarily what give the dough flavor and strength (acids help condition the gluten network) and carbon dioxide gives the dough volume and lightness.
While our friendly yeast and bacteria are doing most of this work, the dough still benefits from a periodic check-in by the baker. We help regulate dough temperature and strength through a series of folds, and these check-ins also give us an opportunity to assess how the dough is progressing.
For a typical sourdough bread recipe, I let bulk fermentation play out at room temperature over 3 to 5 hours. But this time period is ultimately dictated by the bread you're making, what the recorded desired dough temperature is, and the temperature at which you keep the dough.
In this post, we'll examine a few things to look for in determining when to end bulk fermentation; but first, let's look at why we fold bread dough during bulk fermentation.
Folding helps add strength to bread dough through a very simple series of actions: stretch the dough out and over itself. This act of stretching and folding, which takes just a few moments, helps develop the gluten network in the dough. Each fold has a significant impact on dough strength.
 Through folding, we're also helping to regulate dough temperature throughout the entire bulk mass. This ensures the dough's temperature is relatively even throughout — no cool or warm spots at the top or bottom.
And finally, at each set, we have a chance to handle the dough and gain a firsthand assessment on how it's developing: is the dough sluggish because it's cool in the kitchen? This means we might need to extend bulk fermentation. Is it strong enough for preshaping or does it need another set of folds? By interacting with the dough in this way, we have an opportunity to answer these questions and adjust course as necessary.
This process works best when you perform a quick series of folds and then let the dough rest. In the left-hand image below, you can see the dough bunched tightly in the center after performing a set of stretches and folds. In the right image, you can see it relaxed after a 30-minute rest, ready for another set of folds.
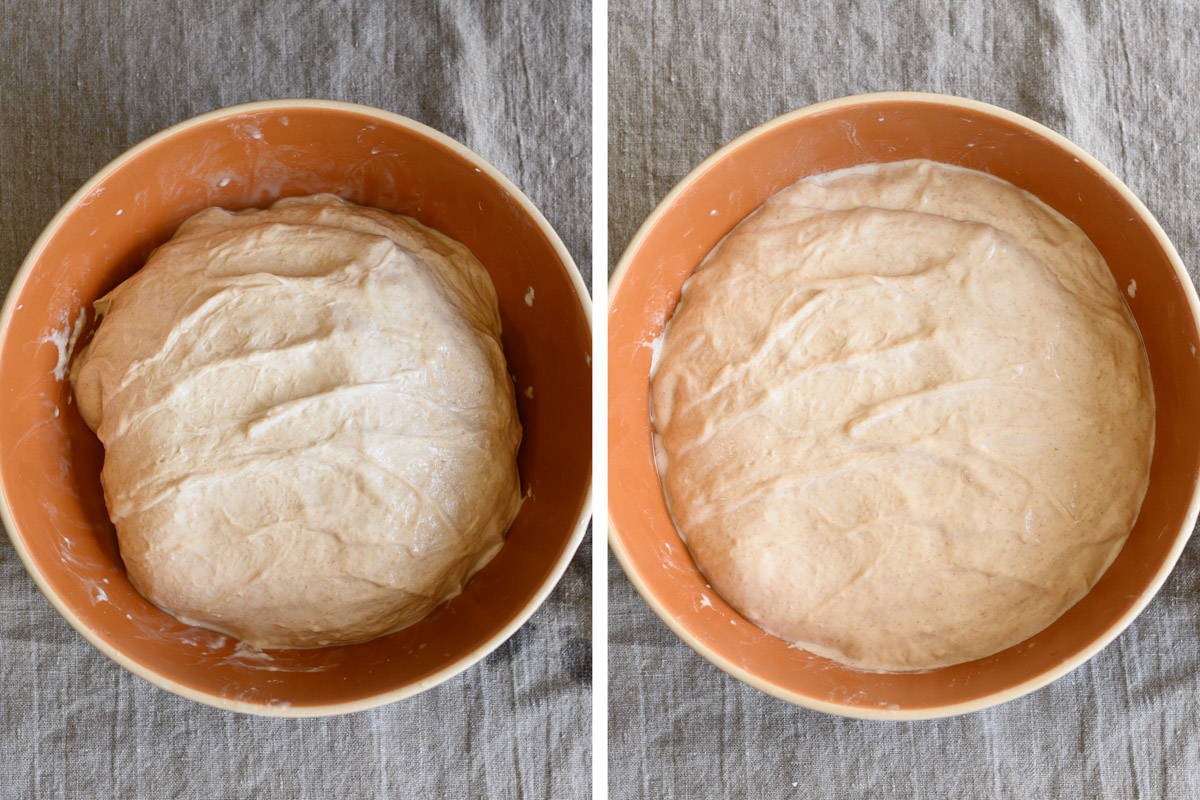
If you try to perform another set too soon, you'll find the dough is too tight. It'll be hard to stretch and may even tear. For most doughs, I find spacing out each set by 30 minutes (with the first set happening 30 minutes after the beginning of bulk fermentation) to be just right.
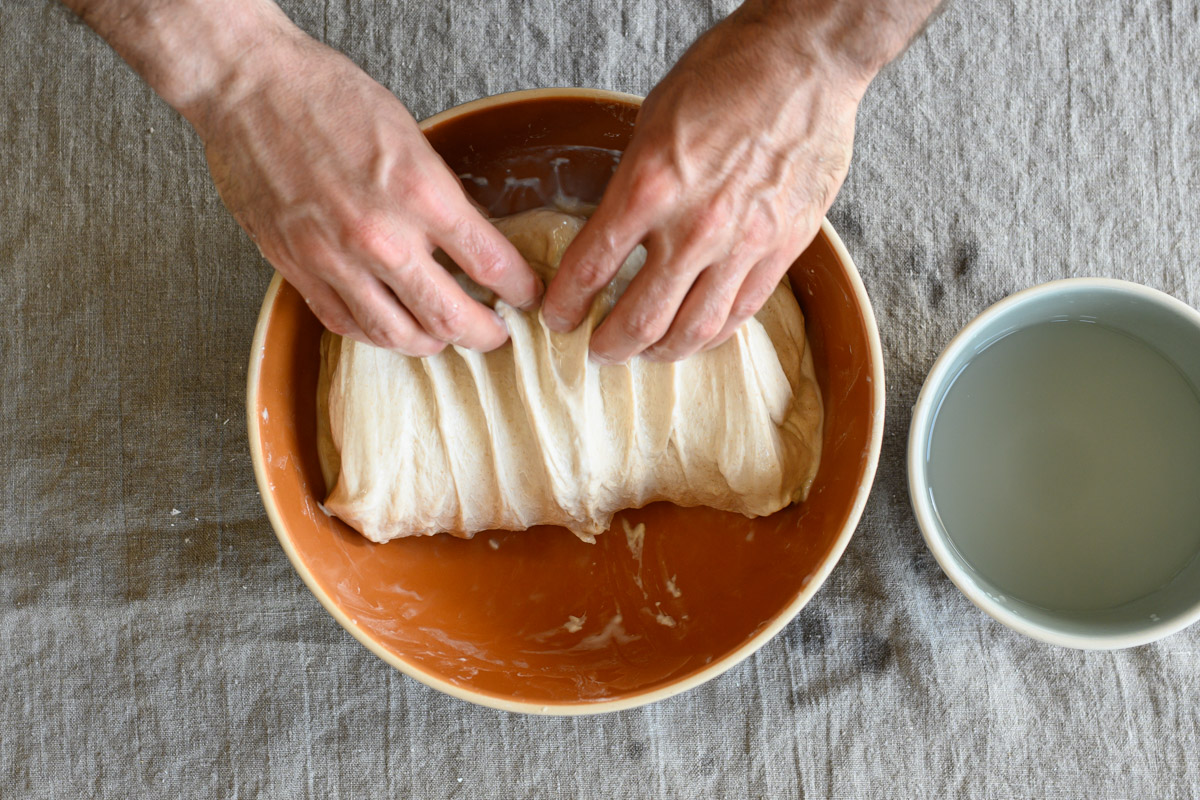
There are many ways to fold bread dough, but my preference is to perform them directly in the bowl. First, get a small bowl filled with water and place it next to your bulk container. Dip your hands in the water before folding to prevent excessive sticking.
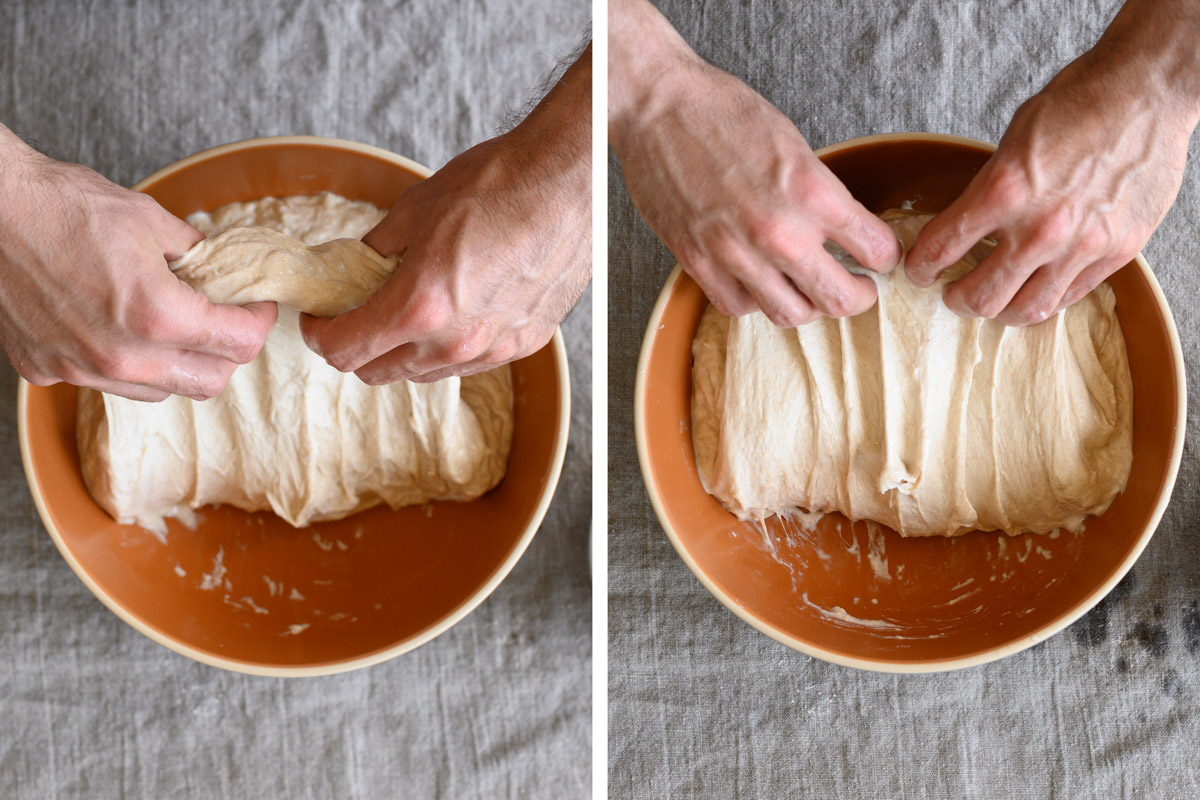
You will perform the same up-and-over motion four times, turning the bowl after each fold. As shown above, use two wet hands and grab the side of the dough farthest from you, then lift it up and over to the side nearest your body. Next, rotate your container 180°, wet your hands again if necessary, and perform the same stretch and fold. Next, rotate your container 90°. Grab the side of the dough farthest from you; once again stretch it up and over to the side of the container nearest your body. Rotate your bowl 180° and perform the same fold one final time.
To finish the set, I like to gently pick the dough up in the center and let the ends fold under just a little. This helps keep the dough tidy in the middle.
Watch this video to see the full stretch-and-fold process:
There's no single answer for how many sets your dough needs. If you hand-mix your dough, two to four sets should do it. Of course, the type of flour and hydration in a recipe also play a big role in answering this question. Generally, the slacker the dough, the more folds we'll need to sufficiently strengthen it.
After I perform a set of stretches and folds, I like to make a judgment call: was the dough hard to stretch out and fold over? If so, I likely can omit future sets of folding and let the dough rest for the remainder of bulk fermentation. Was the dough still slack and extensible? If so, I might do another set and reassess afterward.
Also, there are many doughs for which folding might not be necessary. For example, with a 100% rye bread, you can likely skip folding because the gluten properties in rye don't strengthen the same way that wheat gluten does. Additionally, if your dough is very stiff and low hydration — or if it was mixed and kneaded to full development before bulk fermentation — there's no need to impart additional strength through folding.
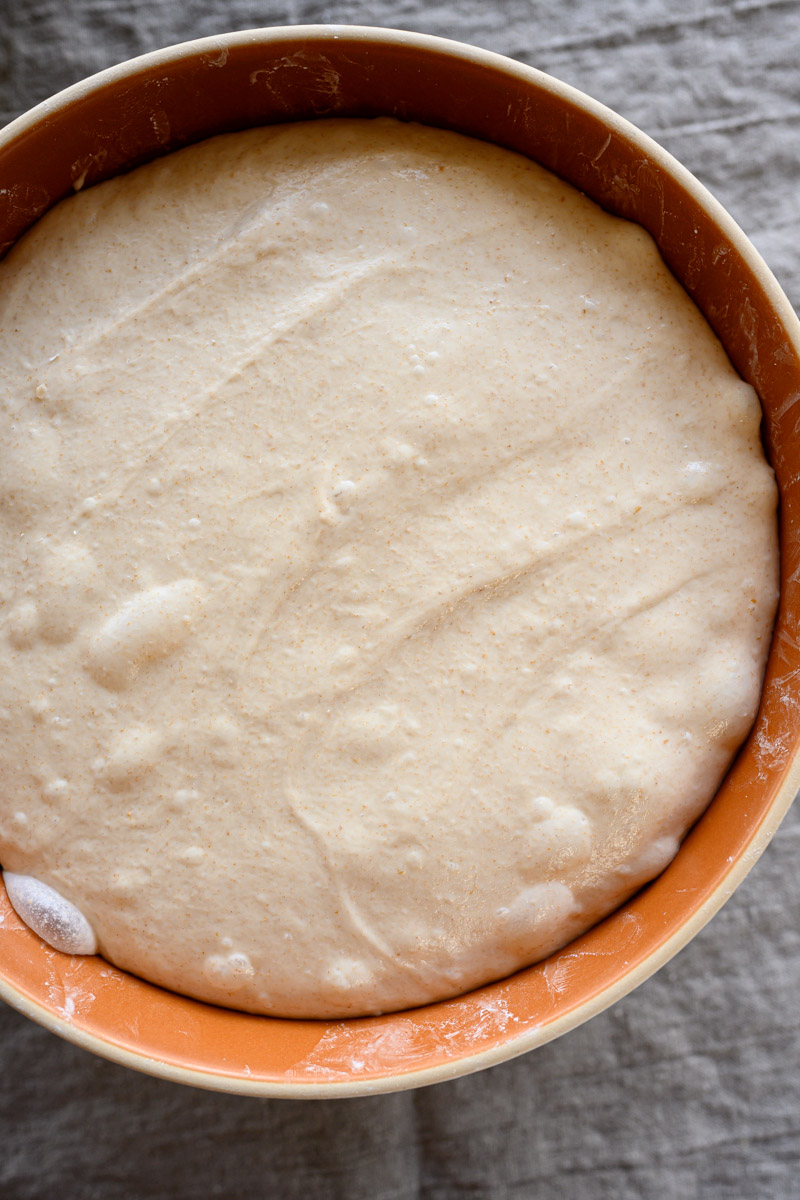
Finding the exact point when to end bulk fermentation takes practice. With time, you'll learn to read the signs of sufficient fermentation: dough strength, elasticity, smoothness, volume gain, and bubbly appearance.
But making this call can be difficult. Cutting bulk fermentation short might mean your dough won't be sufficiently fermented and you'll head toward an under-proofed result. On the other hand, if you push bulk fermentation too far, your dough will be hard to handle and on the verge of over-proofing. There's a balance to be found.
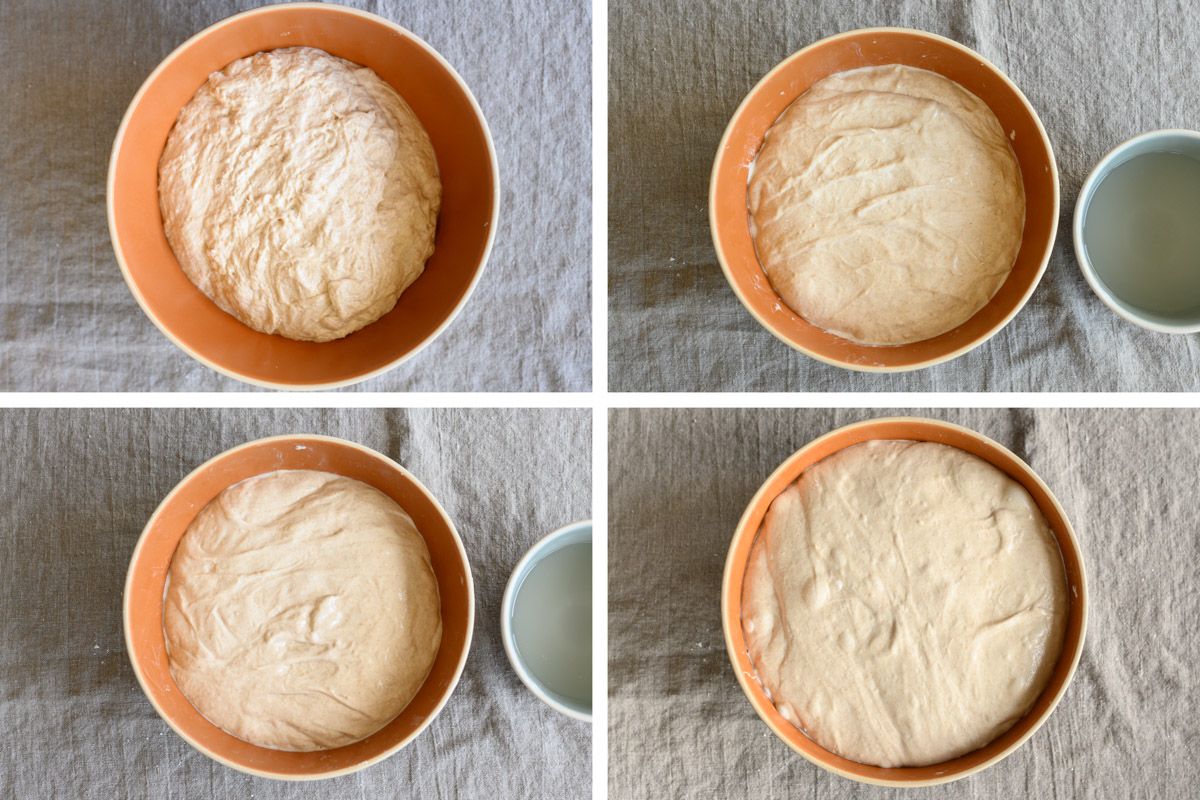
In the image above, see how it initially starts as a shaggy mass, but eventually rises significantly and becomes smooth, strong, and bubbly?
At the end of bulk fermentation, I look for a dough that's risen significantly and is much smoother than when bulk started. If you tug on the dough a little with a wet hand, you'll feel resistance and elasticity.
Additionally, look for liveliness. Gently shake the bowl and it'll jiggle, letting you know there's plenty of aeration in the dough. These are all great signs that the dough has fermented sufficiently and is strong enough to be divided.
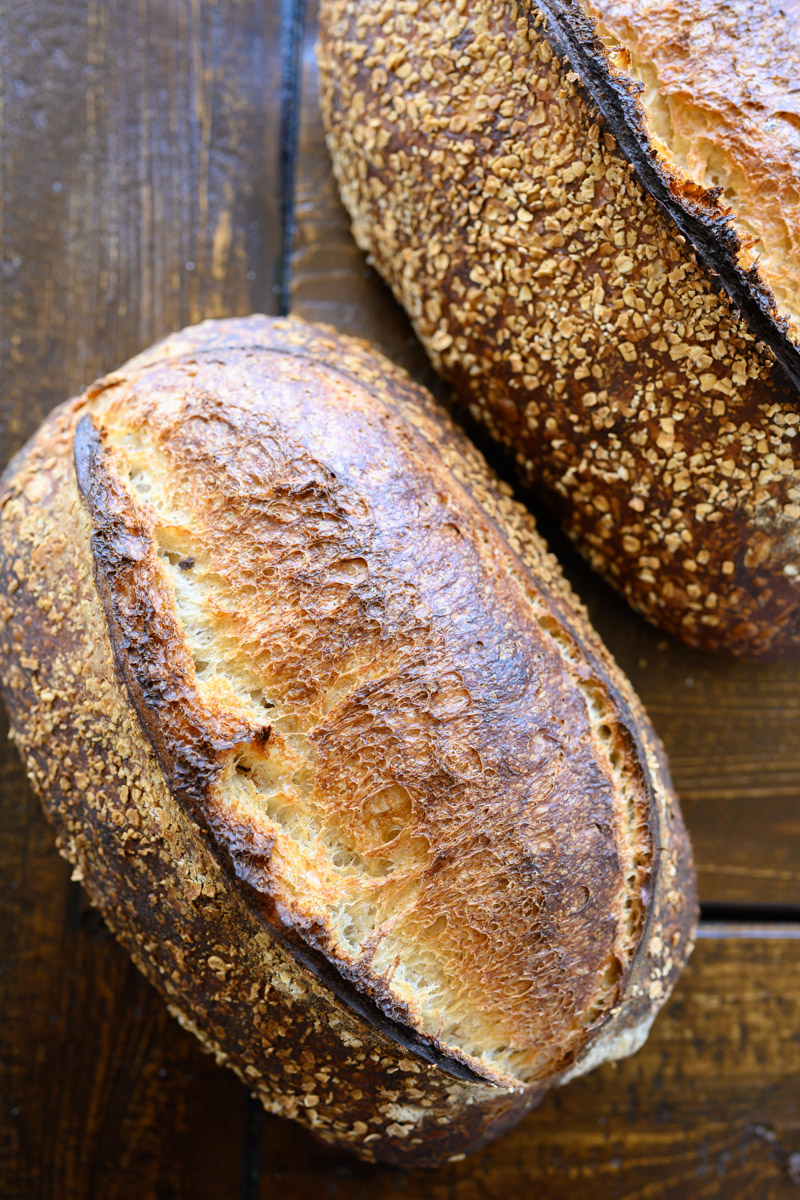
Strong fermentation, sufficient dough strength, ending bulk fermentation at the right time, and a full proof – these are all steps required for a wonderful loaf of bread. And as you develop a sense for how to execute on each of these, you'll taste the difference in every bite.
For more information on all steps of the bread-baking process, including a different method for folding bread dough in bulk fermentation, visit the King Arthur Flour Complete Guide to Sourdough Baking.