


It's with semi-trepidation that I approach any recipe whose result is both flat, and shaped.
Oh sure, I can make chocolate chip cookies; they're kinda flat, right?
But that's not what I'm talking about. The recipes that really make me think twice call for a particular tool that's been the bane of my baking existence for what feels like 100 years.
The rolling pin.
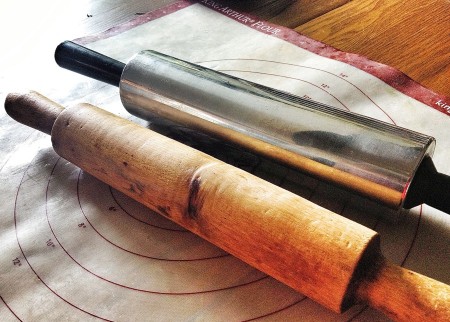
Pity the poor rolling pin, object of such fear and loathing!
How many of you are just the tiniest bit hesitant about rolling pie crust? C'mon, you can admit it; we're all friends here. As I indicated above, I'm not a happy camper when it comes to taking a disk o' dough and turning it into a perfectly flat, perfectly even 12" circle.
I've learned a lot of tricks over the years, it's true; but there are so many potential pitfalls along the pie-way – sticky dough, dry dough, ragged edges, falling apart – it's hard to nail each and every one perfectly, each and every time I make a pie.
Or cutout cookies. Or crackers.
Thus, when handed the winning recipe from EatingWell magazine's Whole Grains Makeover contest – sponsored in part by King Arthur Flour and the Whole Grains Council – and asked to add it to our recipe site, I was chagrined.
Whole grain crackers? The winner couldn't be bread or brownies or muffins or something easy, right? Had to be something requiring – gulp – a rolling pin.
So, was I ever pleasantly and totally surprised when this particular dough – made with 100% whole wheat flour – rolled out like a dream (rather than a nightmare).
Yes, there were some ragged edges to deal with (entirely my fault); but the dough itself was smooth, supple, easy to handle, and just downright cooperative.
OK, I had some other issues with these crackers (again, all my own doing, as you'll see). But next time I make them (and there WILL be a next time – they're super-tasty), I've already worked through all the kinks.
Which is why we call it the TEST kitchen. We make the mistakes, so you don't have to!
Let's start with one of the key ingredients in these crackers: cheese.
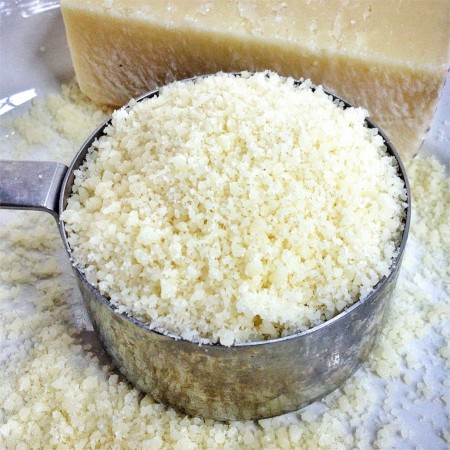
Freshly grated Parmesan is just SO worth it, compared to the "shake cheese" in a cardboard canister you'll find in your supermarket's pasta aisle.
And yes, you can spend upwards of $20/lb. for "real" Parmesan. But you can also find much less expensive wedges in the store's dairy case, or the specialty cheese area usually found adjacent to the deli.
Preheat the oven to 400°F. Get out several large baking sheets; no need to grease them.
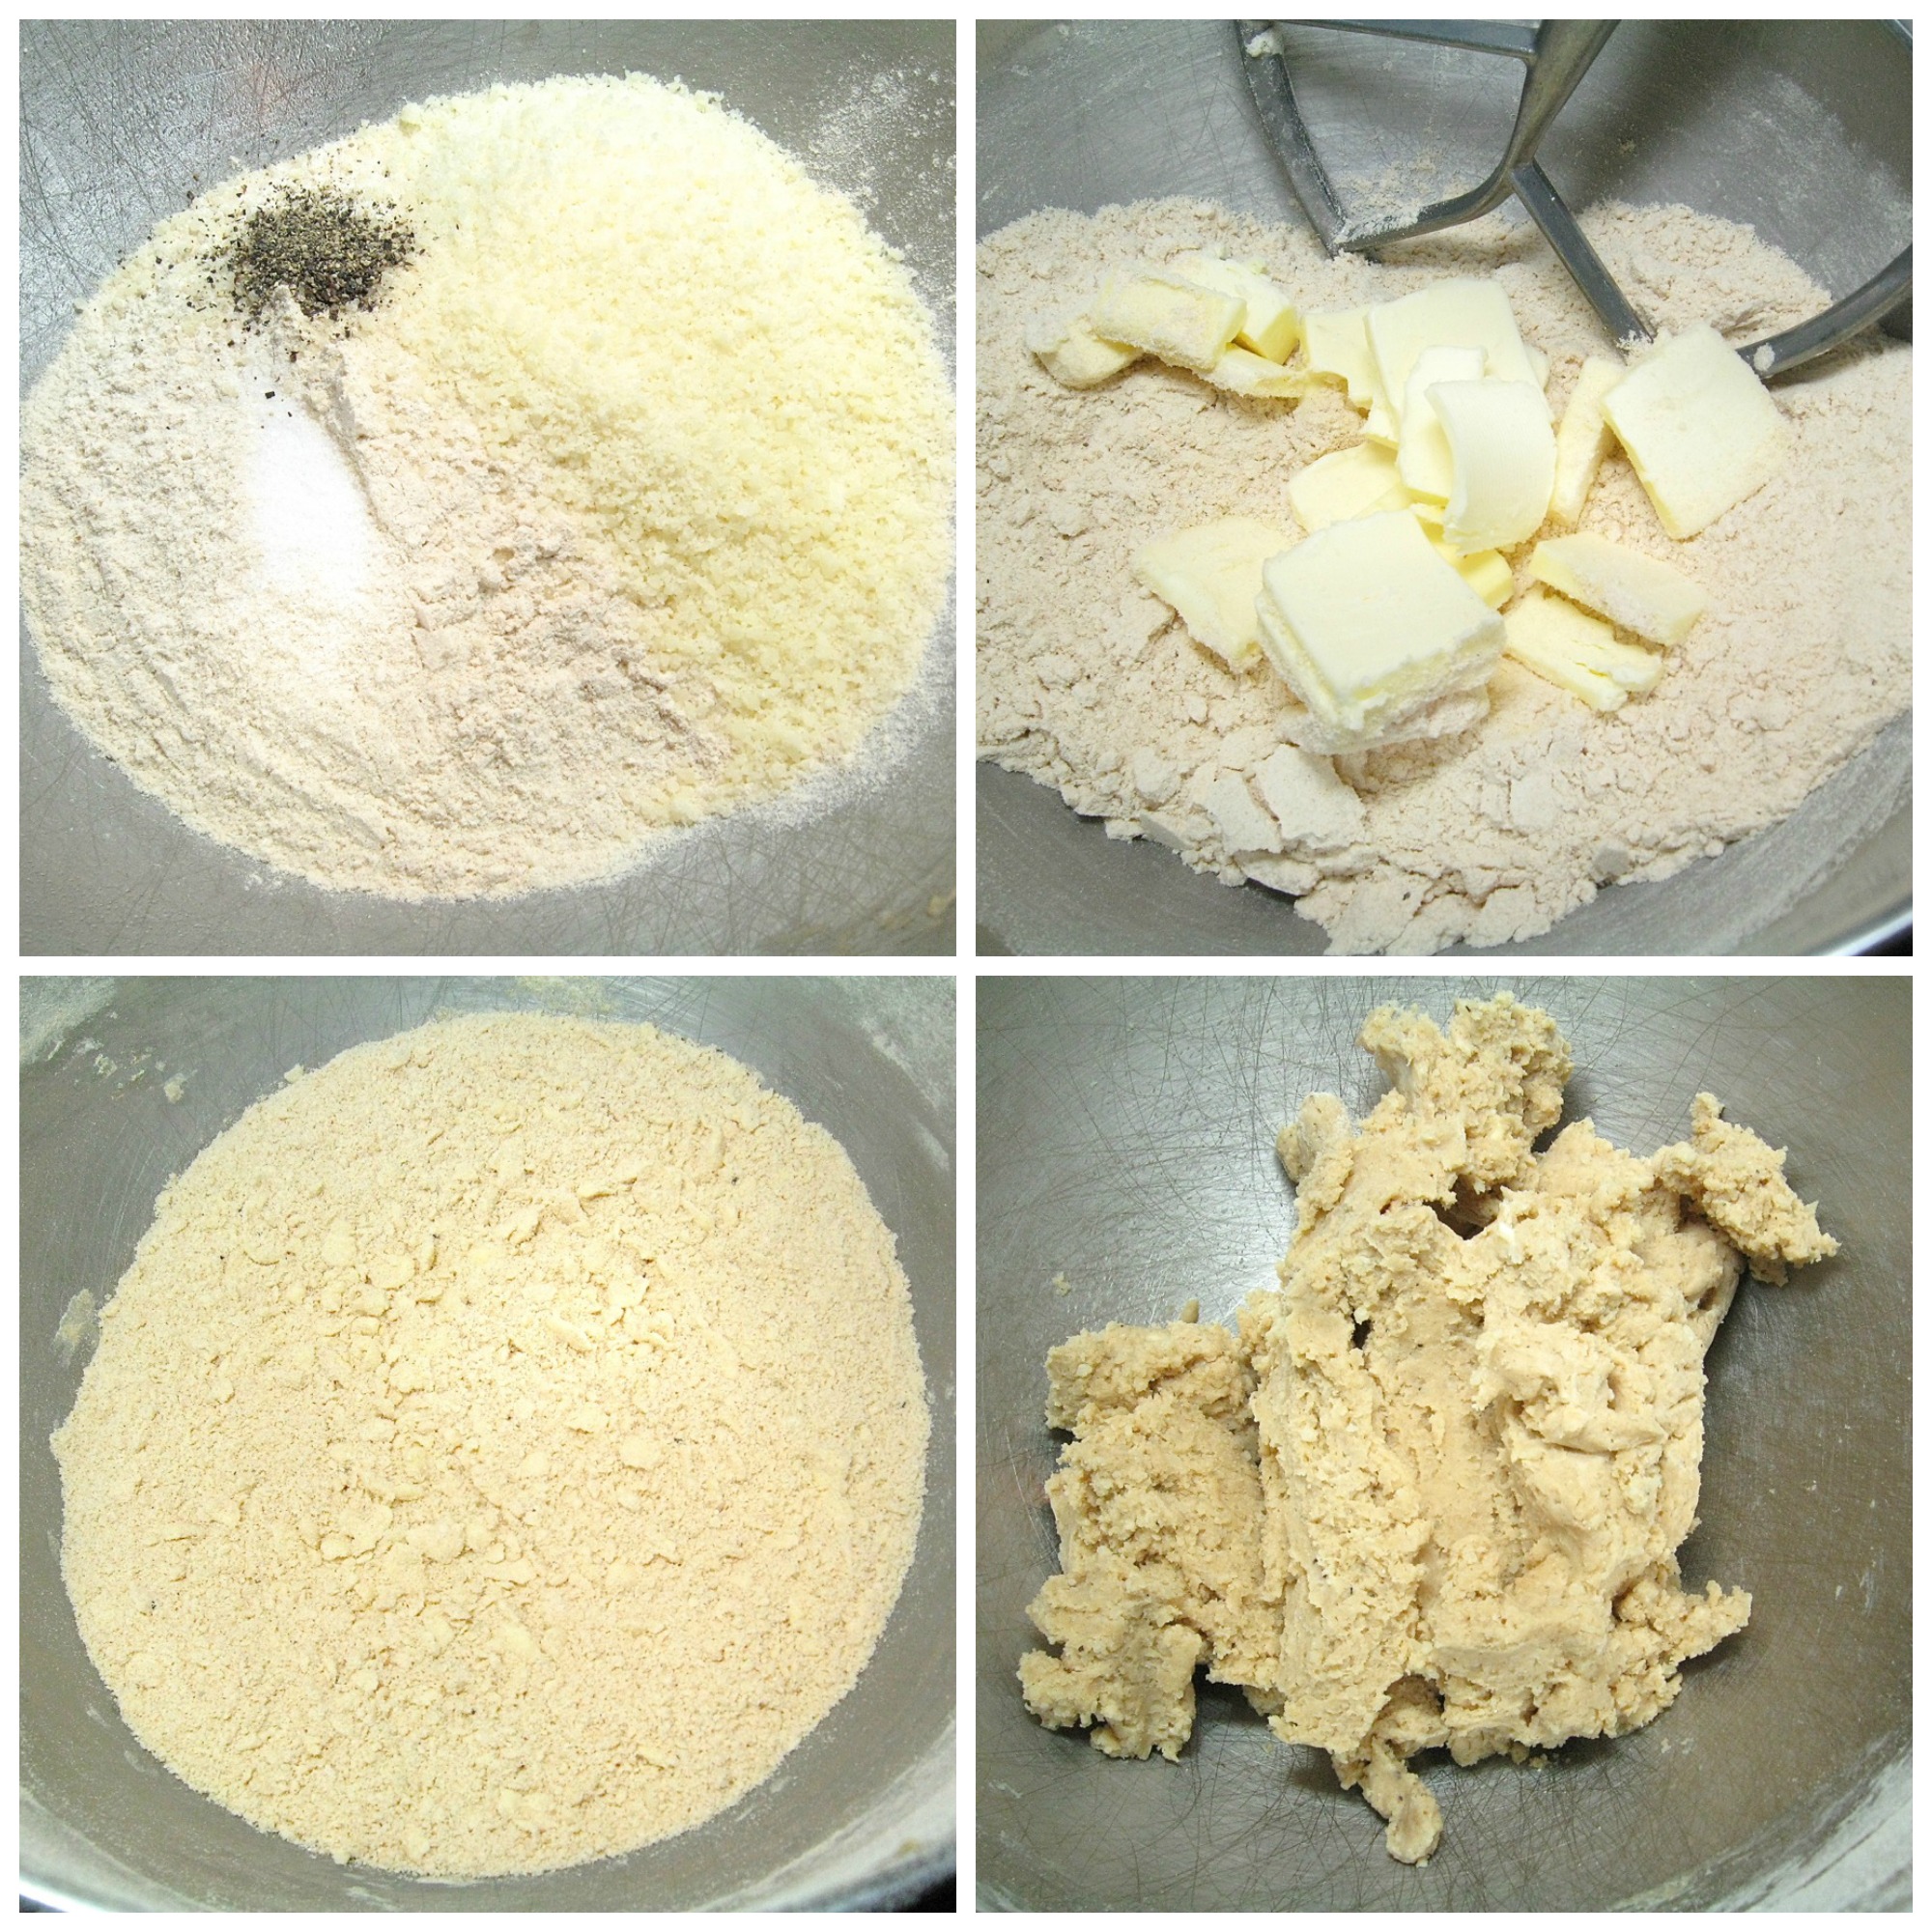
Whisk together the following:
2 cups (227g) King Arthur Unbleached White Whole Wheat Flour
1/2 teaspoon salt
a few grinds coarsely ground black pepper, optional
1 cup (113g) grated Parmesan cheese
Add 8 tablespoons, (113 g) cold unsalted butter, working it in until no large pieces remain; a mixer works well here.
With the mixer running (or stirring all the while), drizzle in 1/2 cup (113g) whole, 2%, or 1% milk until the dough comes together; you may not need the entire 1/2 cup.
Gather the dough into a ball, and squeeze it a few times to bring it together.
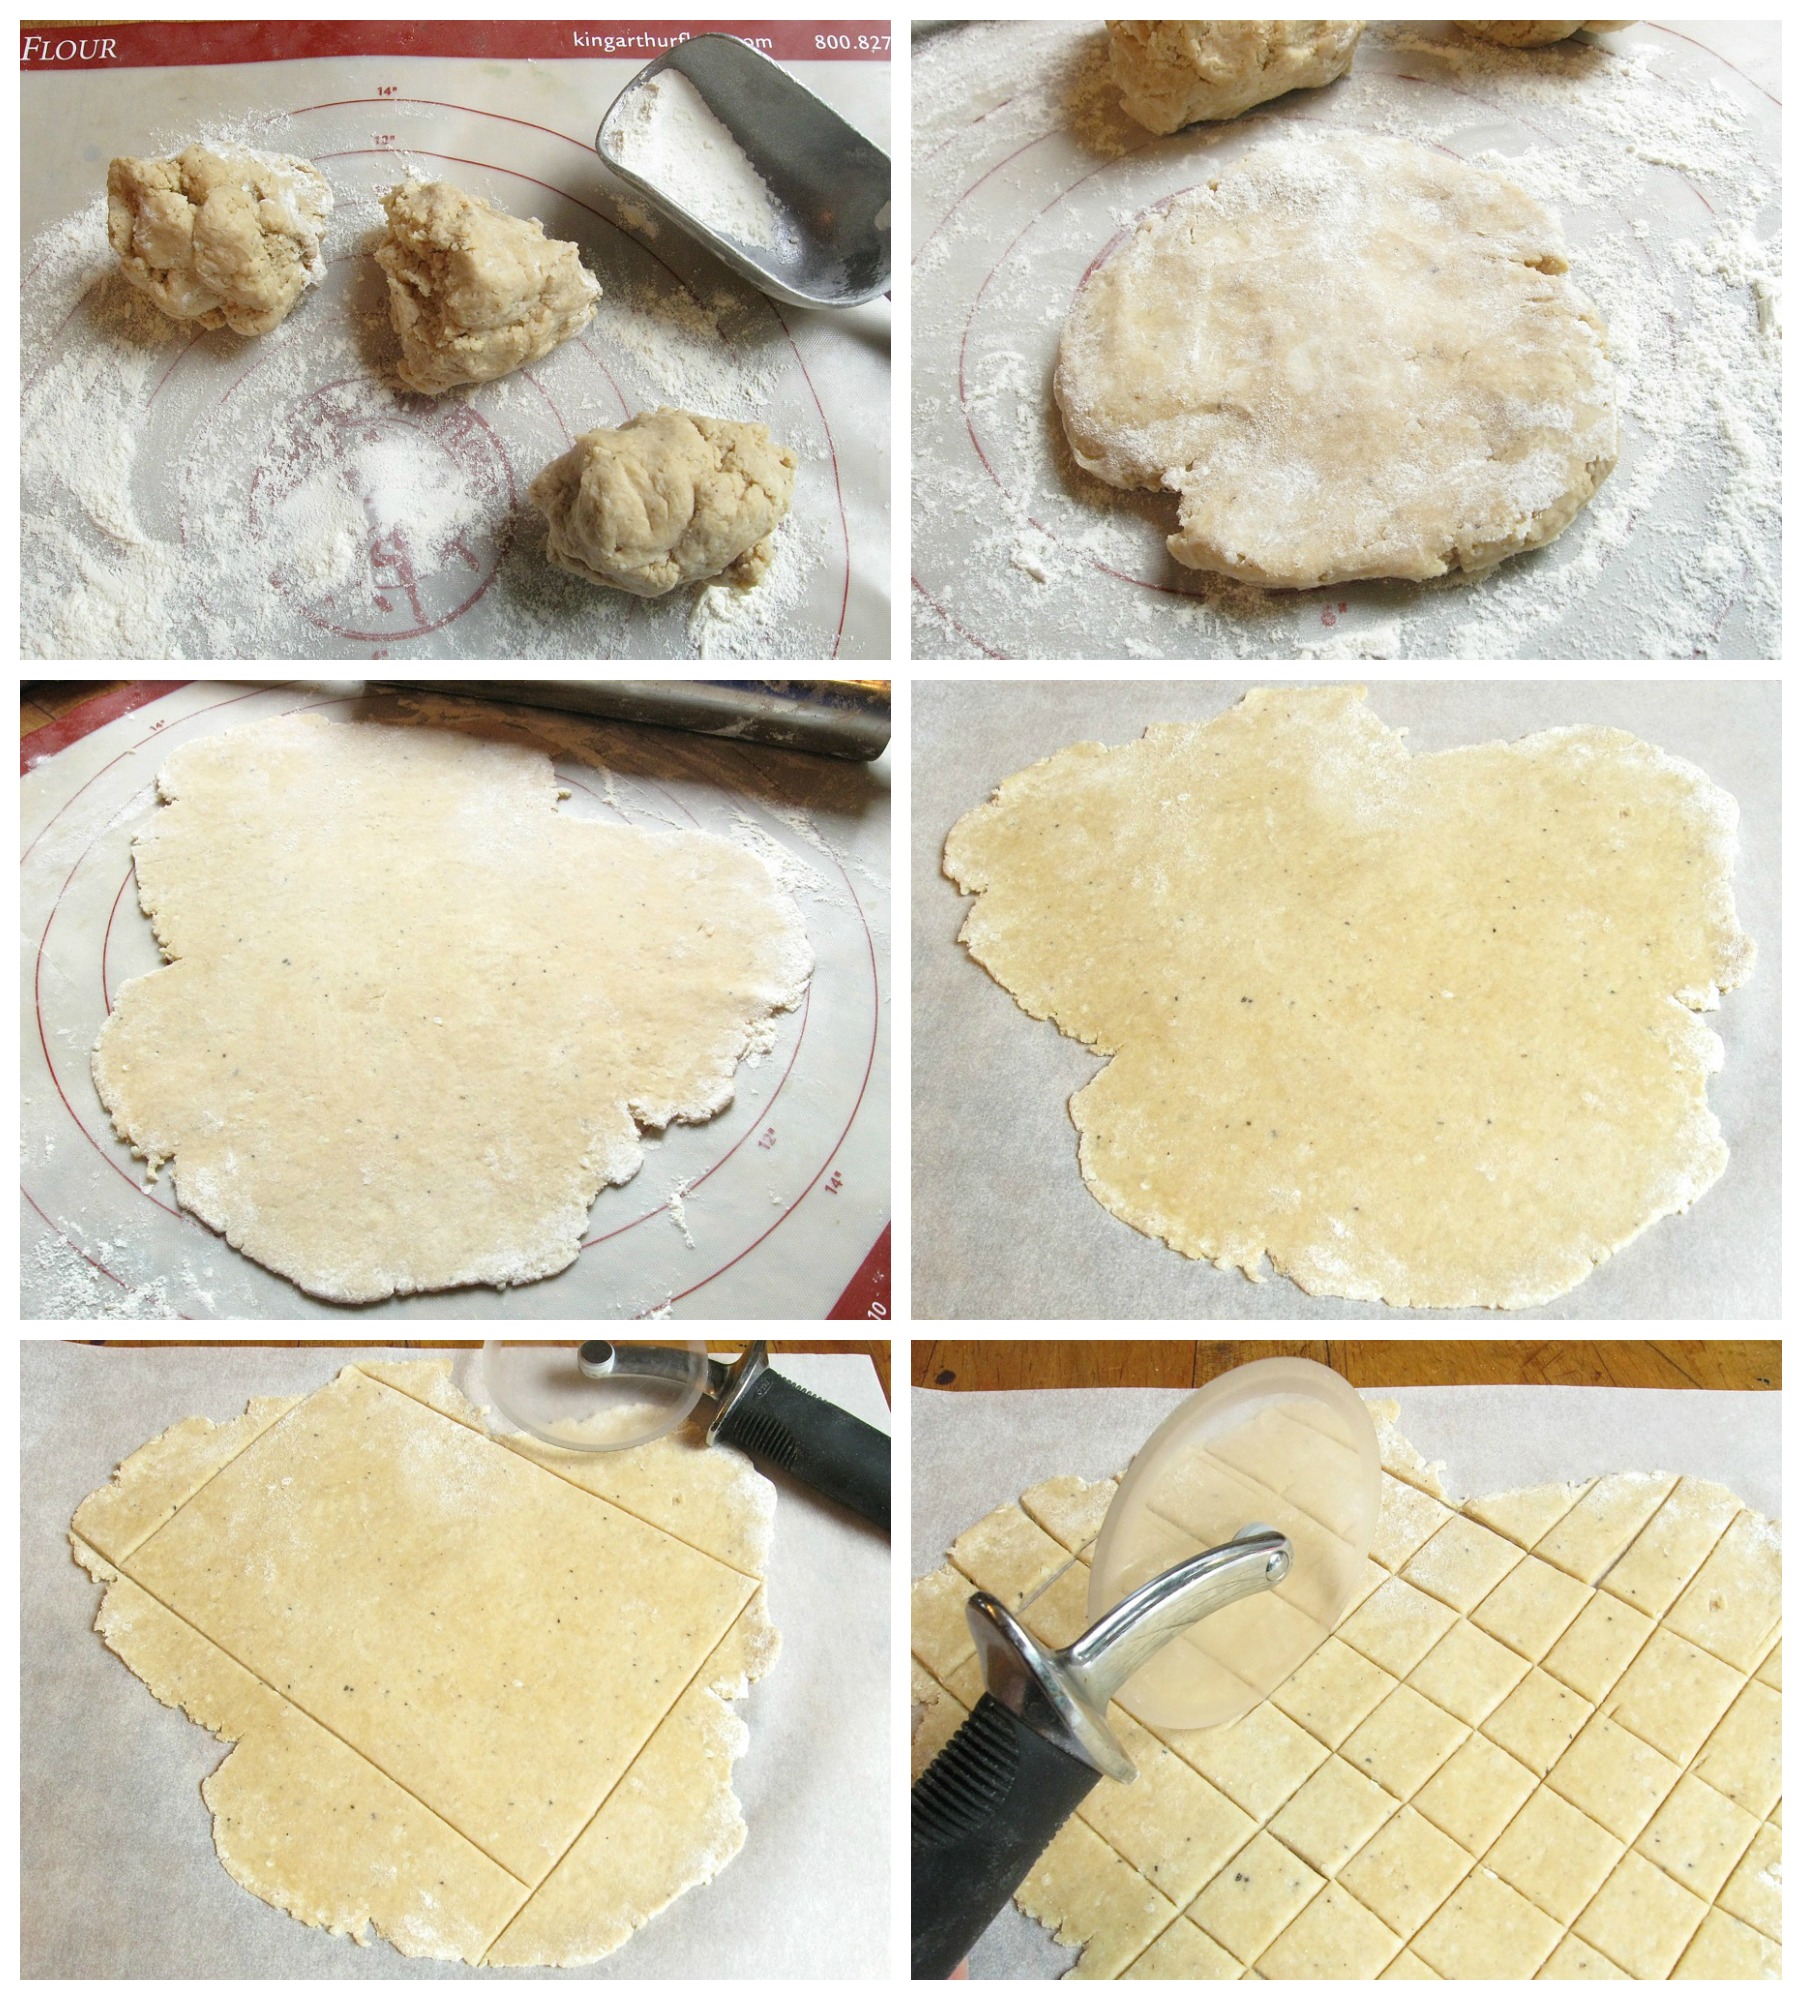
Divide the dough into three pieces. If you have a scale, they'll weigh about 6 1/2 ounces (187g) each.
Working with one piece of dough at a time, flatten it into a rough square, and place it on a lightly floured work surface. Roll the dough 1/8" thick; it'll be about 10" square (or an 11" circle, if your rolling efforts result in a circle).
Transfer the dough to a piece of parchment or aluminum foil. Using a sharp knife, pizza cutter, or pastry wheel, cut the dough into 1" squares; don't separate them. You may trim the edges first, if you like, in order to separate the "good looking" crackers from the raggedy ones around the edges.
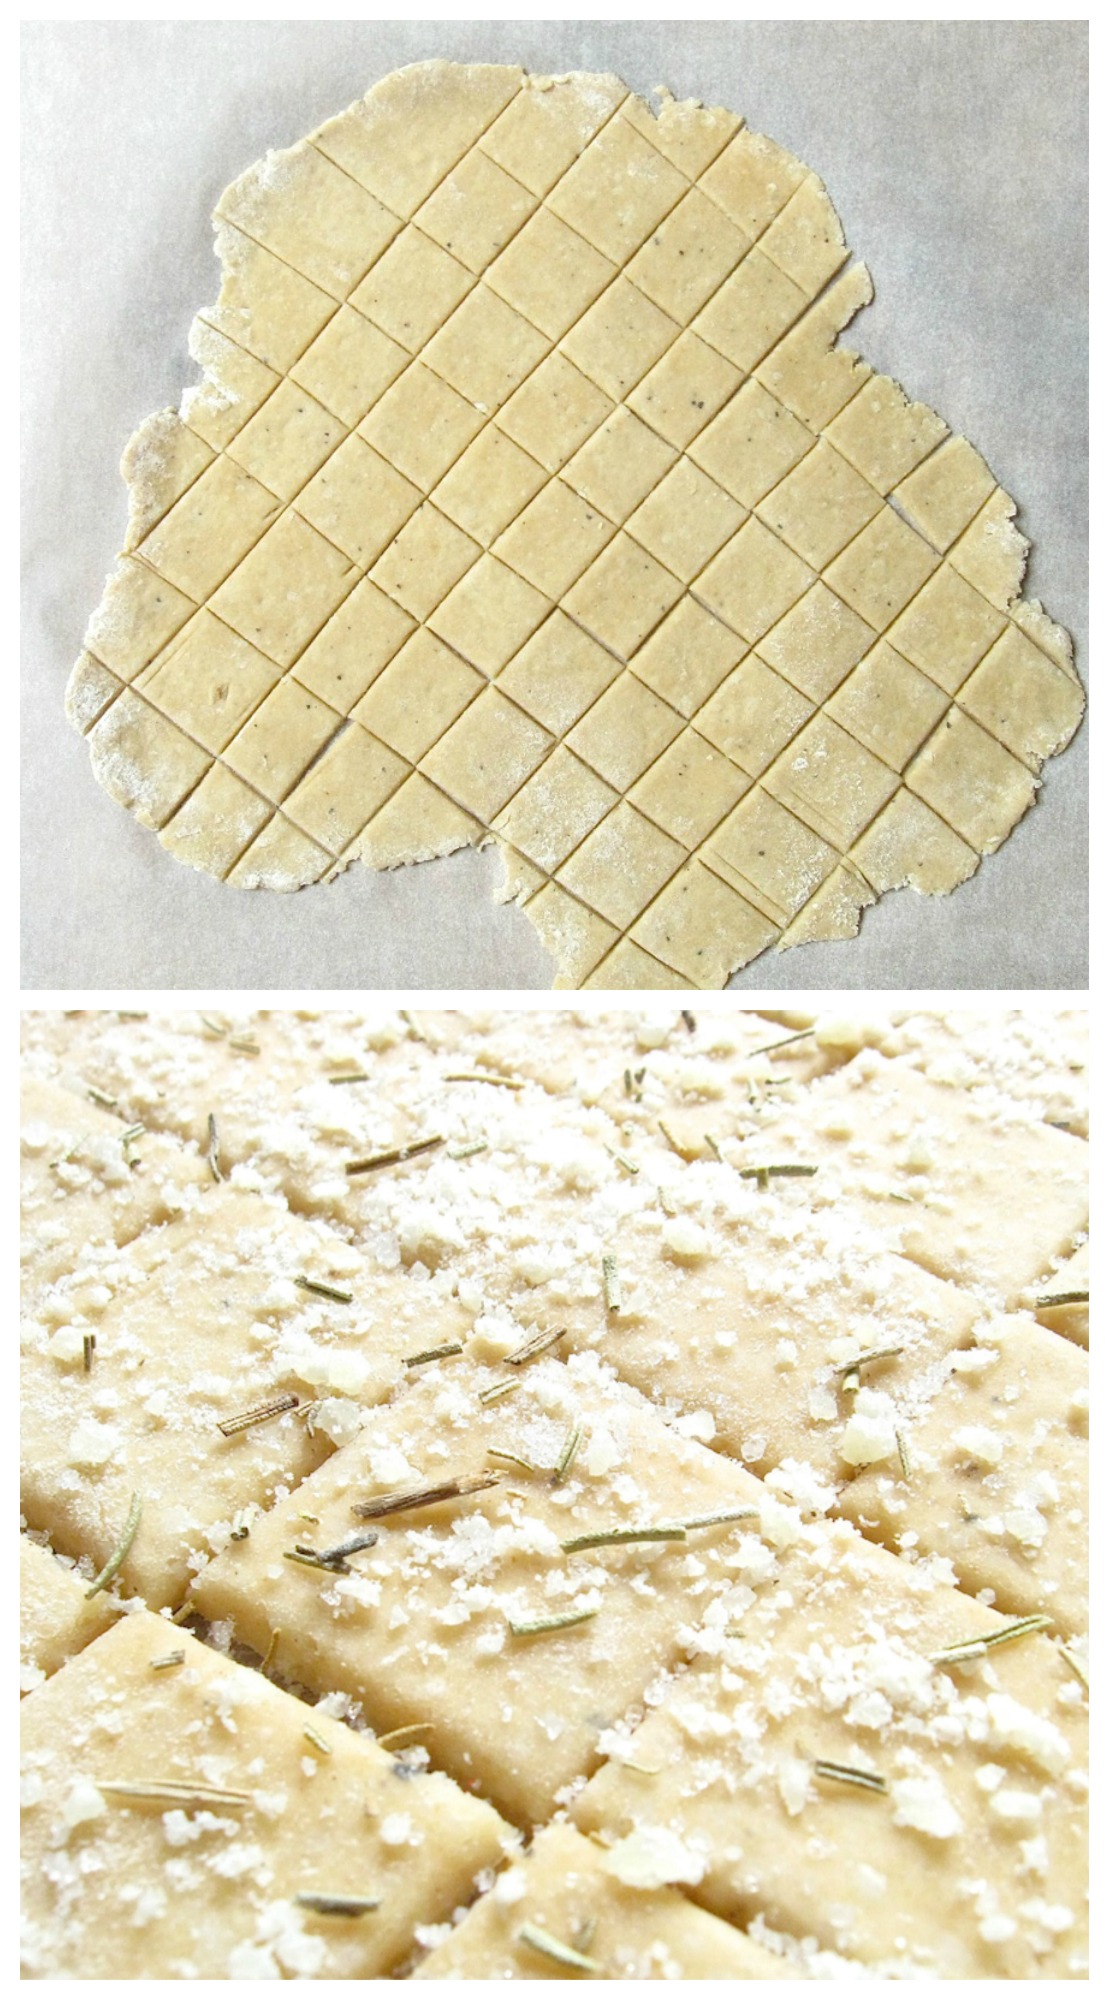
Lift the piece of parchment/crackers onto a baking sheet.
Sprinkle the crackers with coarse sea salt, additional grated cheese, and/or dried herbs, if desired.
Edit. note: The original recipe calls for sprinkling with coarse sea salt. But after tasting the crackers, we've made the salt an optional ingredient here; we feel the crackers are salty enough without adding more on top.

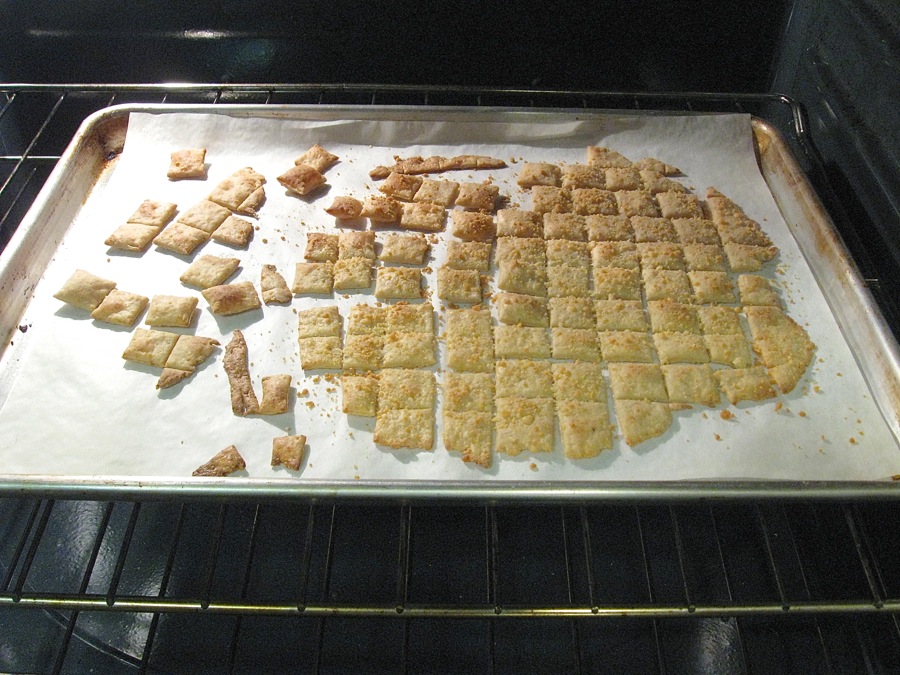
Bake the crackers for about 15 minutes, until they're a medium golden brown. Remove them from the oven, and cool right on the pan.
As you can see, I did some experimenting with the first batch; the original recipe called for a baking time of 10 to 15 minutes. I found 15 to 16 minutes, at least in my oven, was more like it. You want to bake them until they're crisp all the way through, without being overly browned. It's worth it to bake and cool one pan's worth of crackers first, to check for doneness, before baking the remainder.
So, on to the next piece of dough. Remember, there are two more – which is good, since I need the rolling and cutting practice.
What should I do differently to avoid the continent-like shape of my first rolling job?

How about shaping the dough into a flattened square before rolling?
Well, that worked OK; the result was still basically circular, but at least I avoided the ragged edges.
Still, I made a silly mistake; can anyone spot what I did?
D'OH. Rolled the dough on the silicone mat, but then cut the crackers right on the mat, rather than transferring to a piece of parchment first.
Not a huge boo-boo; transferring all those little squares to the parchment/pan was a bit tricky, but a giant spatula helped.
It wasn't completely smooth sailing yet, though.
Many of the crackers puffed up into little pillows rather than lying flat. Still tasty; just a bit misshapen.
OK, I know the solution for that, too.
One more piece of dough – let's see if I can get it all right THIS time.
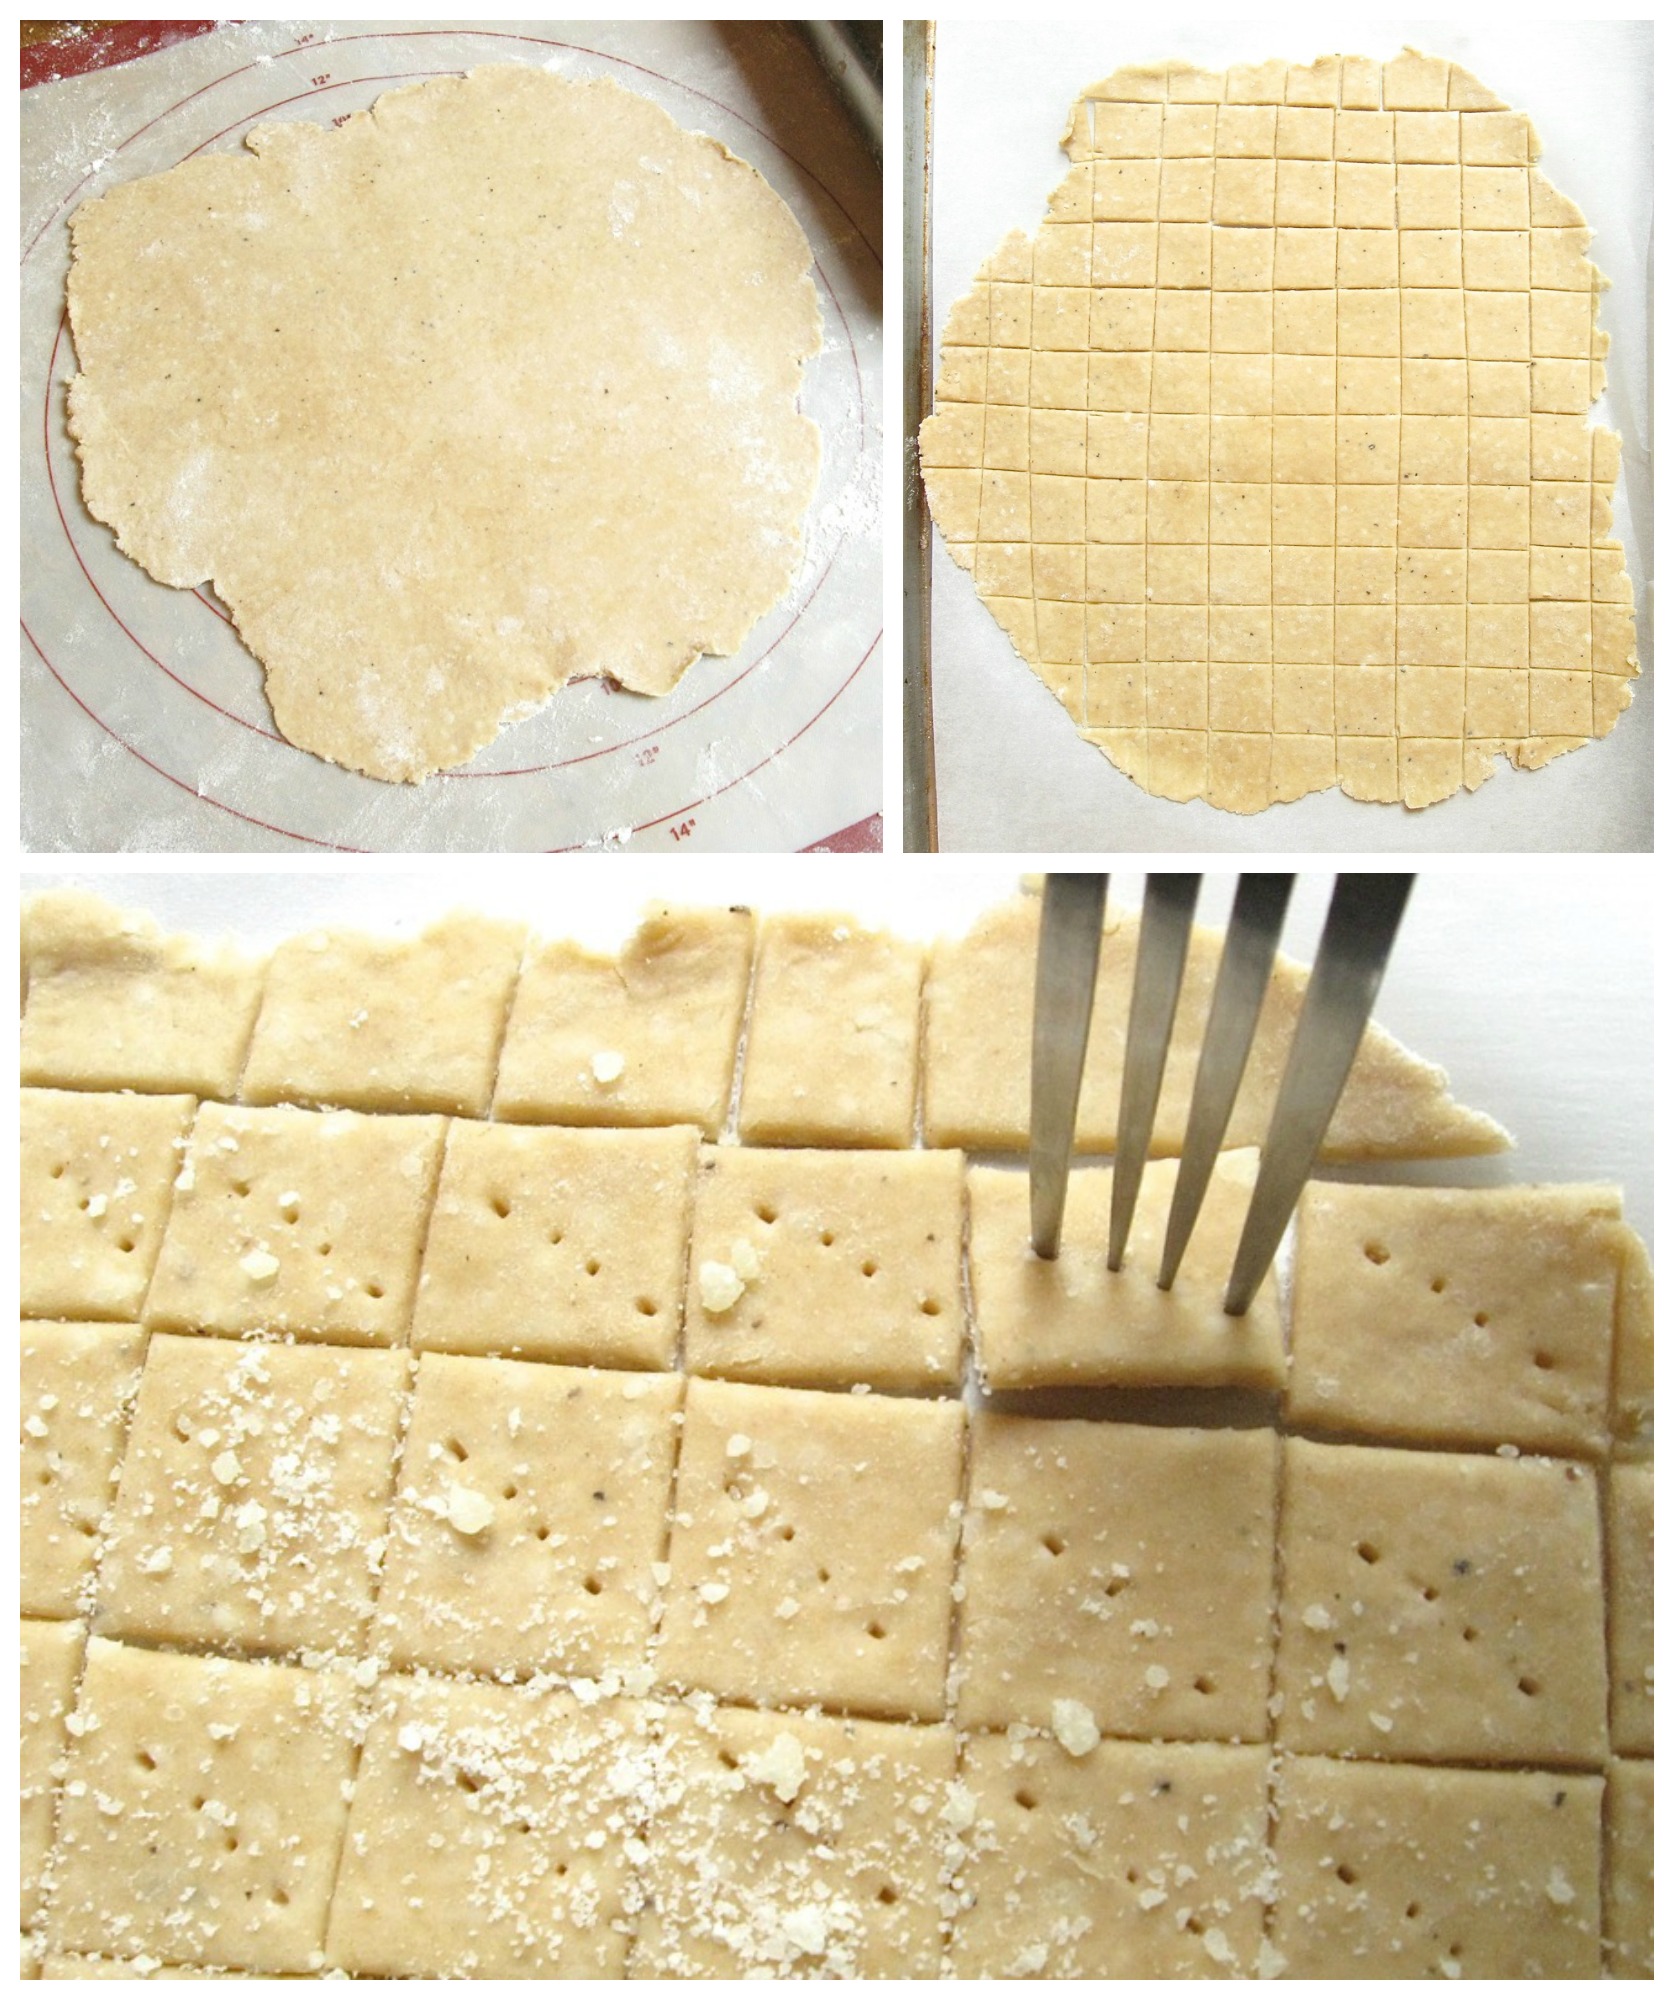
Fairly straight edges; transferred to parchment before cutting; pricked each square with a fork, to prevent "pillowing."

Not bad!
One more hint: the crackers around the edge bake faster than those in the center. This is kind of finicky but, if you like, remove the brown crackers around the edge, and put the pan back in the oven to finish baking the ones in the center.
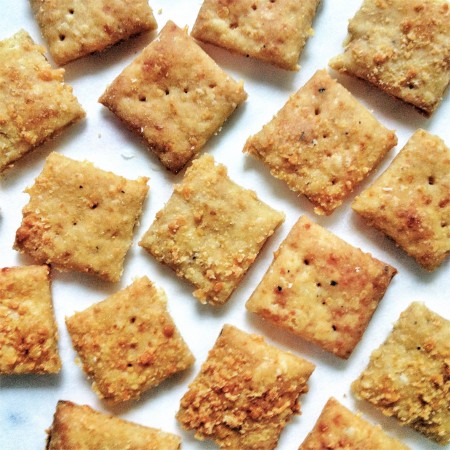
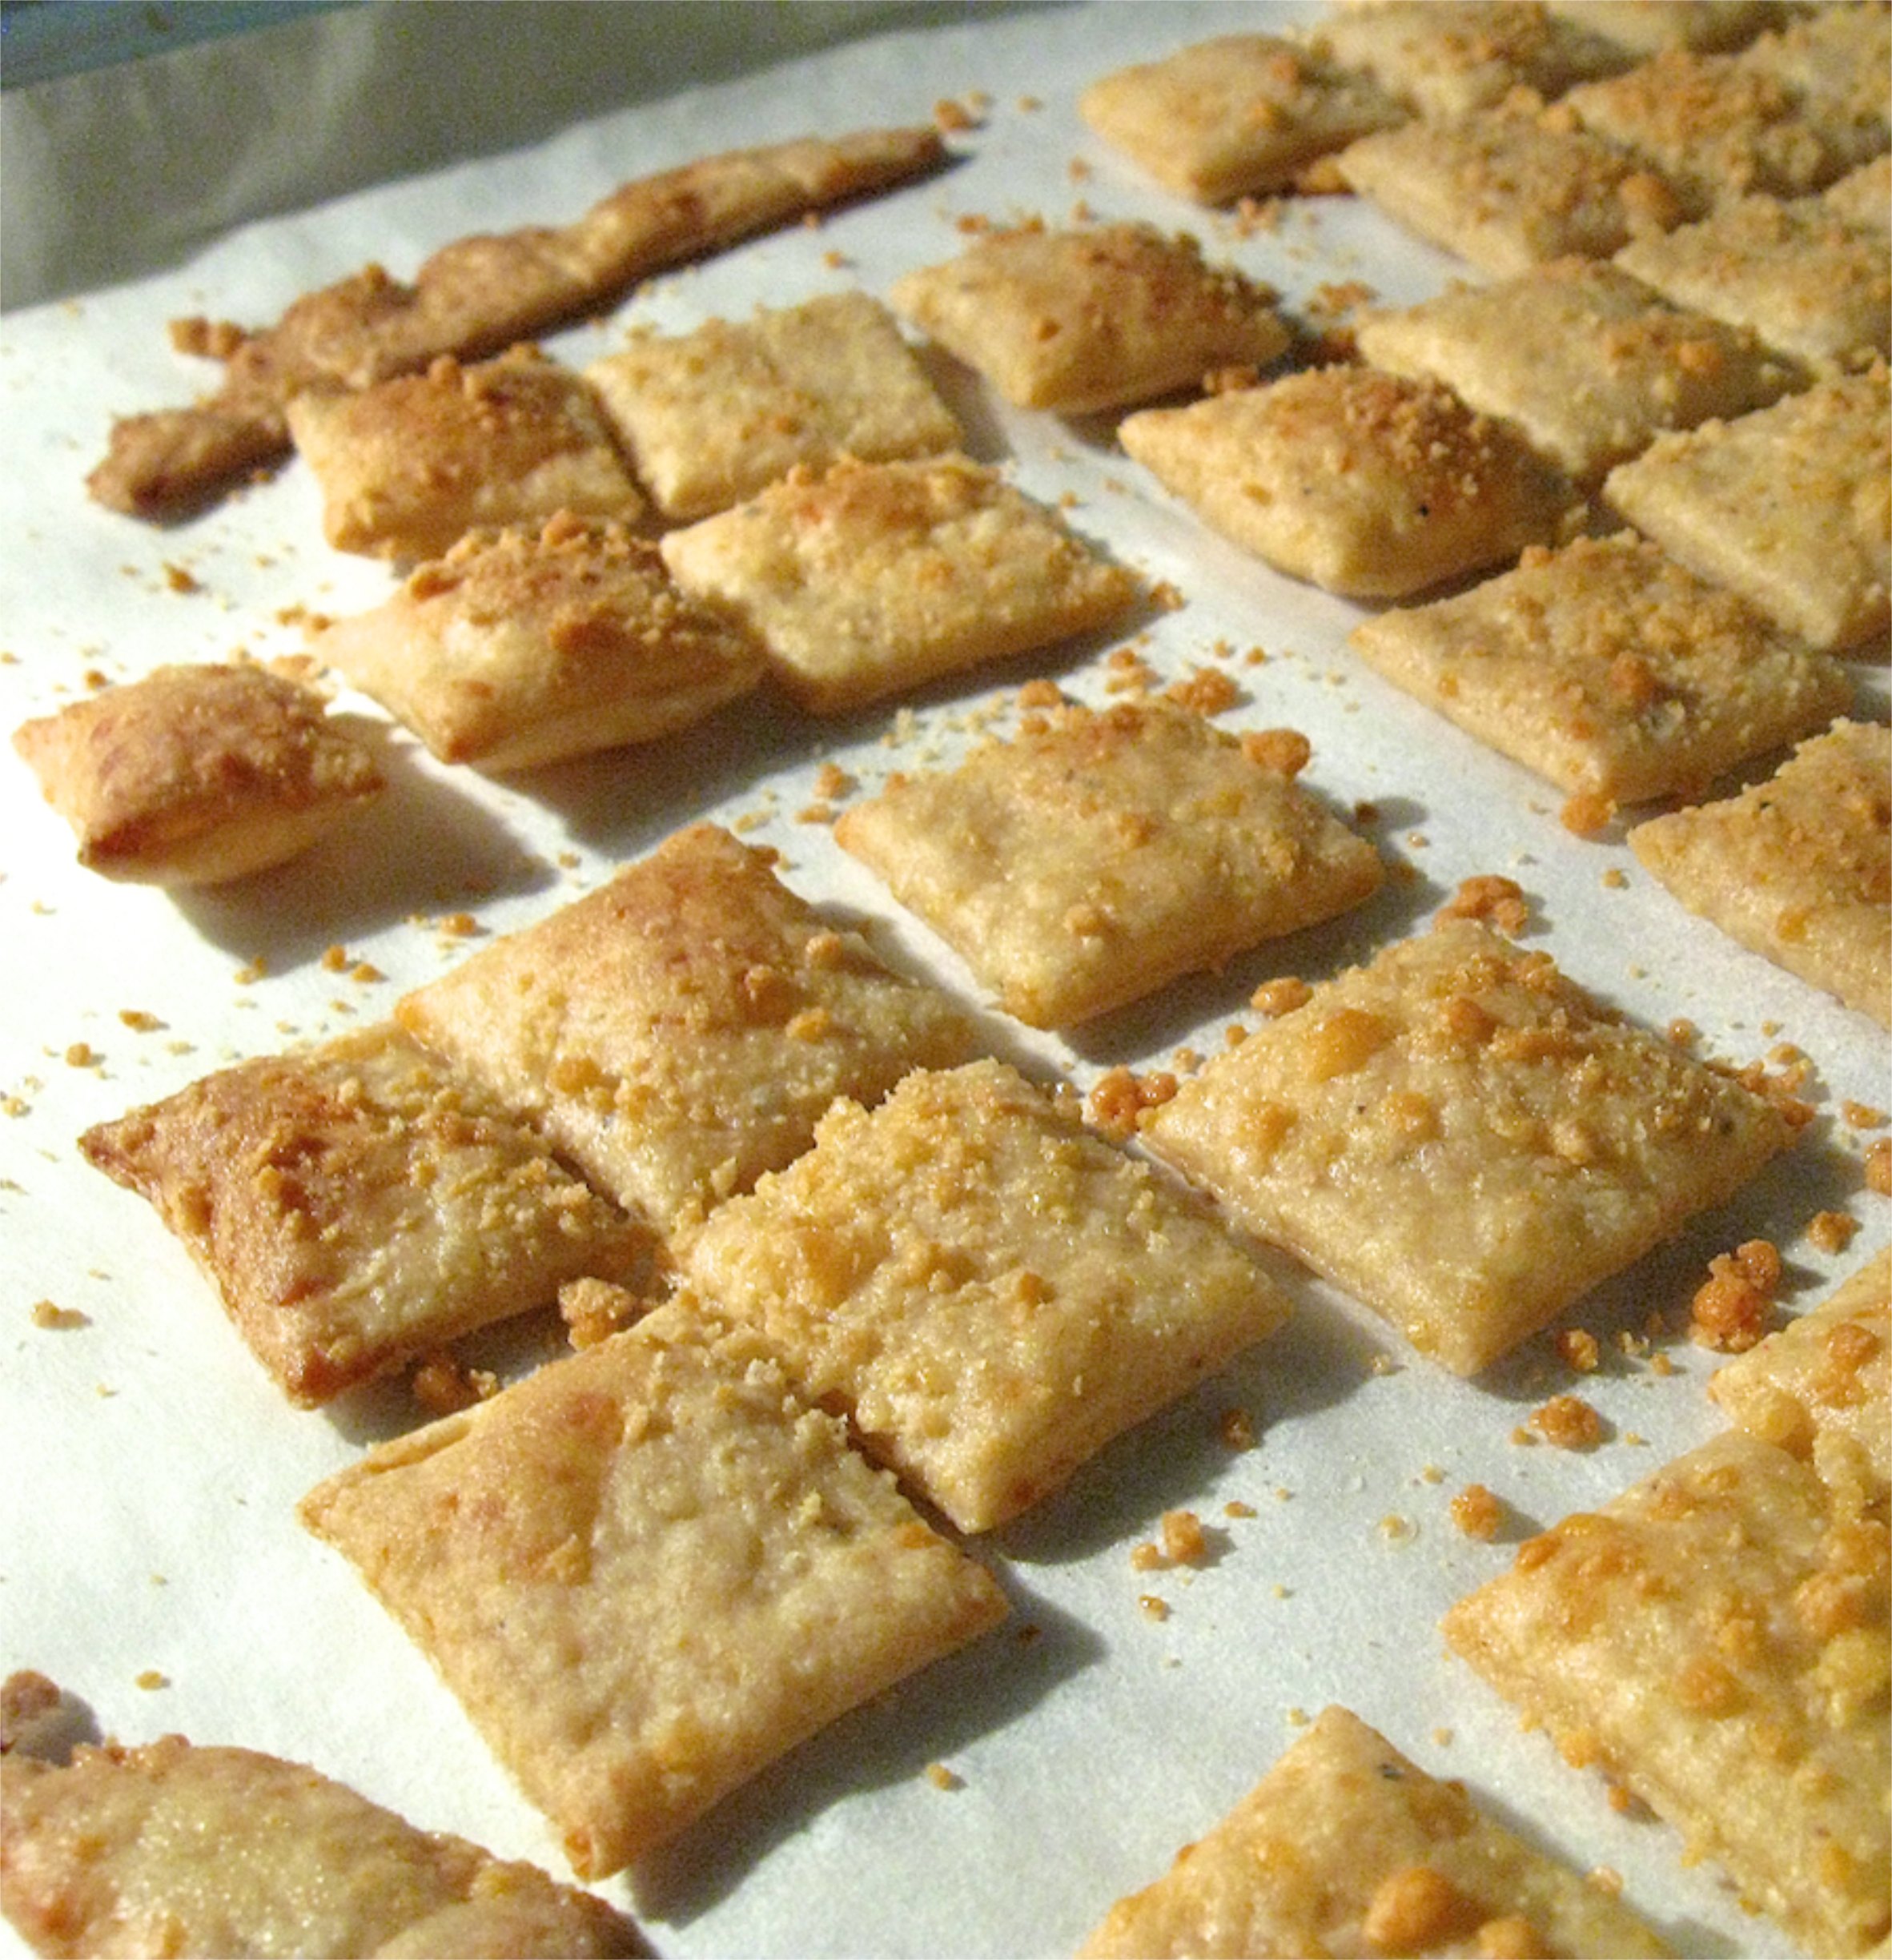
Pretty nice browning; nice shape; great flavor, and light, crunchy texture.
Some of these had a sprinkle of Parmesan added on top before baking; I really don't think it's necessary.
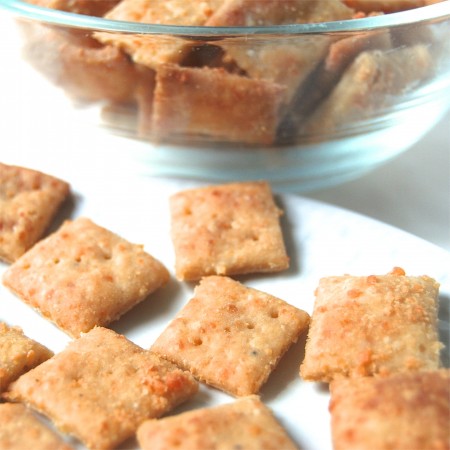
They're wonderfully cheese-y (as opposed to cheesy) even without the extra Parm.
Want to hone your rolling-pin skills, in anticipation of apple pie season? This recipe is a tasty place to start.
Please bake, rate, and review this recipe for Crunchy Parmesan Crackers, courtesy of EatingWell magazine and recipe author Pam Correll of Brockport, PA.
