Have I ever mentioned before that I love cookie cutters? Love 'em! I have the basics, the funky and the unusual. Graduated circles? got 'em. Stockings, ornaments, trees? Check, check and check. I even have a lobster. But what's a gal to do when she doesn't have ...
just the right cutter? Thanks to a computer, a printer and a pair of scissors you can go from being out of luck to out of sight and dy-no-mite with your cookie creations. Here's the scoop.
First, take a second to check out the photo above. As you can see, one of the eggs isn't a cookie. It's a pysanka. Pysanky (pie-sank-ee or piz-anhk-ee) is an ancient art form from Eastern Europe, using wax and dye to decorate real eggshells with symbolic colors and patterns. I got turned on to pysanky about 20 years ago after seeing a magazine article. I bought a kit and have been making egg art for years now.I don't have any Eastern European lineage, but I love color and line and pattern, so this art really speaks to me.
Every spring I bring in some eggs for show and tell with my fellow bakers. Last year Halley, our web director fell in love and tried to get me to feature the eggs in a blog. "But Halley, they don't have anything to do with baking!" was my excuse but this year those crafty web girls had a plan. My blog schedule arrived in my mailbox with "March, Easter cookies-MJ- I'm sure you can work your fantastic eggs in somehow!"
So, caught in the web (pun intended) I set out to use one of my favorite decorating techniques to produce elaborate Easter egg cookies to mimic pysanky. The dough was made and chilling and off I went to find an oval cutter. I searched high and low in the test kitchen and the merchandise room, the sample shelf and the test kitchen again. Gasp! Not an oval to be found.
Now I was in a quandary. I knew I had no less than 7 or 8 different sized ovals at home but there was no way to get them here. Should I mangle one of the round cutters to make an oval? Probably not. Should I give up? Definitely not. I should think outside of the cookie cutter box and come up with a solution that would work for me, and for you, my fellow bakers. Enter my computer, a piece of paper, my trusty scissors, and an egg is born. Let's see how it's done.

Most word processing programs like Microsoft Word have a tool box with templates for basic shapes. I found this one under Insert, AutoShapes. And look, an oval!
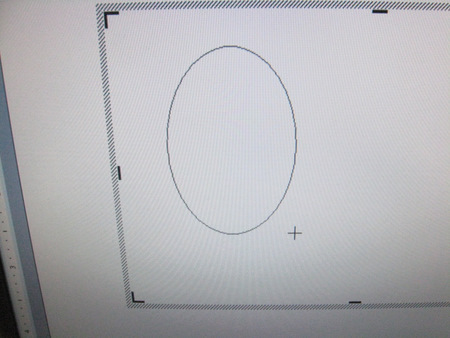
Then, just drag out the shape you want to the size you want. The ruler in the margins is a big help. No computer? Again, no problem. Many children's coloring books have great basic shapes that you can trace and cut out. It's all good.
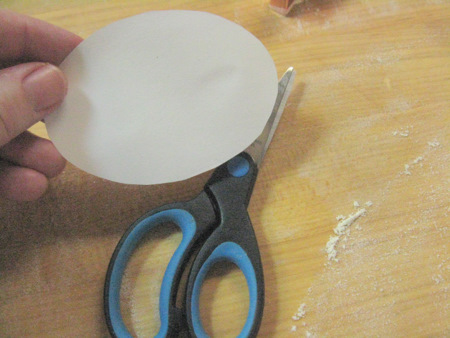
Next, print onto plain white paper and cut on the lines. If you are making lots of cookies, you may want to glue the paper form to something sturdy like cereal box cardboard to give it strength.
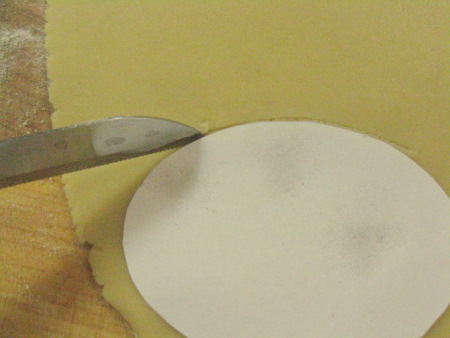
Now, just place the template on your rolled out cookie dough and cut with a sharp knife. My very favorite recipe for rolled cookies is our Holiday Butter Cookies. Great texture, rolls beautifully, holds its shape well and oh yeah, it's DELICIOUS!
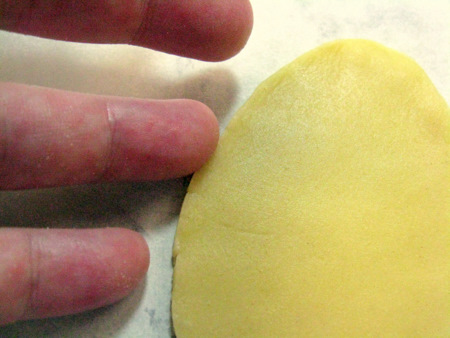
Cutting shapes by hand does lead to a few rough edges. Just use your fingertip to smooth them out.
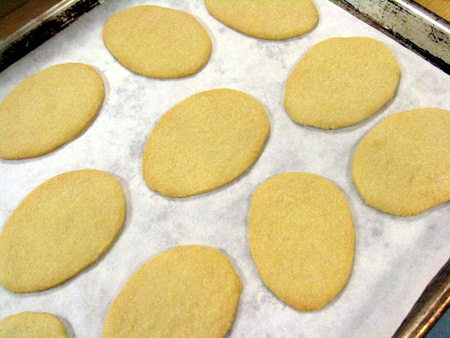
Transfer to a parchment lined baking sheet with a large flat spatula or turner and bake until lightly golden browned.

On to the icing. We've done cookie icing a few times here on the blog, so I won't show all the steps again here, but do check this out if you need a refresher.
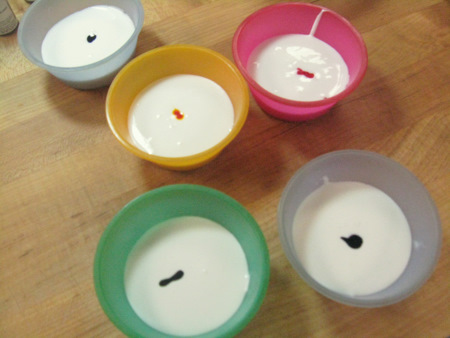
I love using these mini silicone pans for mixing small batches of colored icing. They are just the right size and the flexibility makes for easy stirring. Plus, being able to match the color of the icing to the color of the bowl really floats my boat. Just a drop or two of our gel colors will give you vibrant color and won't thin down your icing. Bonus!

See?! Isn't that great! Pink icing in the pink bowl, blue in the blue. All is right with the world.

Test the consistency of the icing after you've added the color. A blob dropped in the mixture should disappear by the count of 10.
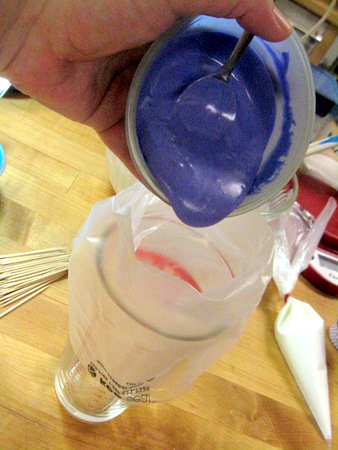
Run out of hands? Use a sturdy tall cup to hold your piping bag open for you. See the big pile of toothpicks on the left? You'll need a bunch of those. I'll wait while you go grab some.
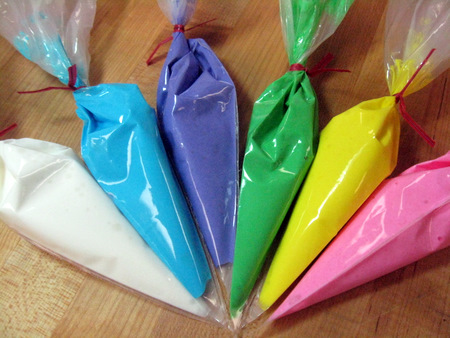
Doesn't that picture just make you smile? Cheerful happy colors all ready to go. Now for the fun part, it's gonna blow your mind how easy this is.
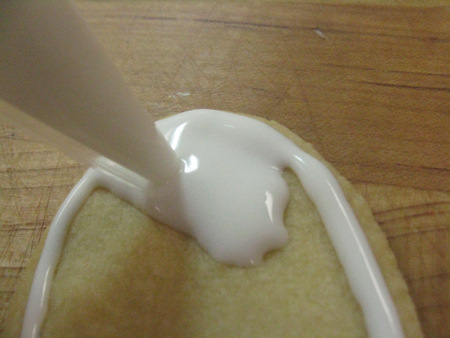
Outline your cookie with your background color and "flood" it to fill in. Be sure the icing stays wet, this technique just doesn't work with dry icing.
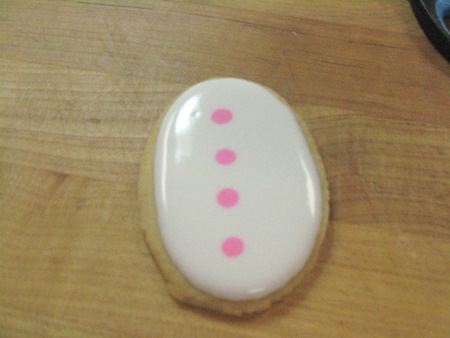
Next pipe a few dots into the wet icing. The new color will sink into the base color, and that's just what you want. Now, grab your toothpick and...
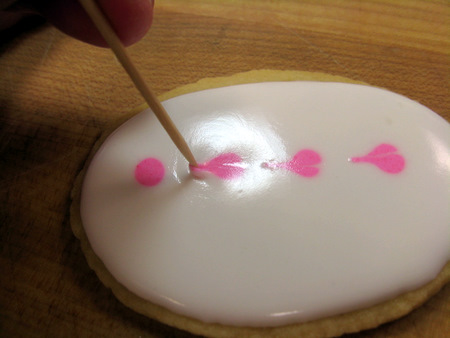
drag it through both layers of icing. The dots turn into tiny hearts. Sweet!
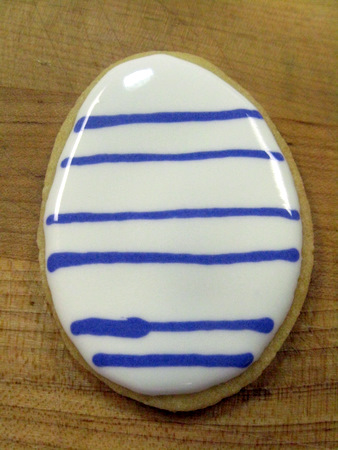
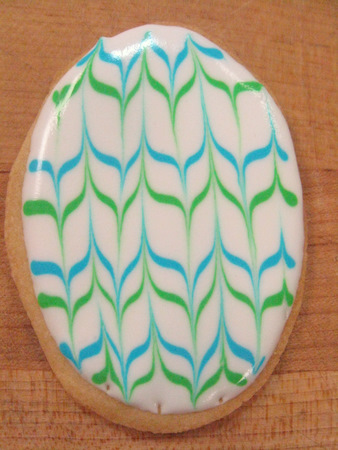
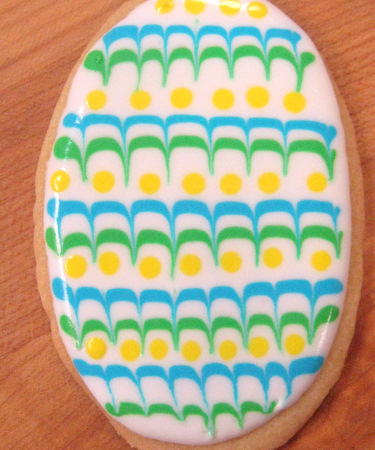
So if dots turn into hearts, what happens when you pipe stripes?
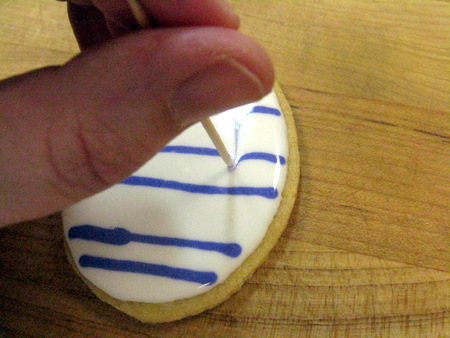
Begin at the top edge of the cookie and drag your toothpick down through both layers of icing, straight towards the bottom edge. Return to the top and repeat across the whole cookie.
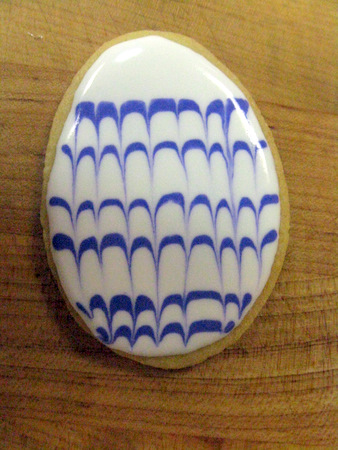
Wow! Just by dragging the toothpick downward through both layers, you get bargello like designs.
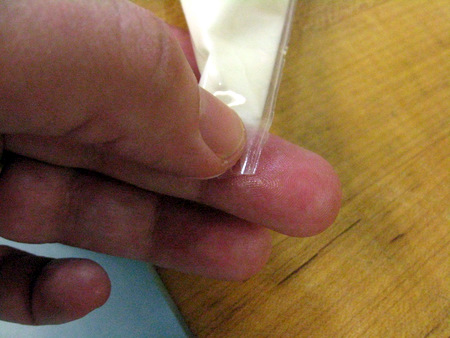
Before I forget, it's very helpful to wipe the tip of the piping bag clean between cookies and colors. It just helps keep the colors from bleeding together or splotching.
It's also very important to wipe your toothpick tip clean between each row or drag. If you don't you'll transfer the icing you just swiped to the clean icing and make smudgy messes.
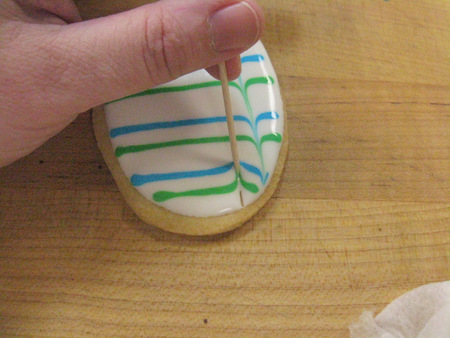
You can vary the colors of the stripes, and you can vary the direction in which you drag the toothpick. Try alternating top to bottom, then bottom to top.
Woo hoo! It's stunning and no one has to know how easy it is.
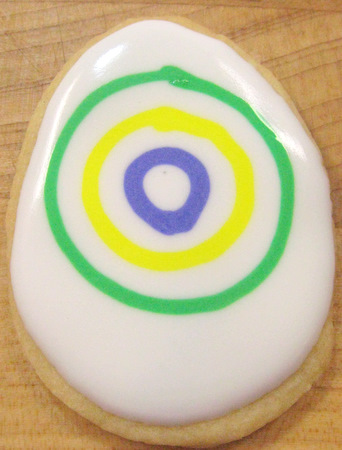
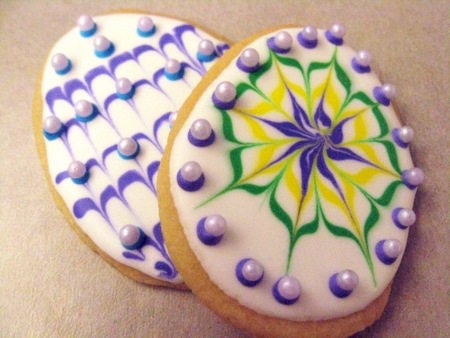
So we've done dots and stripes. Let's move on to circles. Pipe a few concentric circles into the wet base icing.
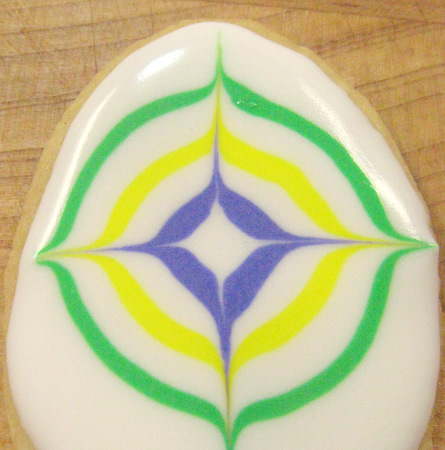
Starting on the inside of the circles, drag outward in four places at 12, 3, 6 and 9 on the clock.
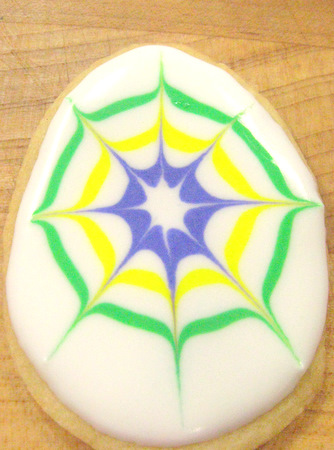
Now, drag outward between those 4 for a total of 8 outward "spikes".
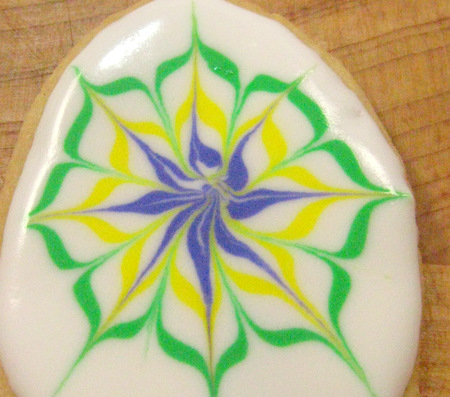
For the finishing touch, drag inward between each of the 8 spikes to form a flower. Amazing!
Now that you know the basics, explore away. Try dragging only partially, to make arches. Leave some stripes or dots alone for contrast.
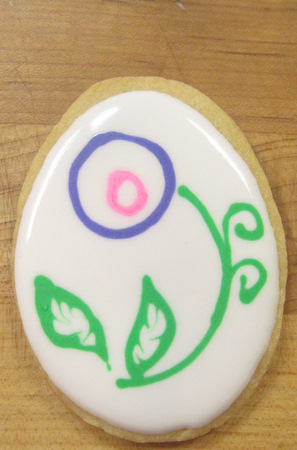
Add leaves and stems to your flowers.
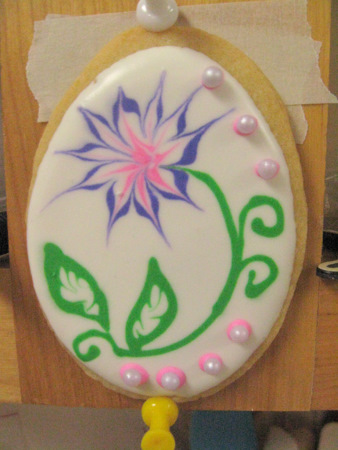
Andrea loved this one so much she hung it at her station. She was such a good girl she didn't even push the pins into the wood, she used tape to support the pins. She's such a smartie!

I'm sure you know how it goes when you are on a creative roll. I started visualizing pinatas in the designs, so I grabbed a cookie cutter and started making donkeys. (OK, technically they are sheep, but pretend with me, eh? )
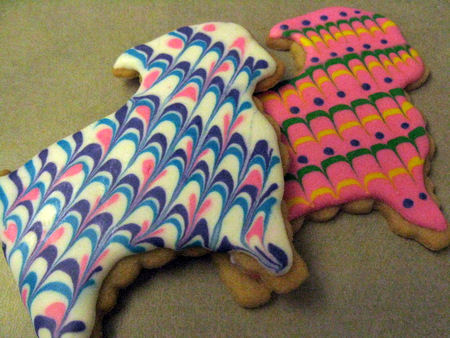
It worked! I really think these invoke pinatas with their fun stripes and bright colors. Don't forget to vary your background color, the pink pinata really sings.
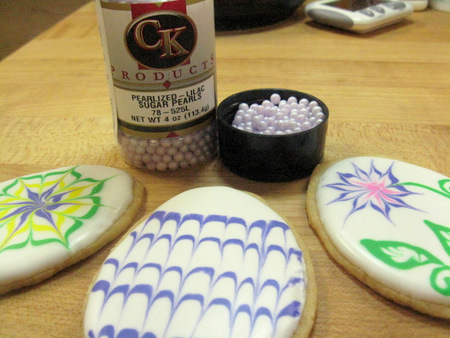
If you're like me, sometimes you just can't resist a little extra bling. I've been wanting to use our new lilac pearls on fancy cookies and this is the perfect opportunity. A few dots of icing will hold the pearls right in place.
In all honesty, these beautiful cookies were all done in less than 90 minutes. I was a bit disappointed when the fun was over, so I have another batch planned soon for an upcoming bake sale. I don't think many people will be able to resist, do you?
Here's wishing you a happy Spring filled with color. Enjoy!