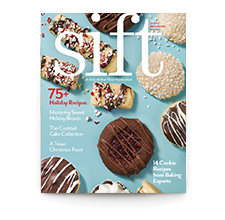
 Sift magazine's holiday issue is full of festive recipes for this season's baking.
In today's feature, baker Samantha Chiu (of the popular Instagram account elleventy) offers inspiration for festive cookie decorating. Holiday cookies are delicious regardless of looks, but we know you might want to really impress with your baking at this time of year. If you're interested in decorating cookies but don't know where to begin, here are some ideas to inspire you. This year, spread the joy of baking with the prettiest cookie plate yet!
To try your hand at these cookie decorating techniques, start with recipes that will yield reliable results for decorating. For cut-out cookie dough, we like our Holiday Butter Cookie recipe. It rolls easily and has a nicely crisp texture once baked. For icing, our Simple Cookie Glaze is your best option for decorating. It dries hard and shiny, and you can adjust the consistency by adding more or less liquid.
Note: If you don’t have a particular cookie cutter shape, simply draw the shape on a piece of paper, cut out the silhouette, and place it on your dough. Trace around it with a knife to cut out the cookie.
Onto the fun part! We've broken down these techniques into beginner, intermediate, and advanced. Start with the simplest ones to get used to the methods. Practice makes perfect (plus requires you to eat lots of cookies: win-win!).
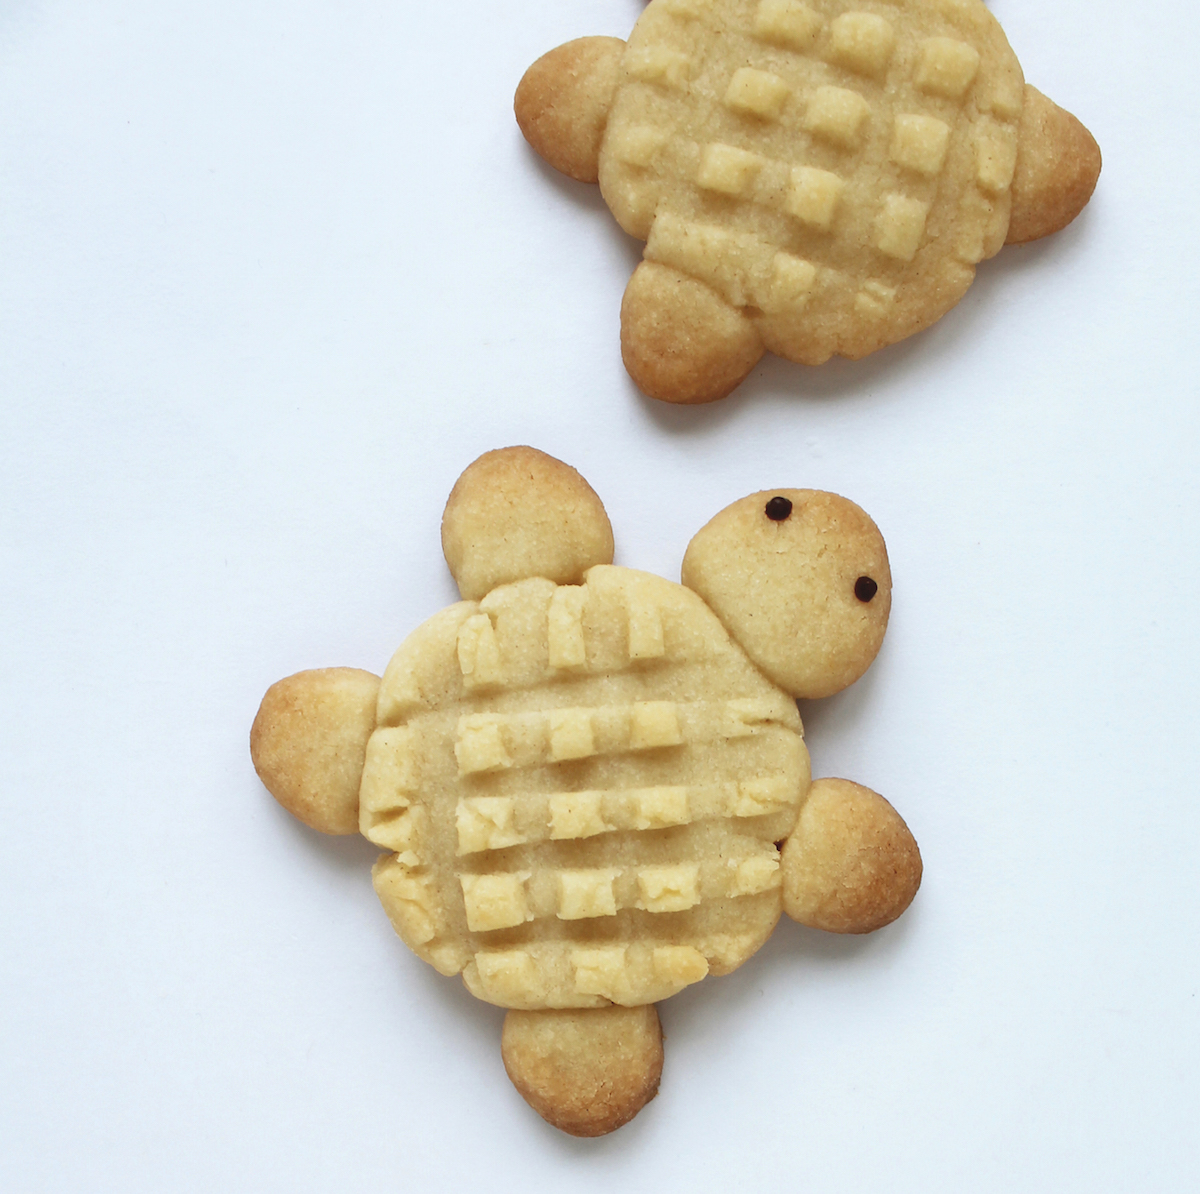
Turtle: Roll a tablespoon of cookie dough into a ball and flatten with a fork horizontally, then vertically. Roll out 4 tiny balls for the arms and legs, and a slightly bigger oval ball for the head. Attach them all to the body. Once the cookies are baked and cooled, melt chocolate. Use a toothpick to add dots of melted chocolate for the eyes.
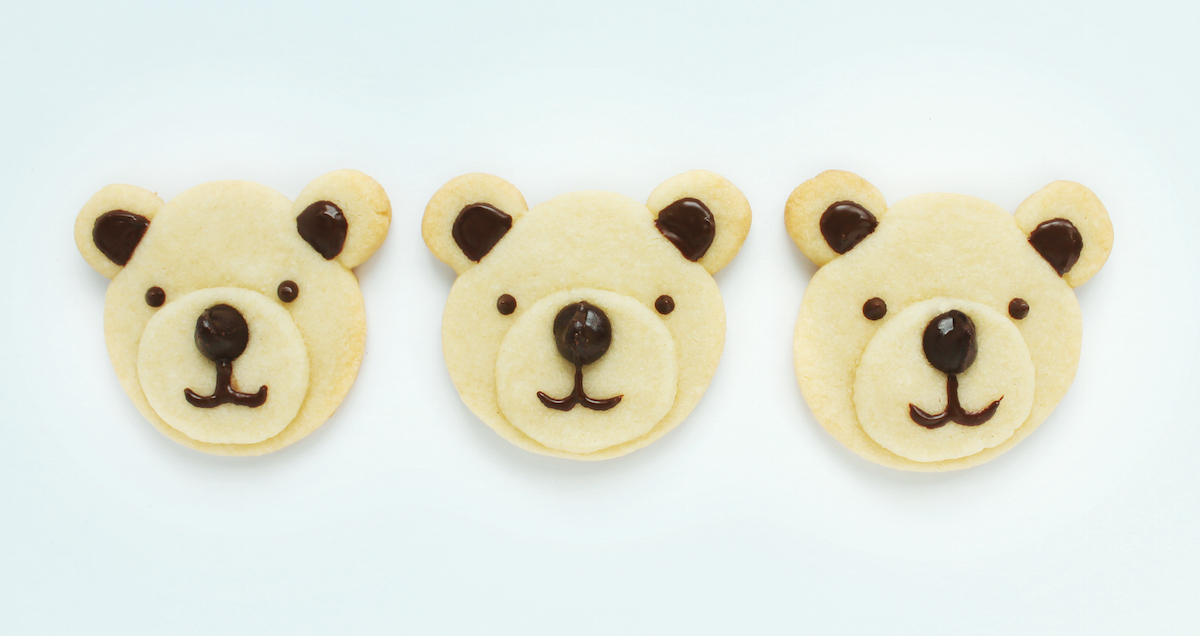
Bear: Cut a 1 1/2” to 2” circle from the cookie dough, and roll out 2 tiny balls for the ears. Cut out a smaller circle (1/2”) and place on top of the bigger circle. Position it closer to the bottom, the place a chocolate chip on top of it for the nose. Once cookies are baked and cooled, melt chocolate. Use a toothpick to apply melted chocolate for the eyes, ears and mouth.
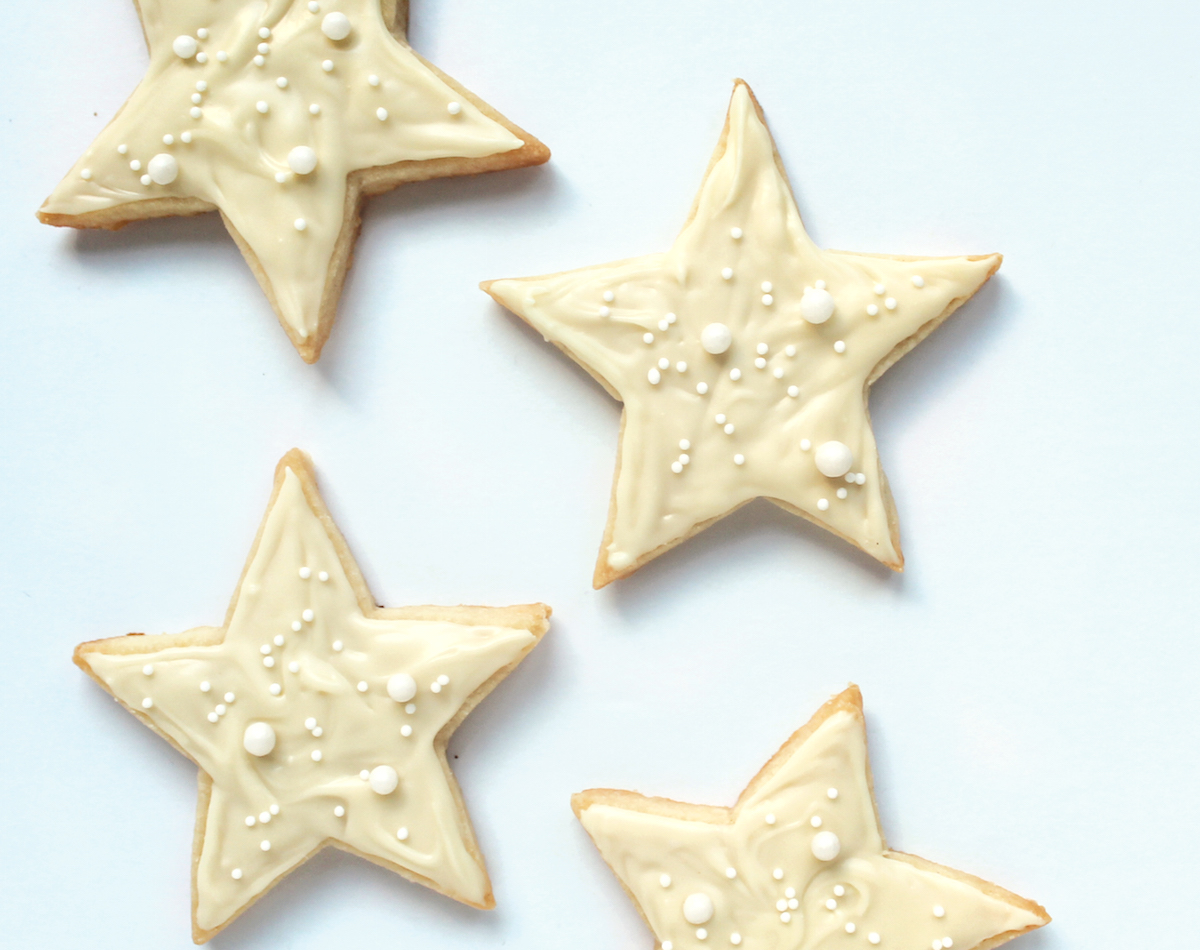
Star: Cut stars from the cookie dough. Once cookies are baked and cooled, melt white chocolate. Use a toothpick to apply chocolate on top of the cookie. Add sprinkles immediately before the chocolate sets.
If you are comfortable with basic cookie decorating, these techniques will help improve your skills. From creating more elaborate shapes to decorating with royal icing, these examples will take your cookies to the next level.
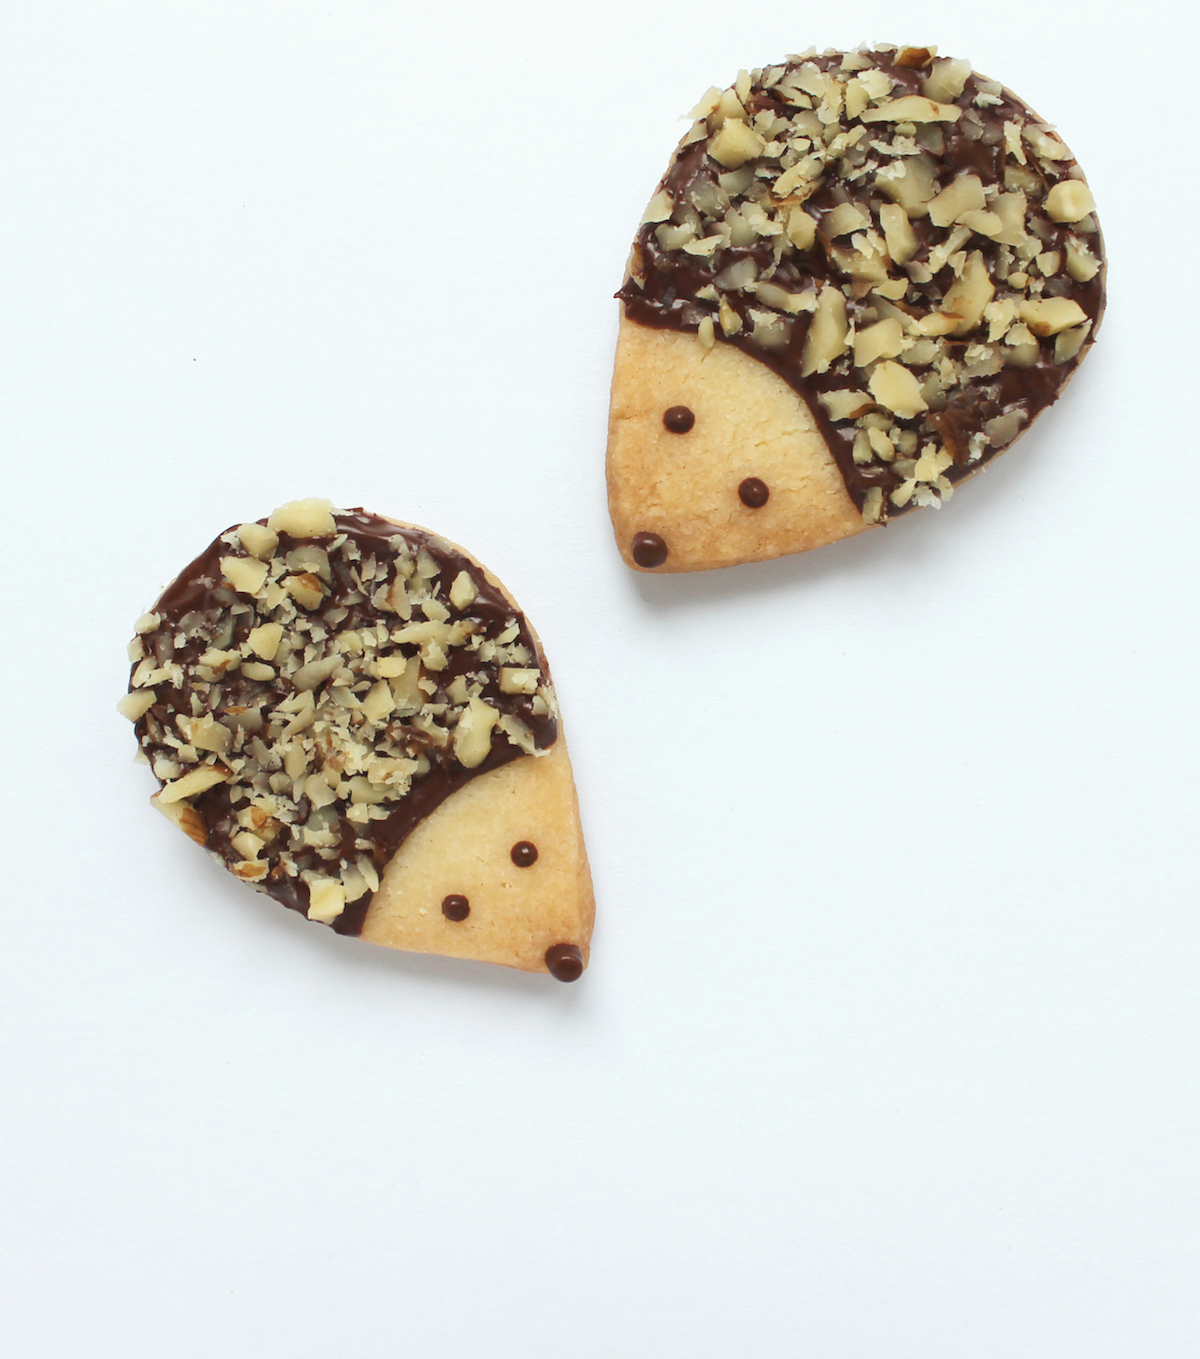
Hedgehog: First, cut raindrop shapes from the cookie dough. Once cookies are baked and cooled, melt chocolate. Next, use a toothpick to apply chocolate on top of the cookie and sprinkle chopped nuts on top immediately after. Use the toothpick to apply chocolate for the eyes and nose.
Candy Cane: Cut out and bake candy cane shapes, then cool fully on a rack. Once cookies are baked and cooled, pipe royal icing with a piping bag (or plastic bag with a tiny hole cut in the corner) onto the cookies, using a toothpick to remove any bubbles and to smooth out the edges.
Tip: To make the icing less translucent, mix white food coloring into the royal icing.
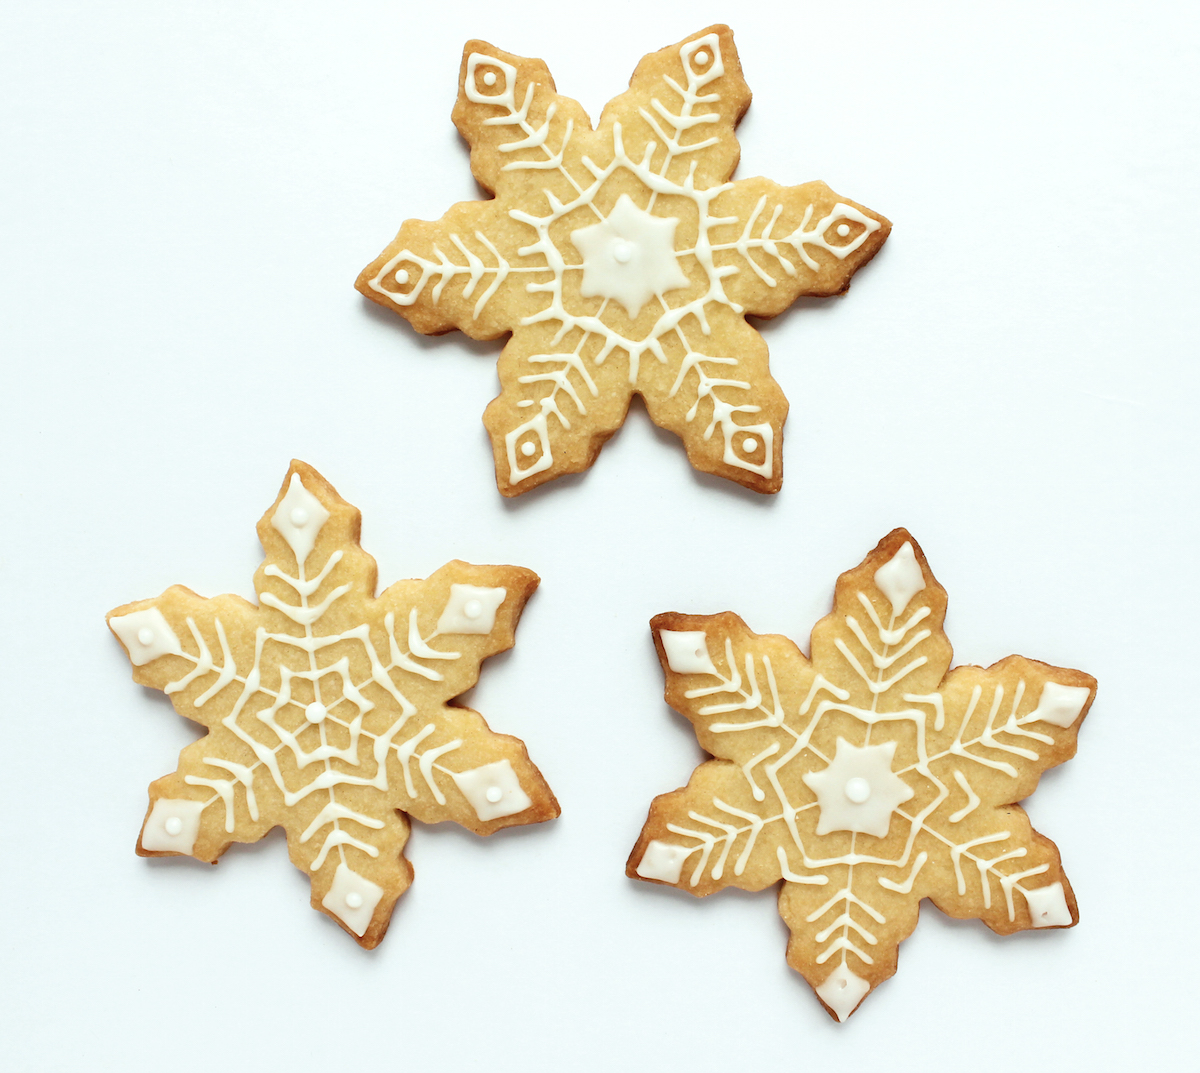
Snowflake: Cut out and bake snowflake shapes, then cool fully on a rack.
Next, mix white food coloring into royal icing, cut a small hole in the end of your piping bag, and pipe onto cookie. Use a toothpick to smooth out any bubbles or rough edges. Let the icing dry for 12 to 24 hours.
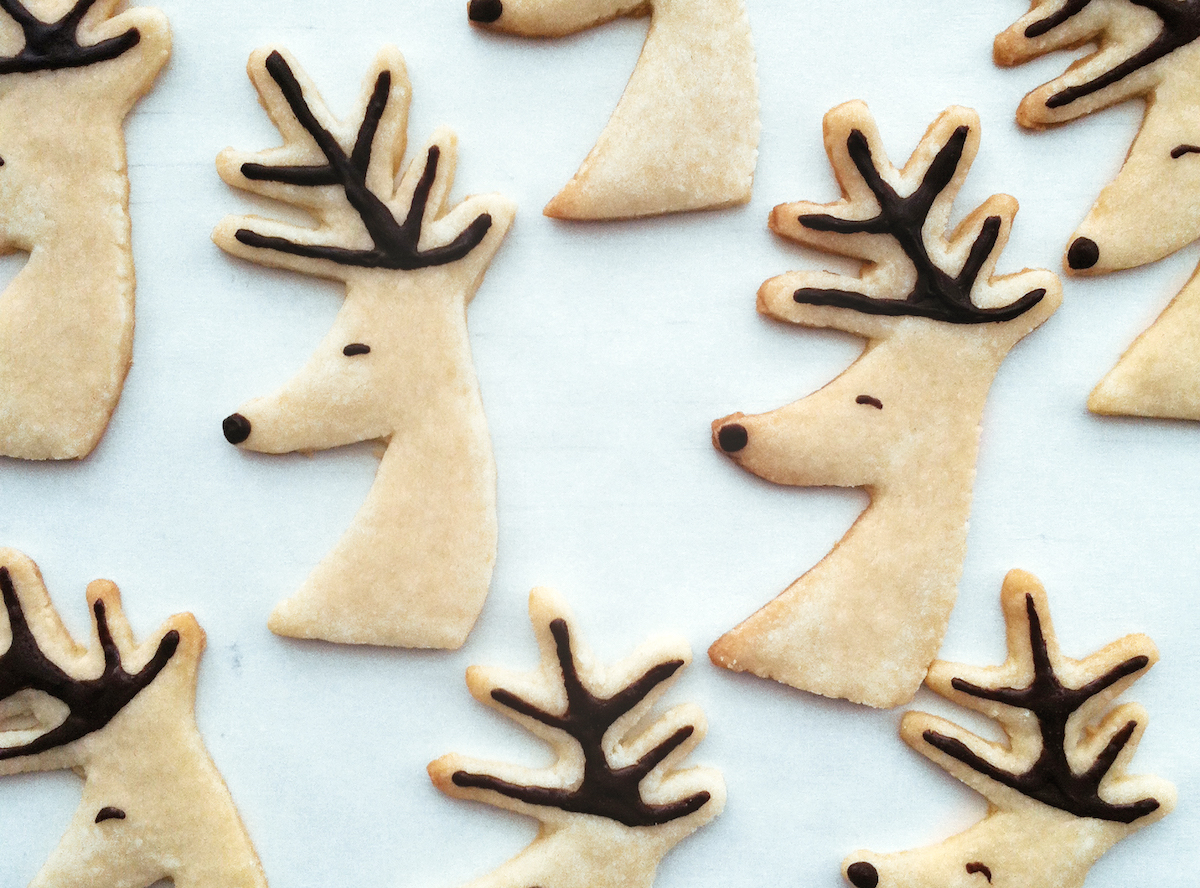
Reindeer: Cut out and bake reindeer shapes, then cool fully on a rack.
Next, melt chocolate. Draw on the details using a toothpick as a brush and melted chocolate as paint.
Intricately decorated cookies are always fun to create. Here are some ways to use royal icing to make detailed designs and show off your skills.
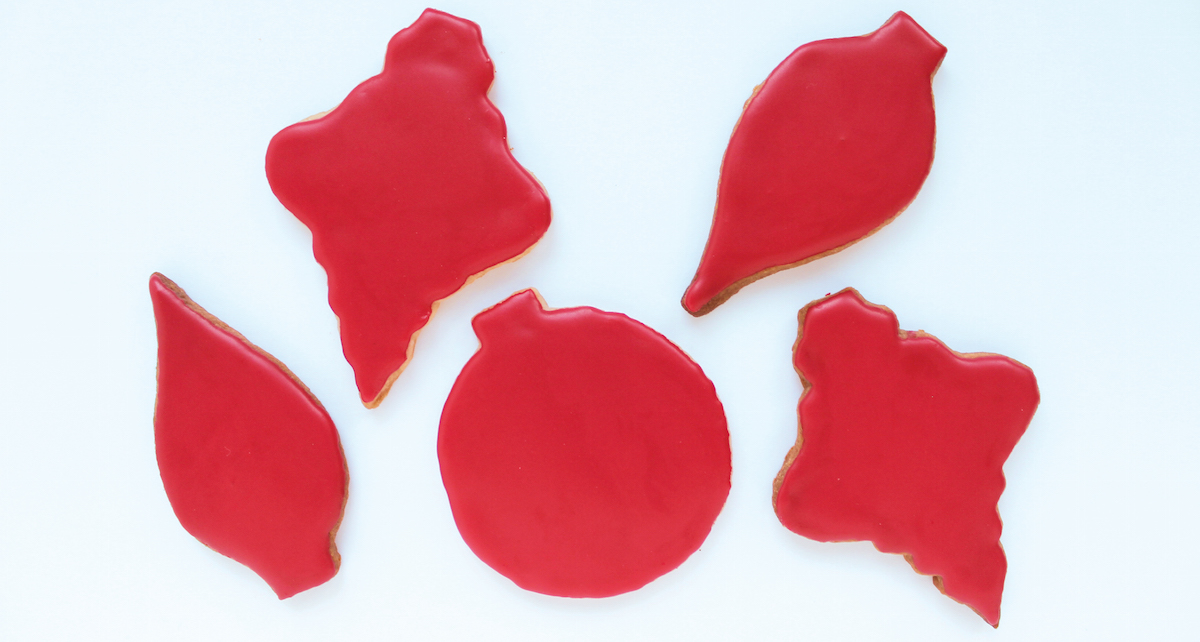
Ornaments: Cut out and bake ornaments, then cool fully on a rack. Next, mix red food coloring into royal icing, and pipe onto cookies using a toothpick to smooth out any bubbles or rough edges. Let the icing dry for 12 to 24 hours.
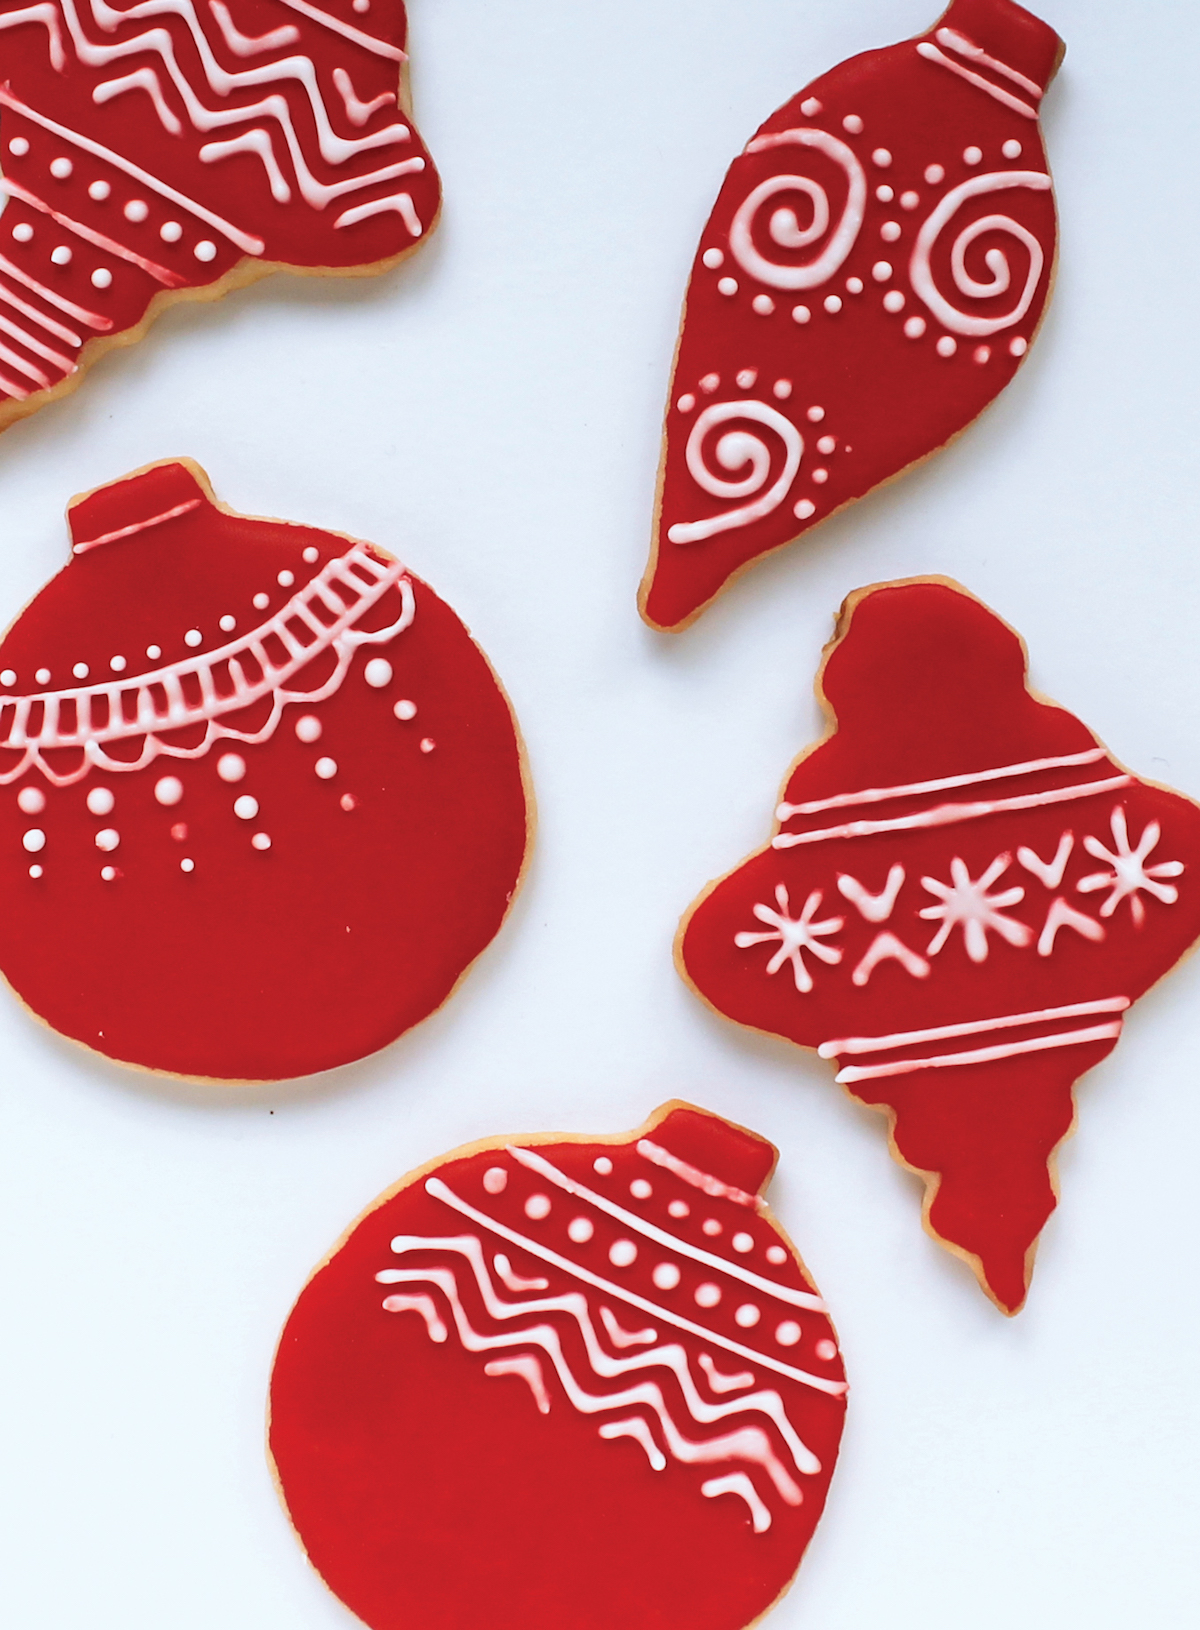
Once the first layer of royal icing has dried, pipe on the details with white royal icing. Let the cookies dry for another 12 to 24 hours.
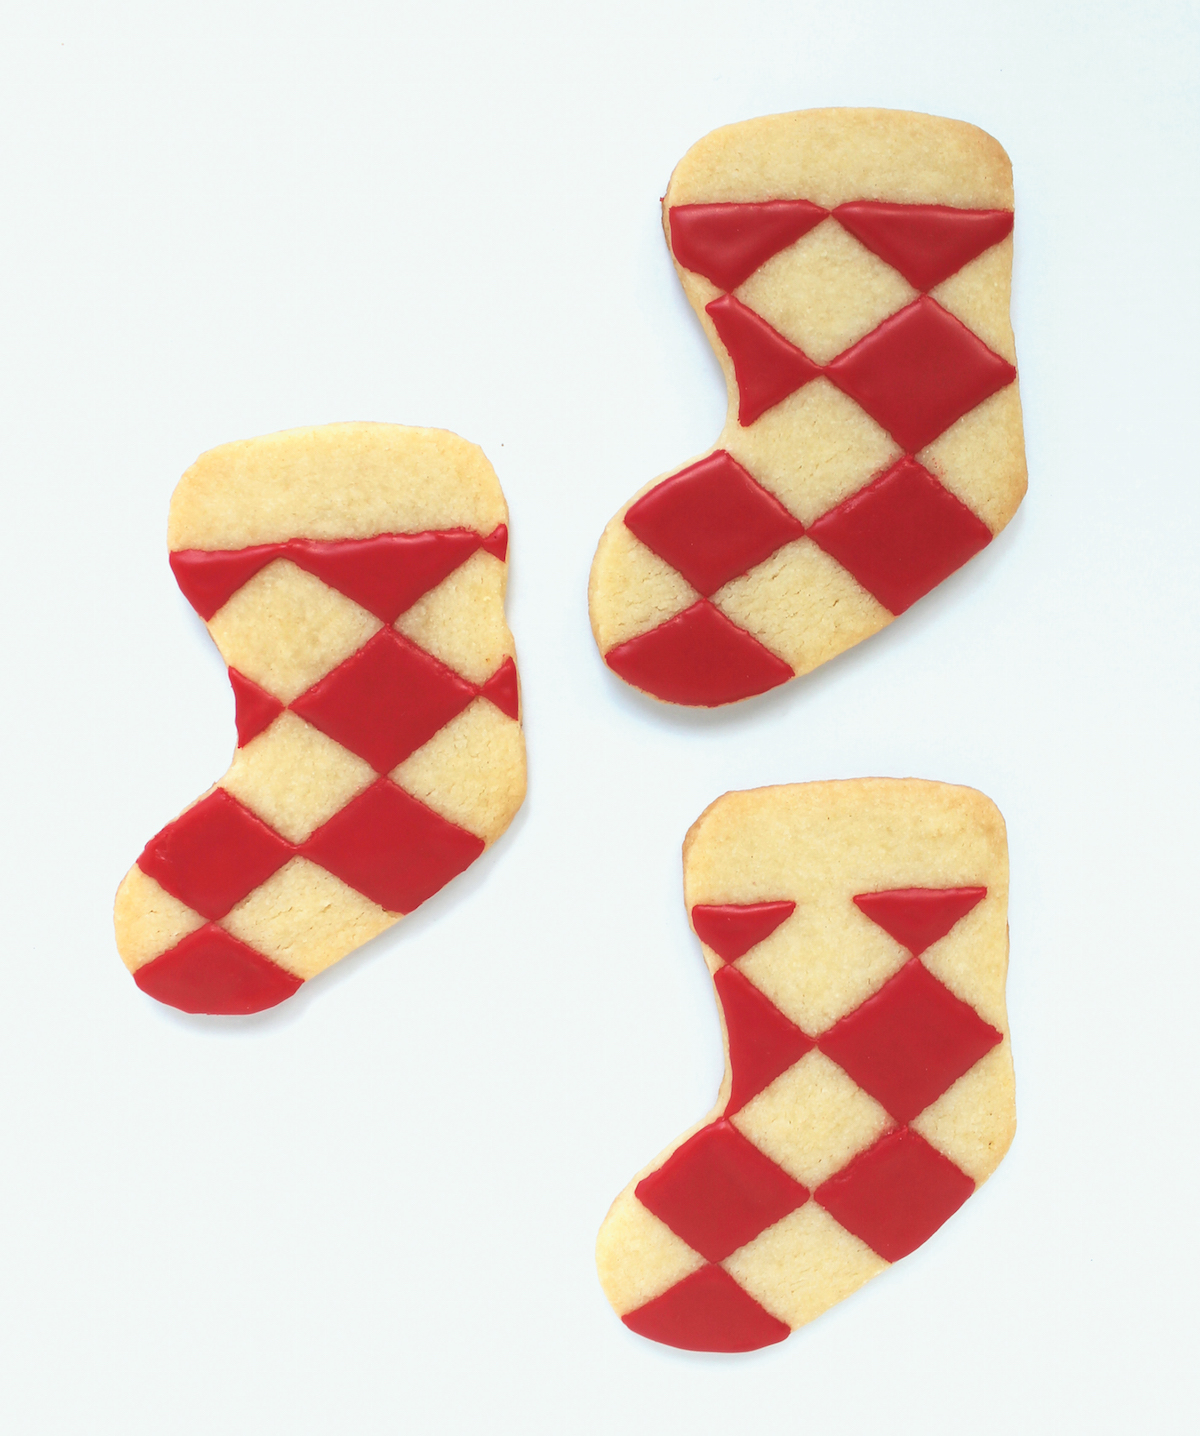
Stockings: Cut out and bake stockings, then cool fully on a rack. Next, mix red food coloring into the royal icing and carefully fill alternating sections of the cookie. Use a toothpick to smooth out any bubbles in the royal icing as well as help draw icing into the corners.

Tip: For a cleaner look, try to prevent the corners from touching.
Let the first layer of royal icing dry for 15 to 20 minutes before filling the remaining diamonds. Finish up by adding white sugar pearls (or white royal icing dots) where the diamonds meet. Let royal icing dry for 12 to 24 hours.
With so much inspiration, all that's left to do is start your ovens and get baking. For more instruction, visit our website to find videos showing the techniques for working with royal icing. Look for videos on testing cookie glaze for consistency, flooding cookies, and decorating with piped icing to give you a sense of how to make these beauties. Happy cookie decorating!