


How many different pizza recipes are there in the world?
Well, how many imaginative pizza bakers are there? Millions?
Then there are certainly millions of pizza recipes.
If Pizza Hut One-Topping is the base of the pyramid; and the "Special Pie" (Brussels sprouts, béchamel, shaved chestnuts, bufala mozzarella and smoked bacon) at New York City's current hot pizza restaurant, Co, is near the top; then think how many variations on the pepperoni/Hawaiian/barbecue theme lurk in between.
We have nearly 50 pizza recipes online right here at kingarthurbaking.com. And that's not counting pizza bread, sweet pizza, pizza sticks, and other variations on the pizza theme.
So how could I possibly introduce yet another pizza recipe to you, our dear but perhaps a bit pizza-satiated readers?
I'll tell you how. Because this particular pizza is a multi-tasker. Not only does it slip easily into place among its 47 brethren in the recipe database; it solves a problem.
Yeah, the “What's for dinner” problem, for sure. But also the “What to do with that cup of sourdough starter I'm supposed to throw away” issue.
Throwing food away? It's anathema to most of us. Stale bread goes into bread pudding or bread crumbs. Crumbled cake, into a trifle or layered dessert. Cold pancakes, if not wrapped for future toaster-warming, go to the birds.
And the cup of “discard” starter from your sourdough feeding? Right here, baby: Sourdough Pizza Crust.
Before we start, let's examine some sourdough dynamics. The less-used your starter, the more liquid on top, the more sour it's likely to be. Using a starter that hasn't been fed for weeks (or months) will yield a pizza crust that rises slowly, and tastes quite tangy. This type of crust is handy when you want to make dough in the morning, and have pizza ready for dinner.
On the other hand, a starter that's fed regularly will yield a less-sour crust, one that will rise much more quickly. This is a great “weekend” crust, as you can shape it at 8 a.m., and have pizza for lunch.

Sigh... If you're anything like me, your sourdough starter often looks like this. Forlorn. Neglected. BAD MOM!
But sourdough – like one of its basic components, yeast – is oh-so-forgiving. (Though, if you've truly managed to kill your starter, we offer fresh sourdough starter here at King Arthur.)

Pour off all but about 1/4” of the liquid on top, then stir the remainder into the dough beneath.
If you stirred in all that liquid, it would make the sourdough too thin. But stirring in just enough adds to its flavor - the liquid is alcohol and acids generated by the sourdough, and both are flavor enhancers.
Now comes the part where your recipe says “Discard 1 cup of your starter, and add 1/2 cup of water and 1 cup of flour to the remainder.”
Well, that's fine. But if you just can't stand throwing ANYTHING away – go ahead and use it. To make delicious waffles or pancakes. Or to make this chewy/crusty Sourdough Pizza Crust.

Combine the following in a mixing bowl:
1 cup sourdough starter, unfed (straight from the fridge)
1/2 cup hot tap water
2 1/2 cups King Arthur Unbleached All-Purpose Flour
1 teaspoon salt
1/2 teaspoon instant yeast*
4 teaspoons Pizza Dough Flavor, optional but delicious
*For a faster rise, increase the yeast. How much yeast for how fast a rise? Don't know; depends on your starter and your house and your micro-climate.
I don't want to discourage anyone, but this isn't the type of recipe offering precise directions and yielding exact results. This is sourdough, the wildest of all the yeast breads. You need to take some chances as you learn to bake with it.
“If I increase the yeast to 1 teaspoon and let it rise in the pan for 2 hours, will the crust be thick, or thin?” I'm telling you in advance – I don't know. Try it and see – next time you'll know. And whatever you do will be acceptable – thick or thin, the crust will definitely be tasty.
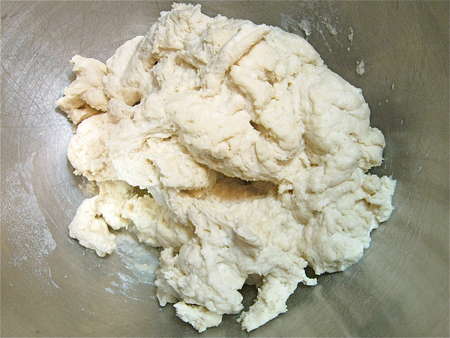
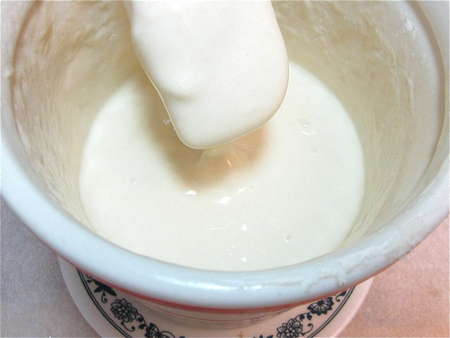
Mix the ingredients to make a rough dough.

Then knead to make a soft, elastic dough. I kneaded this for about 7 minutes in a stand mixer. Feel free to use your bread machine, set on the dough cycle.
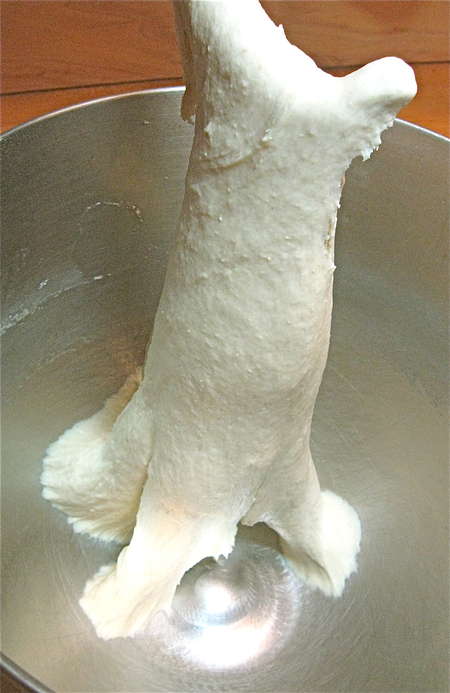
This is what I mean by elastic. Love that gluten!
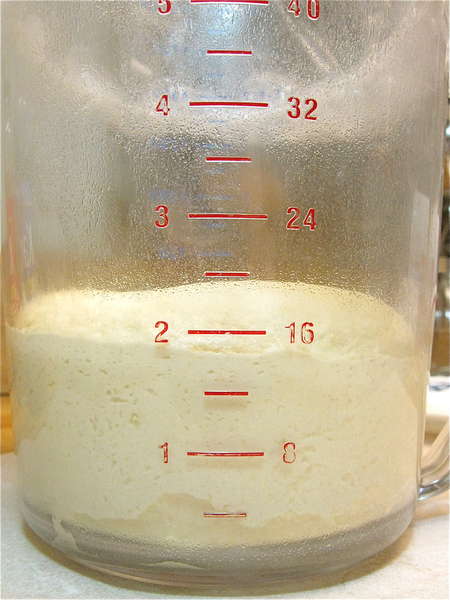
Now you have a choice. You can place the dough in a lightly greased container (like this 8-cup measure) ...

... and let it rise till doubled, which will probably take several hours.
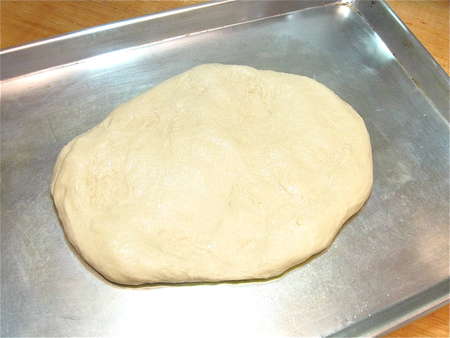
Or you can skip this initial rise, pat the dough into the pan, and let it rise till it's as thick as you like, which will take awhile for a thick-crust pizza.
What's the advantage of each? If you're going to be around the house, I think you get slightly lighter texture by letting the dough rise once in a covered container, then deflating it, patting it into the pan, and letting it rise again. Deflating the dough gets rid of excess CO2, and redistributes the yeast
However, if you're leaving for the day and want pizza crust ready to go in the late afternoon, simply patting the dough right into the pan, once it's kneaded, means you don't have to worry about it for the rest of the day.
For two thinner-crust pizzas, divide the dough in half, shaping each half into a flattened disk. Drizzle two 12” round pizza pans with olive oil, tilting the pans to coat the bottom. Place half the dough in each pan. Cover, and let rest for 15 minutes. Gently press the dough towards the edges of the pans; when it starts to shrink back, cover it, and let it rest again, for about 15 minutes. Finish pressing the dough to the edges of the pans, and cover them to prevent the dough drying out.
For a thicker-crust pizza, drizzle a half-sheet pan (18" x 13"), or similar sized pan; or a 14" round pizza pan with olive oil, tilting the pan to coat. Shape the dough into a flattened disk. Place it in the pan, cover it, and let it rest for 15 minutes.
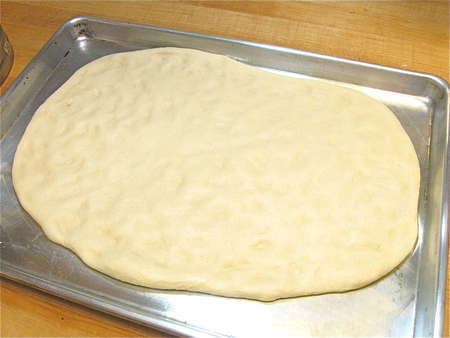
Push the dough towards the edges of the pan; when it starts to fight back, cover it and let it rest for 15 minutes.
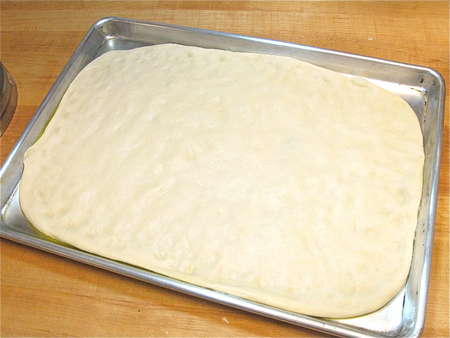
Come back and finish pushing the dough to the edges of the pan.
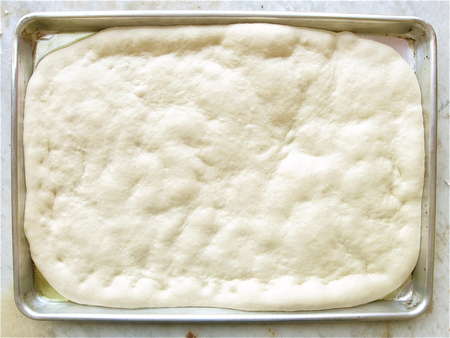
Cover the pan, and let the dough rise till it's as thick as you like. For thin-crust pizza made from fairly fresh starter, this may only be an hour or so. For thick-crust using an old, little-used starter, this may take most of the day. Keep in mind that this crust doesn't have a lot of oven spring; what you see going into the oven is pretty much what you'll get coming out.
There are no hard-and-fast rules here; it all depends on the vigor of your starter, and how you like your crust. Once you make it a couple of times, you'll figure out what time frame works for you.
Towards the end of the rising time, preheat your oven to 450°F.
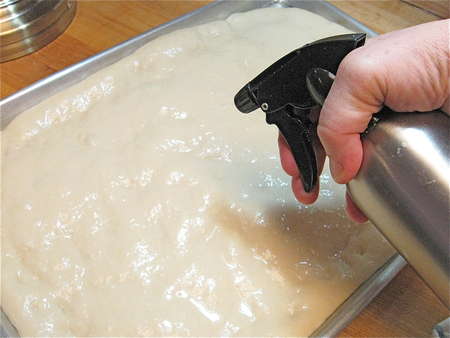
Just before baking, spray the crust with water. This will encourage it to rise to its fullest.

For a thicker crust, pre-bake the crust for about 8 minutes before topping.
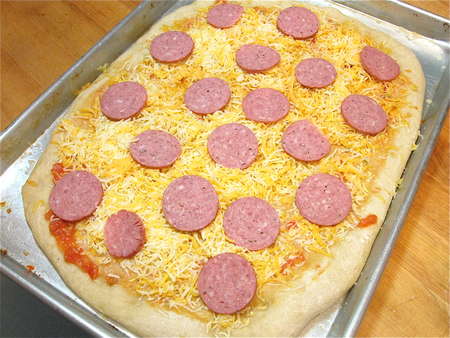
Layer with your favorite toppings...
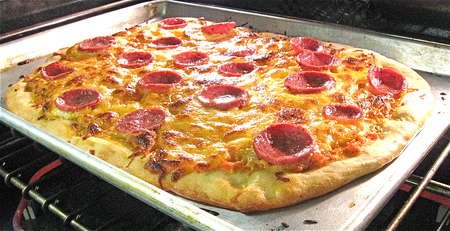
... then bake till toppings are hot and cheese is melted and bubbly, about 10 minutes.
For thin crusts, bake for 4 to 5 minutes, then top and bake for an additional 8 to 10 minutes, or till toppings are as done as you like.

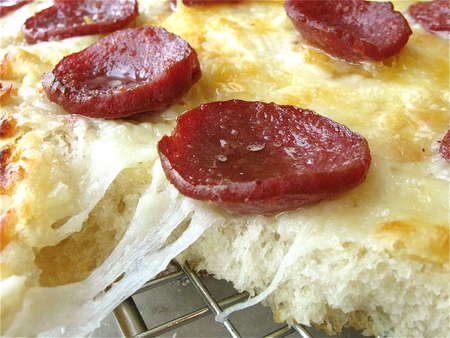
I like to put the pepperoni on top of the cheese – no reason, other than that I think it looks prettier.
Here's some thin-crust pizza that I garnished with a bit of mozzarella once it was out of the oven.
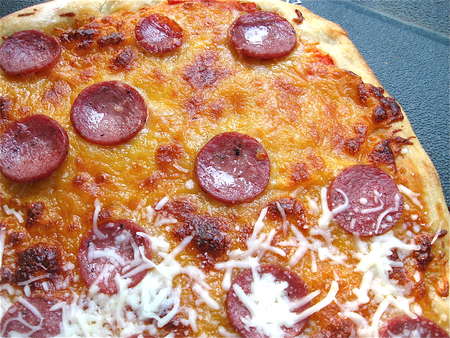
I wanted to see what it would look like. Looks kinda weird; tastes great!

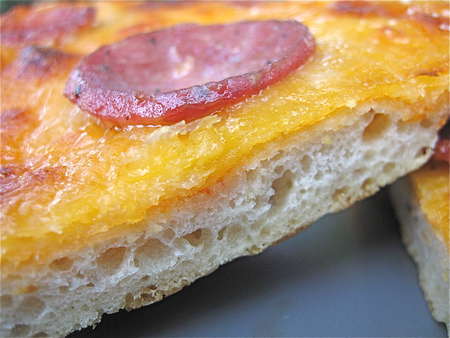
Here's a thick-crust pizza. I'm in the thick-crust camp – none of that New York City, coal-oven burned cracker crust for me, thanks.
Now THAT'S what I call a nice crust. And cheese. And pepperoni.
Medium-thick version...
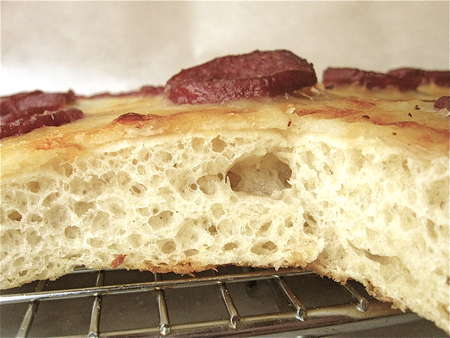
...and extra-thick. It's all in what size pan you use, how much yeast, and how long you let the dough rise. Yeast dough is nothing if not accommodating – to both your schedule, and your culinary whims.

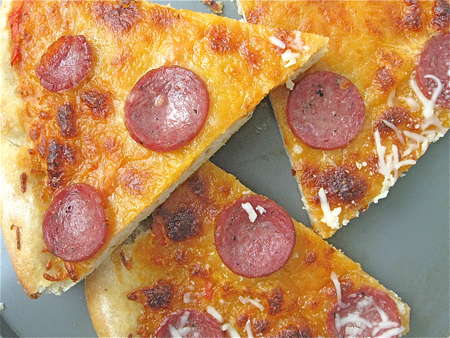
Well, you can't serve pizza without tasting it first to make sure it's edible, right?! Trust me, this was more than edible. It disappeared in a flash – with nothing at all left for the birds.
Read, rate, and review (please!) our recipe for Sourdough Pizza Crust.
New to sourdough? Find the help you need for all of your sourdough baking in our Sourdough Baking Guide.
