There's almost nothing better than a big scoop of ice cream on a hot summer day.
But for someone who doesn't eat dairy, my options are limited to sorbet. And while delicious, it can get a little boring after a while.
The good news is that making ice cream at home is a cinch. Especially dairy-free frozen treats. As long as you have an ice cream maker and a few simple ingredients, in a matter of a few hours you can have an ultra-creamy, decadent, and delicious dessert to enjoy.
In today's post, we're going to share six essential tips for making your dairy-free frozen treats a home run. AND we're going to give you the basic recipe which you can jazz up as you wish.
So let the brain-freeze party begin!
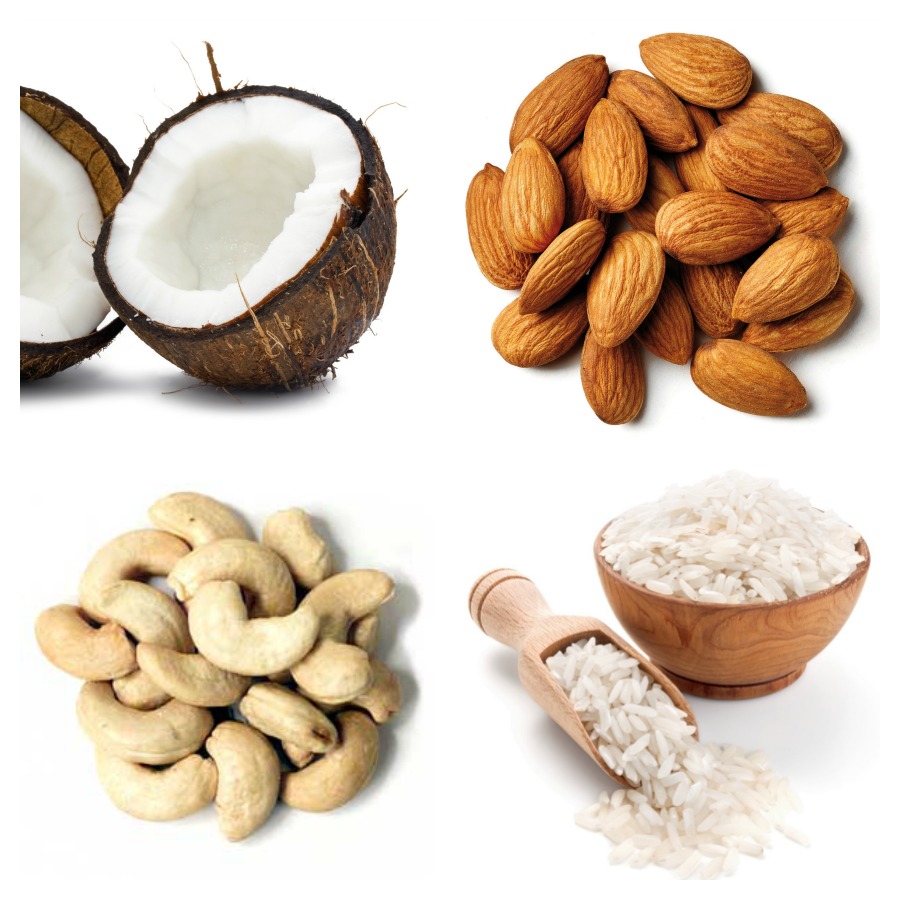
When you’re choosing which plant-based milk to use when you make your dairy-free frozen treats, there’s isn’t a “best choice.” Really, it’s up to you; but do keep in mind that different milks will have varying effects on the end product. Here are some milks to choose from:
You can decide by flavor, but also think about texture. If you want a frozen treat that’s ultra-creamy, silky smooth, and fairly decadent, then choosing a milk with a higher fat content – like full-fat coconut milk – is your best bet.
Since fat freezes at a different rate than water, using a higher-fat milk will result in a creamier, less icy frozen treat. But at the same time, these treats will be quite rich and also high in fat and calories, so consider that as well.
My preference is to combine a high-fat milk with a lower-fat option. I find the texture just how I like it, and the result is a bit on the lighter side. I like to use a blend of coconut milk and either almond, cashew, or hemp milk as my base (mainly because I like the taste of these milks the best).

Next up is picking your sweetener. As with any ice cream, you have lots of options. You can go with a granulated sweetener like cane sugar or coconut/palm sugar. Or you can opt for a liquid sweetener like honey, maple syrup, or agave. Both are great options; again, it just depends on what you prefer.
If you're opting for granulated sugar, just note that you'll need to dissolve the sugar in the base before churning it, which means you'll also have to chill the base for longer before being able to make your ice cream. I've tested both ways and like them both, but I tend to opt for maple syrup as my sweetener of choice because, hey, I’m a Vermont girl and any excuse to eat maple syrup is a win in my book.
Also, while I haven't tested this myself, I do think that you could use stevia as a sweetener. I'd start with 1/2 teaspoon and increase it by 1/8 teaspoon until you find your desired sweetness level.

This is a common question I'm asked when talking about making dairy-free frozen treats at home: do we add eggs or not? The answer is ... it depends.
When you’re using eggs in your ice cream, you’re essentially just making a custard base which you then churn and freeze. Custards are usually on the thicker side, and have a very creamy, smooth texture.
Egg yolks are primarily fat and protein, and help keep the ice cream smooth (similar to the higher-fat milks). Egg yolks also act as an emulsifier: The proteins in the yolk bind with water and fat molecules in the milk, which results in a more stable and creamy end product. Basically, the ice cream will melt more slowly.
So again, as we did with our milk bases, the dilemma of adding or not adding eggs comes down to texture and personal preference. My best tip is to first use eggs when you’re not using high-fat milks. So if you’re making a frozen treat that's just soy milk, to get that rich, creamy texture you’re going to want egg yolks in the mix. If you’re making your frozen treat with coconut milk (or even cashew cream) as the base, then you probably don’t need the eggs.
And then experiment and find what you like best.
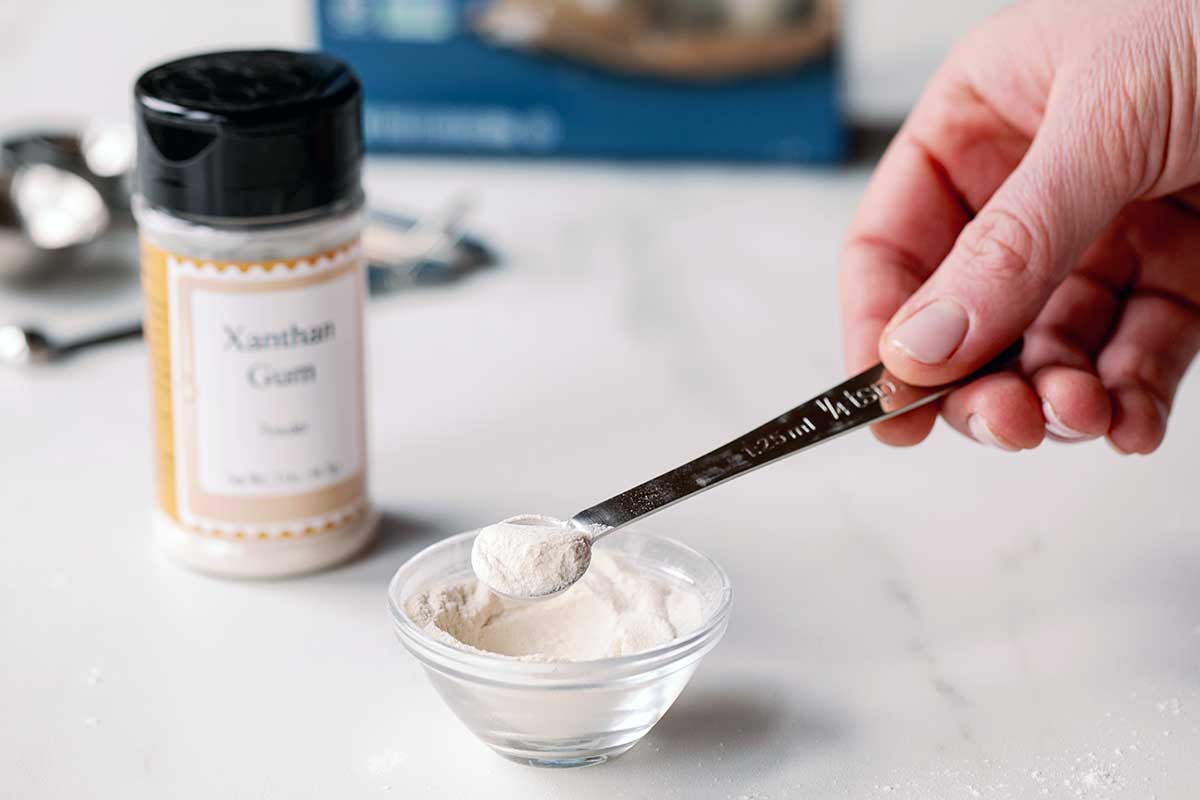
While not a required step in the dairy-free frozen treat making process, adding a thickener can help make it more creamy and help reduce the amount of ice crystals that form during the freezing process, especially if you’re not using egg yolks. Even with the higher-fat ice creams using coconut milk that you see at the store, you'll often find a thickener on the ingredients list because it helps give the ice cream wonderful creamy texture.
Common thickener options include:
Since I’m not using eggs in the recipes in this post, I’ll be adding 1/2 teaspoon of xanthan gum to each batch of frozen treats.
OK ... now the fun part: the flavors! Making frozen treats in tons of different flavors is definitely my favorite part of doing it at home. I can play around with all types of ingredients and find the combination I like most.
Here’s how to make the most common flavors:
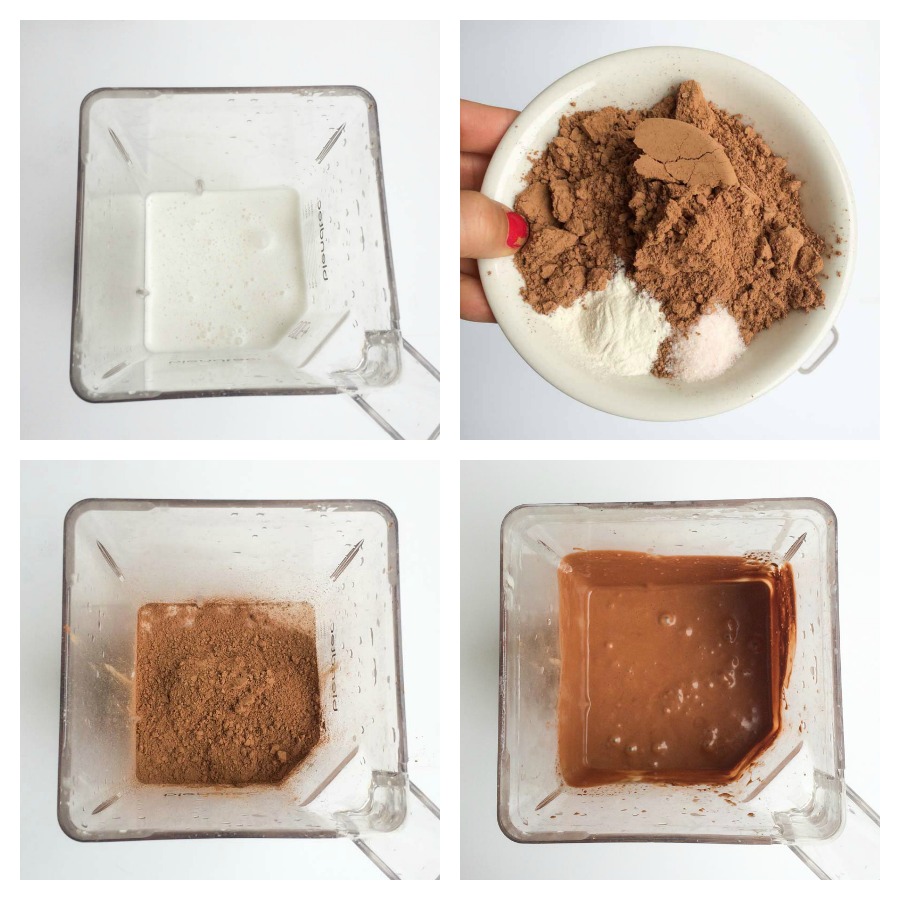
I’m sure you’re starting to notice a theme here. When flavoring the base of your frozen treats, do it before you begin churning. You want to be sure the ice cream base is completely smooth before churning. Check out the image above to see this process in action!
Another fun part of making ice cream at home is adding your favorite goodies. Whether you’re a fan of chocolate chips, cookie dough, white chocolate, or any other delicious add-ins, jazzing up ice cream is super easy; same with your dairy-free frozen treats.
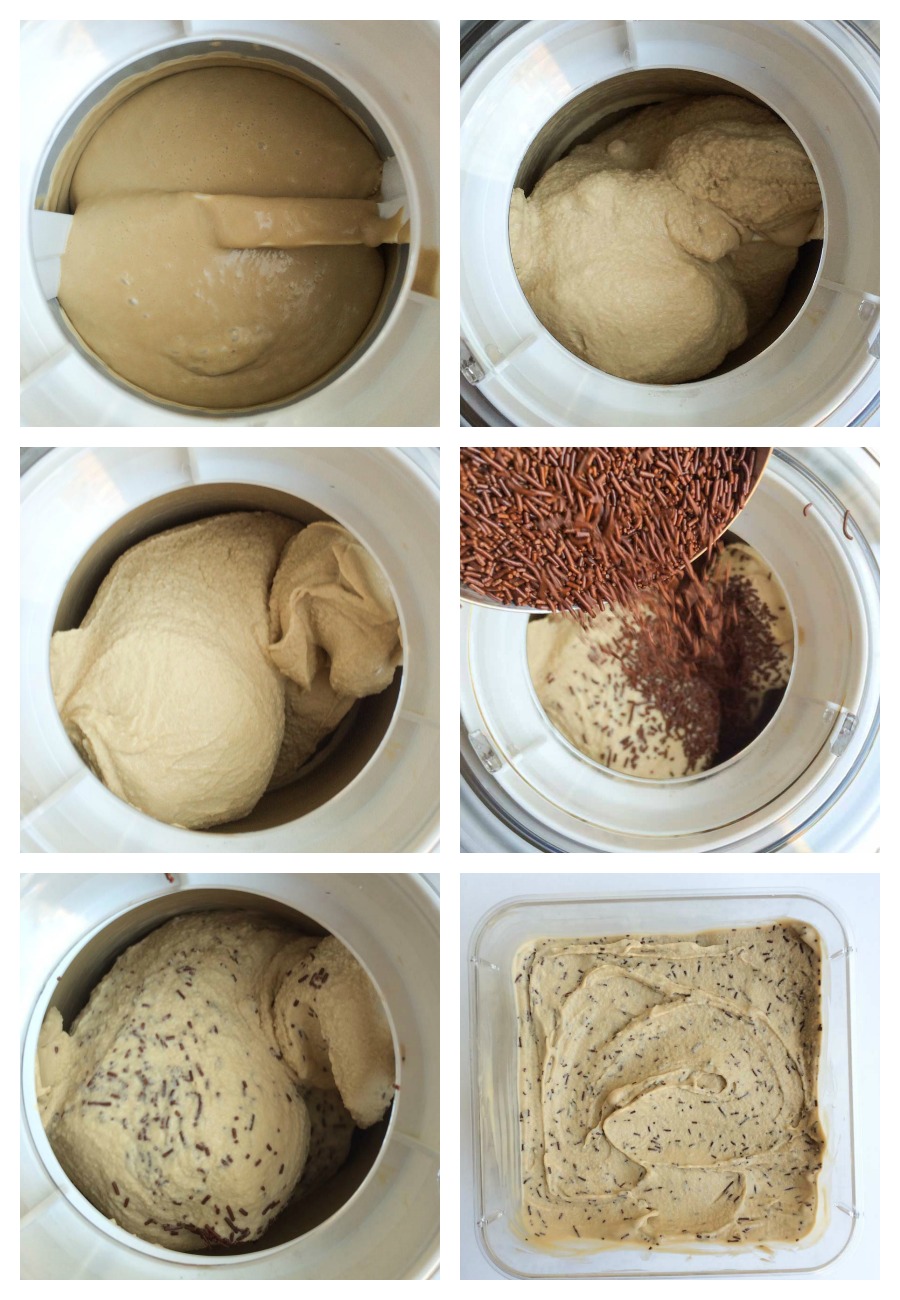
Just pick your favorite extras, and add them to your ice cream maker when it’s got about 5 minutes left of churning. You want the base to still be somewhat soft, so all the ingredients are evenly mixed throughout; but not so soft that they fall to the bottom. I like to add any extras when the mixture is the texture of soft serve.
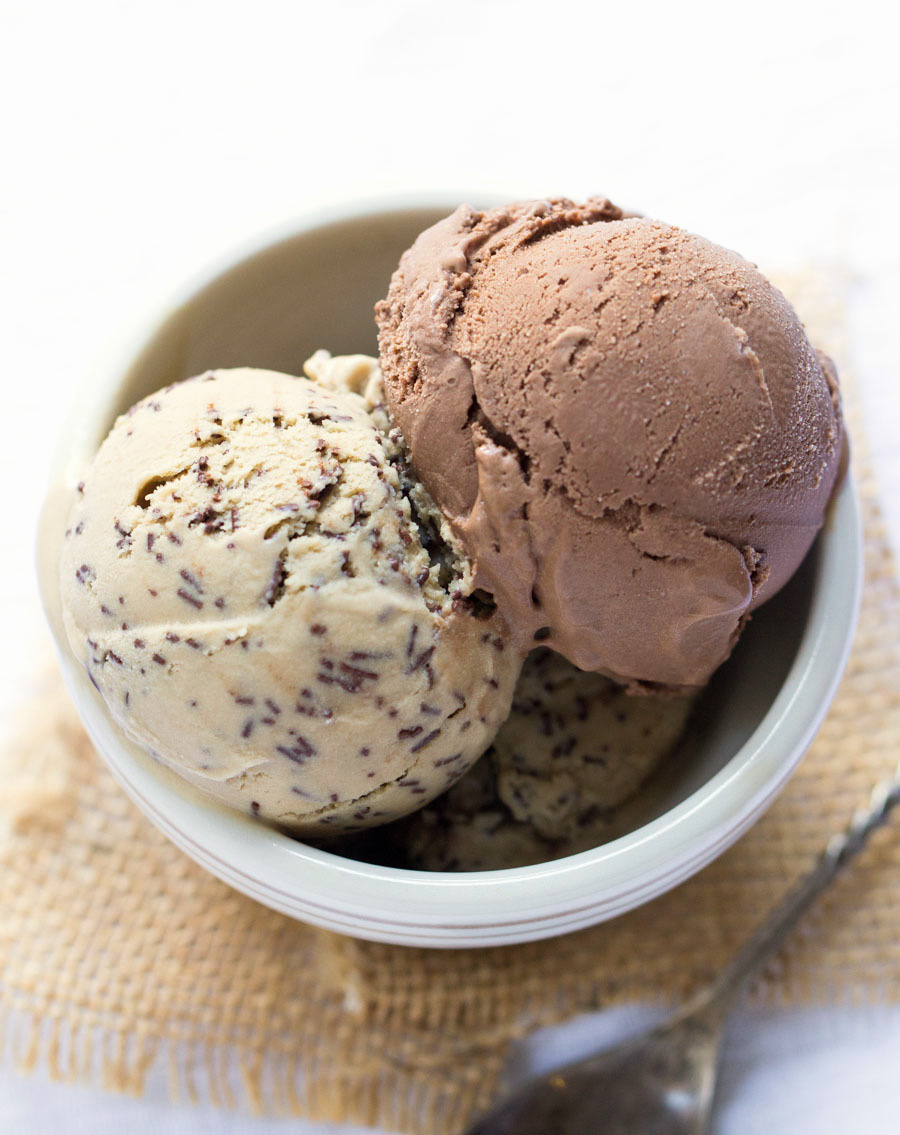
Check out the image above to see the different stages that the frozen treats will go through. I'm adding some delicious chocolate sprinkles to a coffee flavored ice cream!
Following the guidelines above, here's my go-to mix:
Add all the ingredients to a blender or food processor and blend on high until thick and creamy, about 1 to 2 minutes. Let the mixture chill for 2 to 4 hours, then add the mixture to an ice cream maker and churn according to the manufacturer's instructions. Transfer the frozen mixture to a freezer-safe container and store in the freezer until ready to enjoy. (When serving, if frozen rock hard, let it thaw for 10 minutes before scooping.)
We can't wait to hear what you come up with in your own kitchen! Share your best flavor combinations in the comments, below.