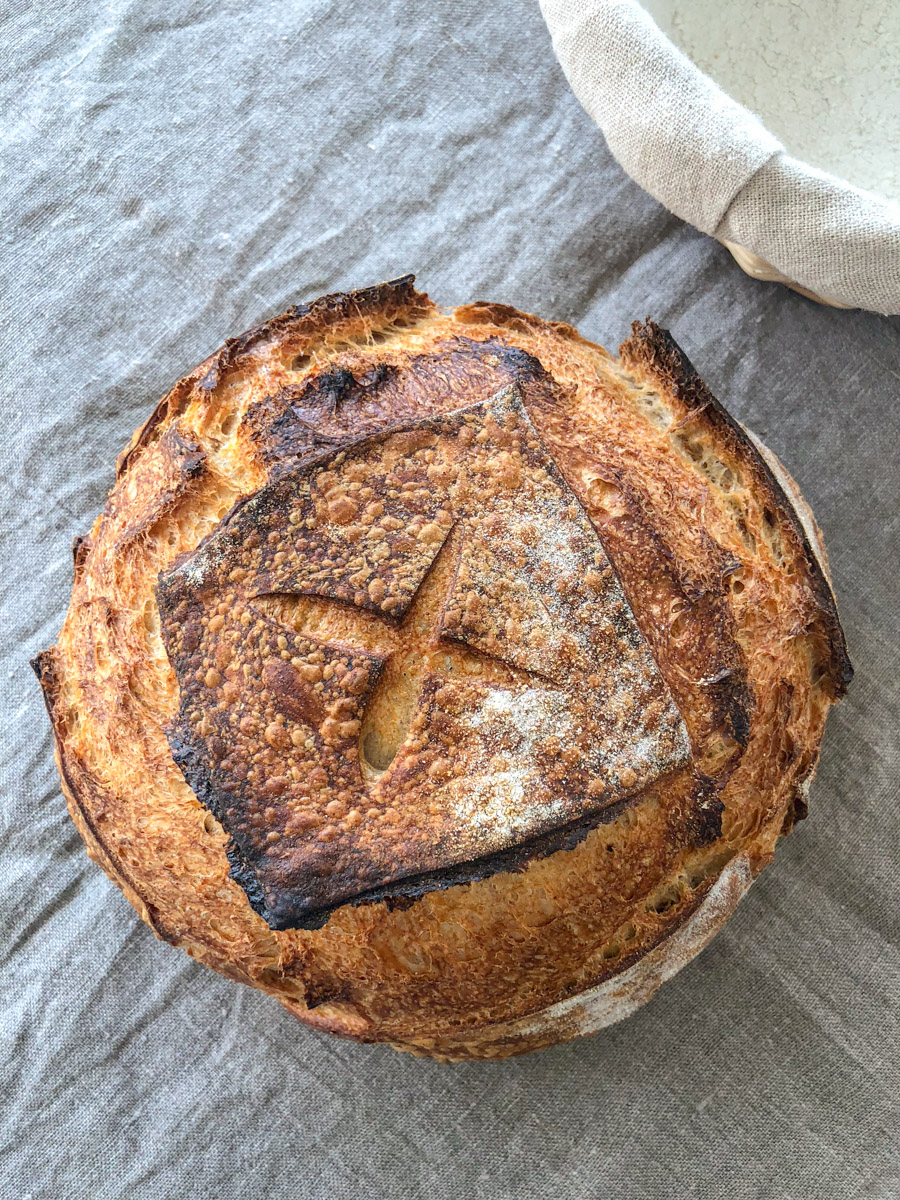
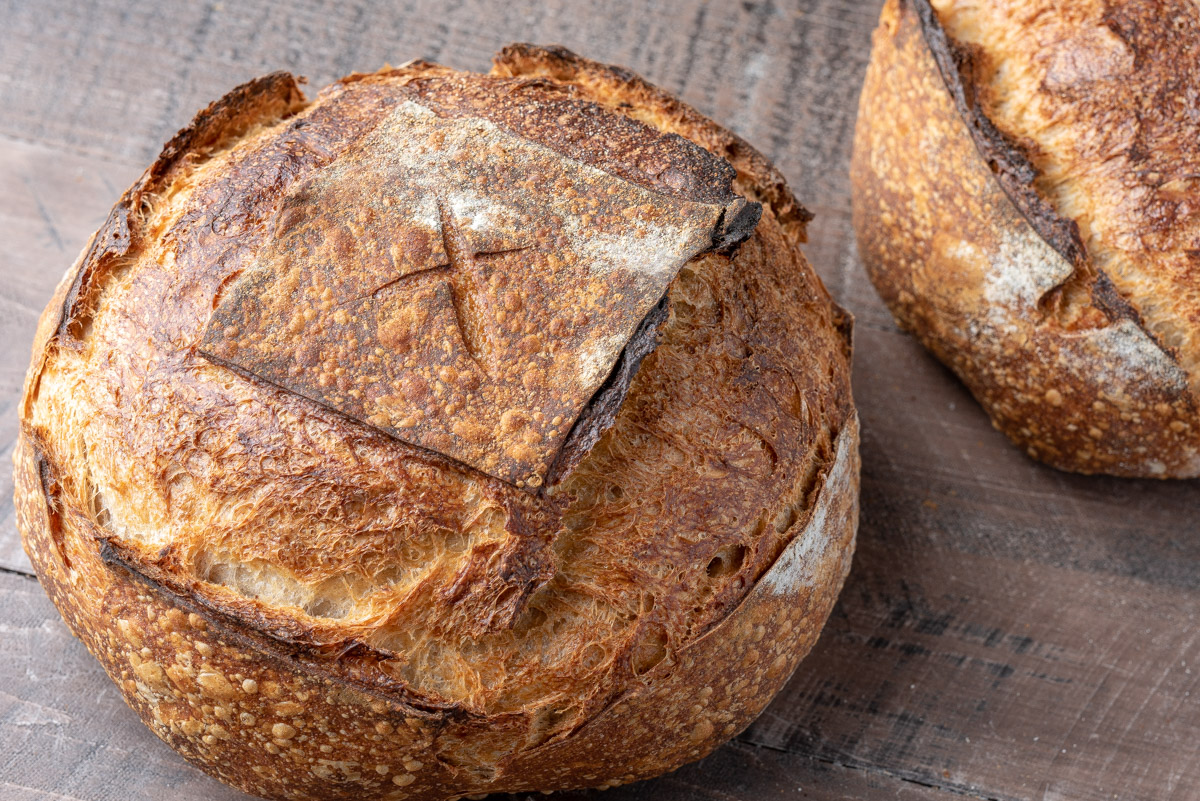
A rustic, round loaf of crunchy bread — there's something comforting about this simple shape, isn't there? This is usually the starting point for most: you first learn to shape a round, then maybe dabble in oblong loaves, perhaps a baguette or two. But there's always the humble boule, a round loaf you return to as a go-to shaping technique. Of course there are many ways to experiment when shaping dough — some more elaborate, involved, and intricate — but a shaping a boule should always have a place in a baker's toolkit.
At first glance, it's obvious that shaping is used to impart a certain look and aesthetic to a dough. However, it's more than that: it dictates how we slice, eat and, ultimately, share the bread we bake. Starting with the same dough, we can create drastically different results simply by shaping it differently.
I find bread shaped as a boule typically has a more rustic feel, with the intention that it's to be cut in half or into quarters, then further sliced; or simply left whole and placed on the dinner table. Tearing by hand is acceptable, encouraged: a bread for sharing.
A boule can also lend itself to decorative scoring techniques as the spacious surface is the perfect canvas to get creative and more intricate. It's a versatile way to shape, and the bread can ultimately be taken in the desired direction of the baker.
As with most things in baking, there are countless ways to shape a boule, but below are three of my most used and most effective.
As usual, it's important to prevent your hands from sticking excessively to the dough as you’re shaping. Use just enough flour on your hands to keep them from sticking but avoid using too much, as this can incorporate unwanted raw flour into the dough. If your hands do begin to stick, slide them along the bench (work surface) to gather a dusting of flour.
Just as the amount of flour on your hands is important, so too is the flour on the bench. The key to shaping a boule, using each of the following methods, is to rely on the bench to slightly tug on the dough as you drag it across. If you use too much flour the dough will slide too easily, never able to develop sufficient tension.
Finally, the surface of the dough should not tear when shaping. This tearing can be caused by too short of a bench rest or by handling too forcefully. If the dough does begin to tear, use a lighter hand when pushing, pulling, and folding the dough.
Each of the methods below starts with a pre-shaped and rested round of dough. Sufficient bench rest is important: it should be long enough to allow the dough to relax after pre-shaping. The tighter the pre-shape the longer the bench rest, but typically 20 to 30 minutes is sufficient. If the dough isn't relaxed adequately it will resist stretching and folding, and may even tear.
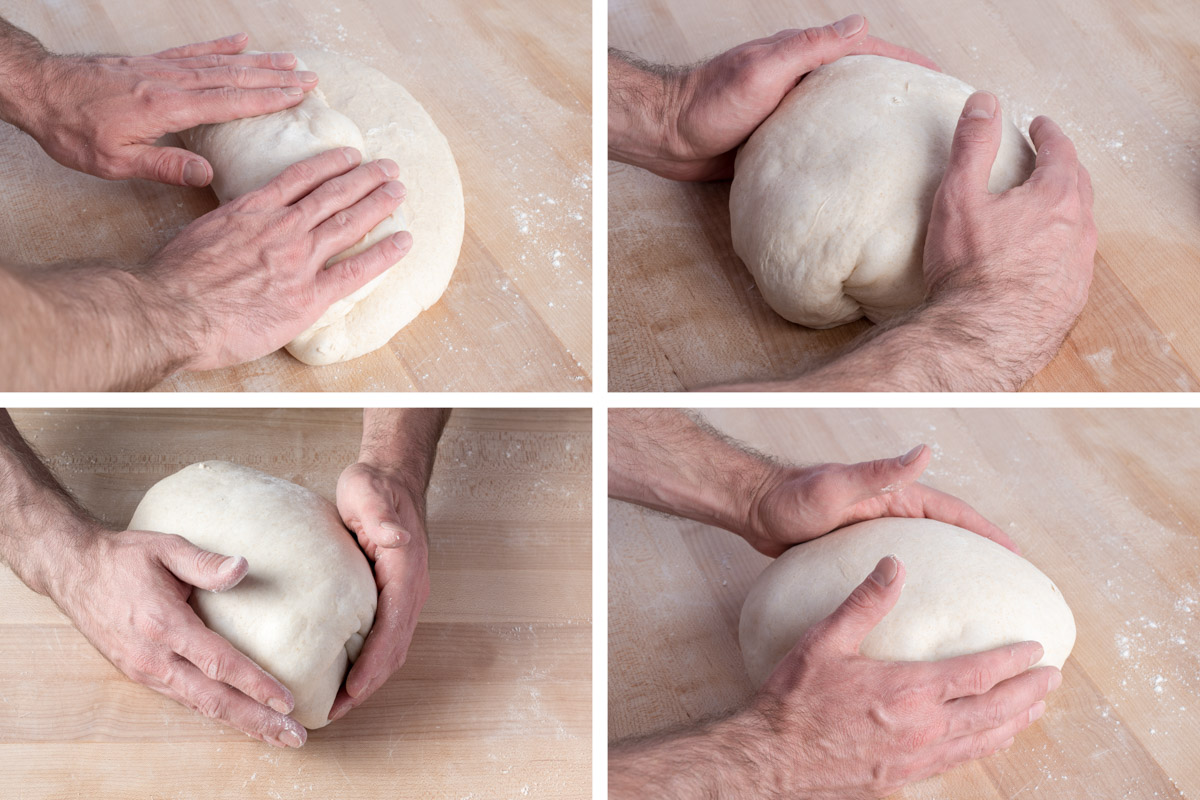
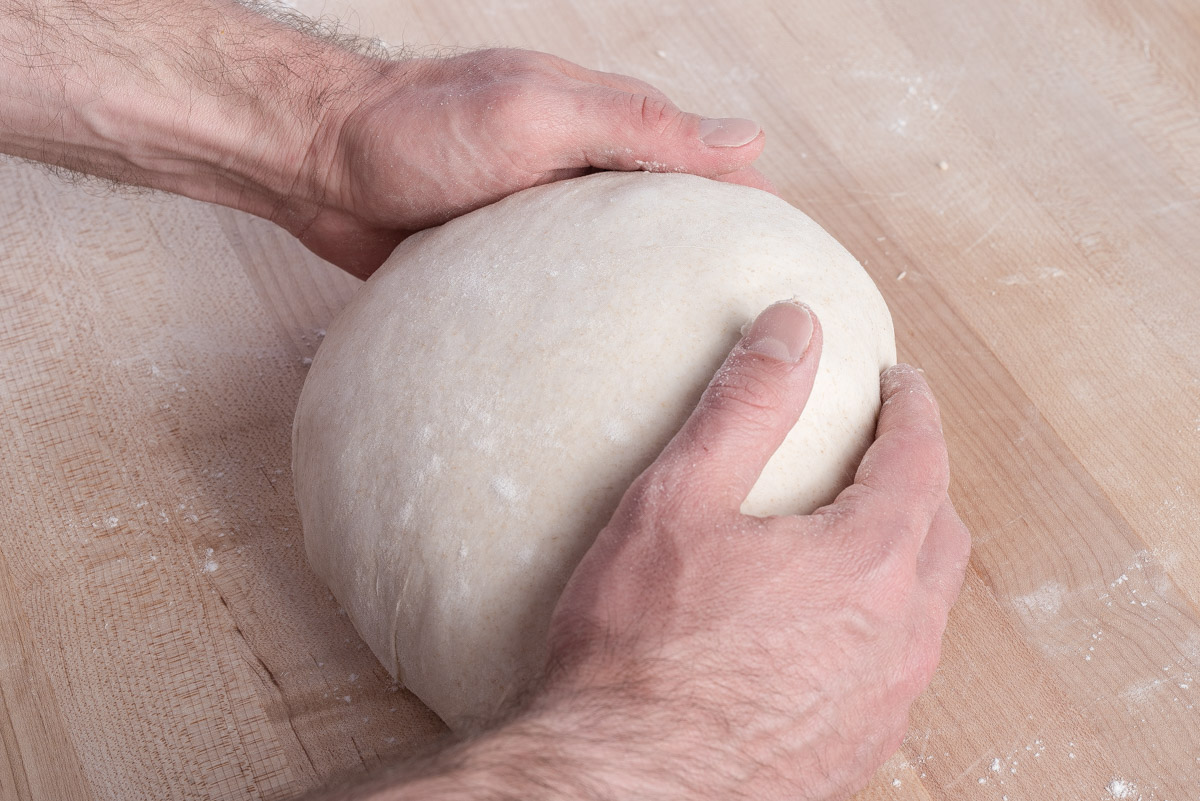
This straightforward approach is always my first choice when shaping a boule. The essence of this technique is to fold the pre-shaped round to resemble an envelope. Then, you'll flip the envelope over and use two hands to drag the dough and create tension as the dough slightly sticks to the bench.
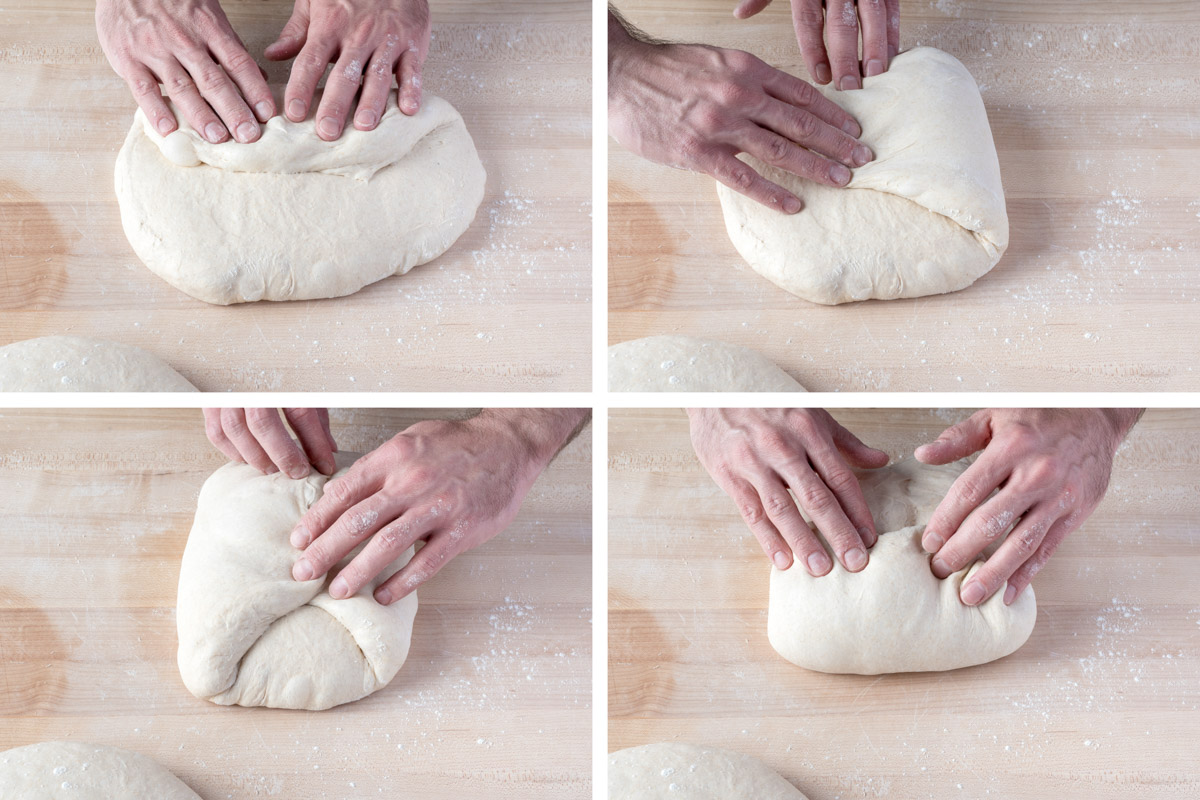
Lightly flour the bench and flip over the pre-shaped round of dough. As shown top-left, above, fold the bottom of the circle up to the middle. Then, fold the left side up and over about two-thirds toward the right, the right side up and over two-thirds toward the left. Finally, fold the top down to about the middle.
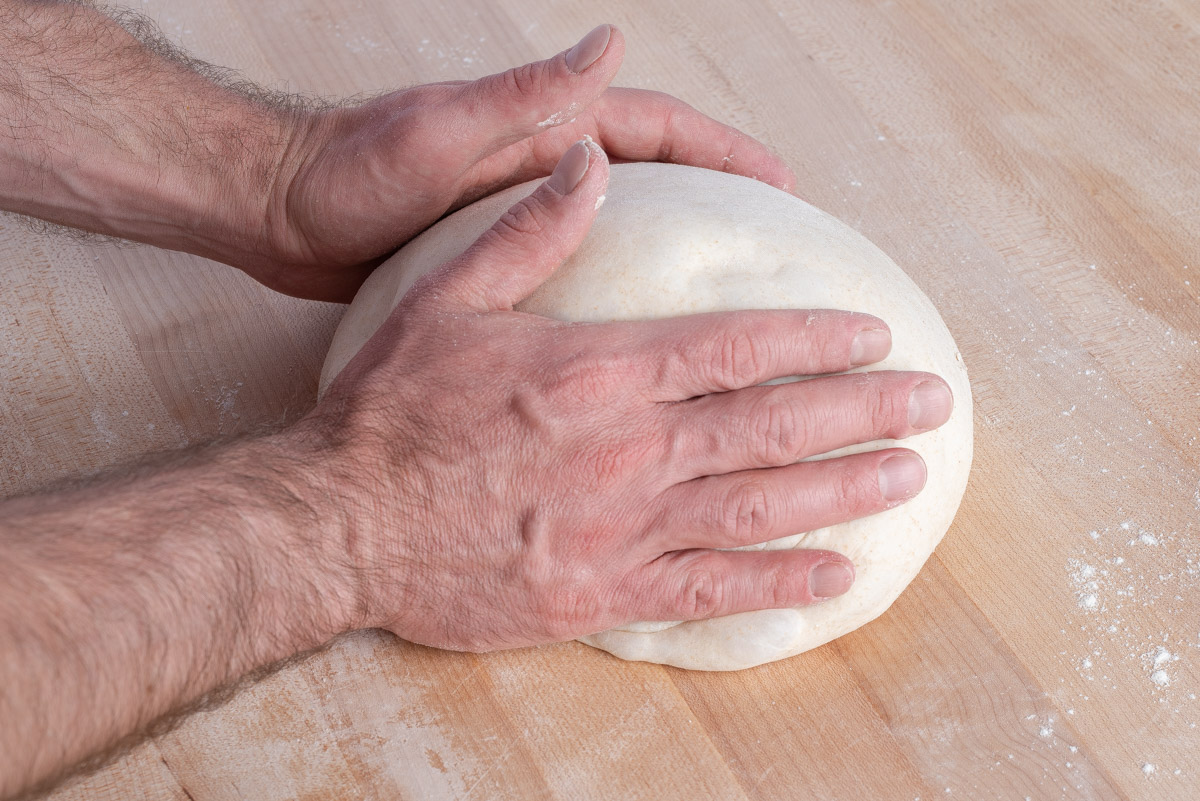
After you've folded the top down, flip the dough over so the seams are now on the bench. Using both hands, which remain in contact with the bench, cup the side of the dough farthest from you and gently drag the dough down towards your body. The dough should slightly stick to the bench and, using the area from each pinky to the base of the hand, the dough should be gently tucked under the mass.

This dragging will create tension on the outside of the dough, as seen above. Rotate the dough using both hands and perform another gentle drag towards your body. Continue rotating and dragging until the dough is sufficiently taut and uniformly round.
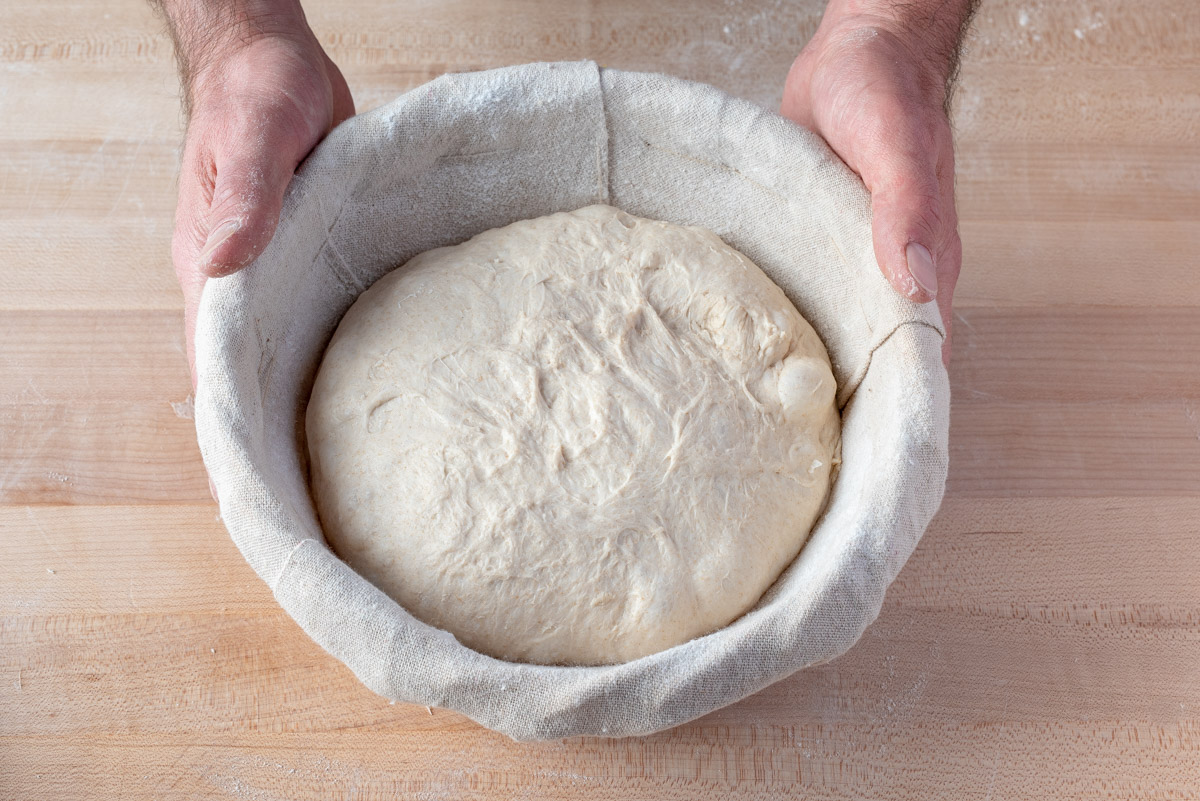
Using a bench knife, gently transfer the shaped round to a proofing basket, seam side up, for the final rise.
This method is similar to the one outlined by Jeffrey Hamelman in his book Bread. It relies on gentle folds of the pre-shaped dough, finishing with two hands pushing the dough around in a circle to impart tension and structure. The key element when pushing the dough around is to use the area on the outside of each hand, between the tip of the pinky and base of the palm, to push the dough lightly against the bench to create tension.
Lightly dust the bench with flour and flip the pre-shaped round onto the flour. Grab the bottom of the dough with two hands and fold it up in half. Then, using both hands with thumbs pointing up, pick up the dough at one side and gently fold it over, about in half, with the seam of the dough facing away from you. As you fold it over also gently pull the dough toward you, tightening the outside skin.
Repeat this pickup-and-tuck a few more times, with a quarter rotation each time, until the dough is gathered up. Then, let the loose round rest in front of you with the seam down on the bench.
Place two hands over the dough so your thumbs are close to each other and your hands and fingers encase the dough. Move your hands together in a circular motion, pushing the dough with one hand toward the other as it’s tightened between your hand and the bench.
The picture above shows a slightly exaggerated depiction of the area where the pinky and palm impart tension on the dough during these circular motions. First, my right hand pushes the dough towards my left. Then, the left reciprocates and pushes back to the right to complete the circle motion. The outside of your pushing hand should be kept in contact with the bench, and it's in this pinched area that the dough tightens.
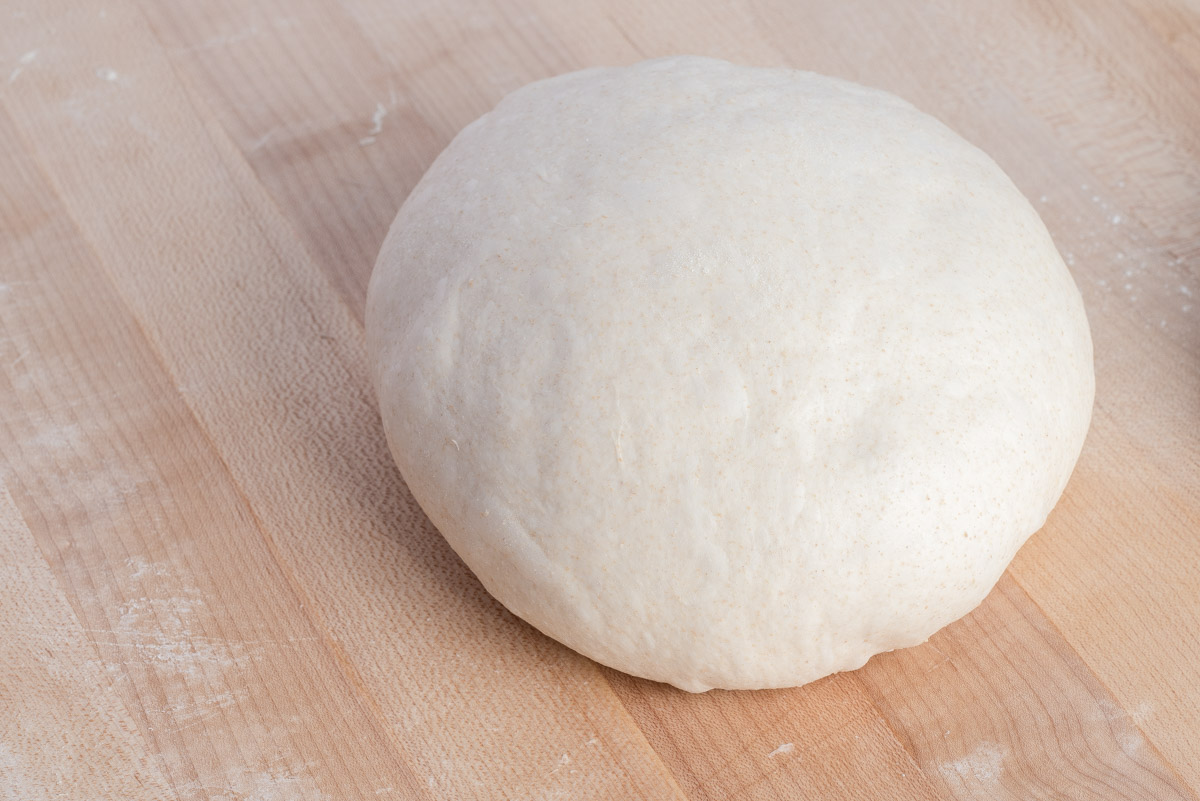
Continue this circular motion until you form the dough into a uniform, taut ball. Using a bench knife, transfer the dough to a proofing basket, seam side up, for the final rise.
While this method may seem similar to the envelope fold, I find it's able to add more structure to a dough. If the dough is overly slack, you can continue to gather the corners over and over to add more strength.
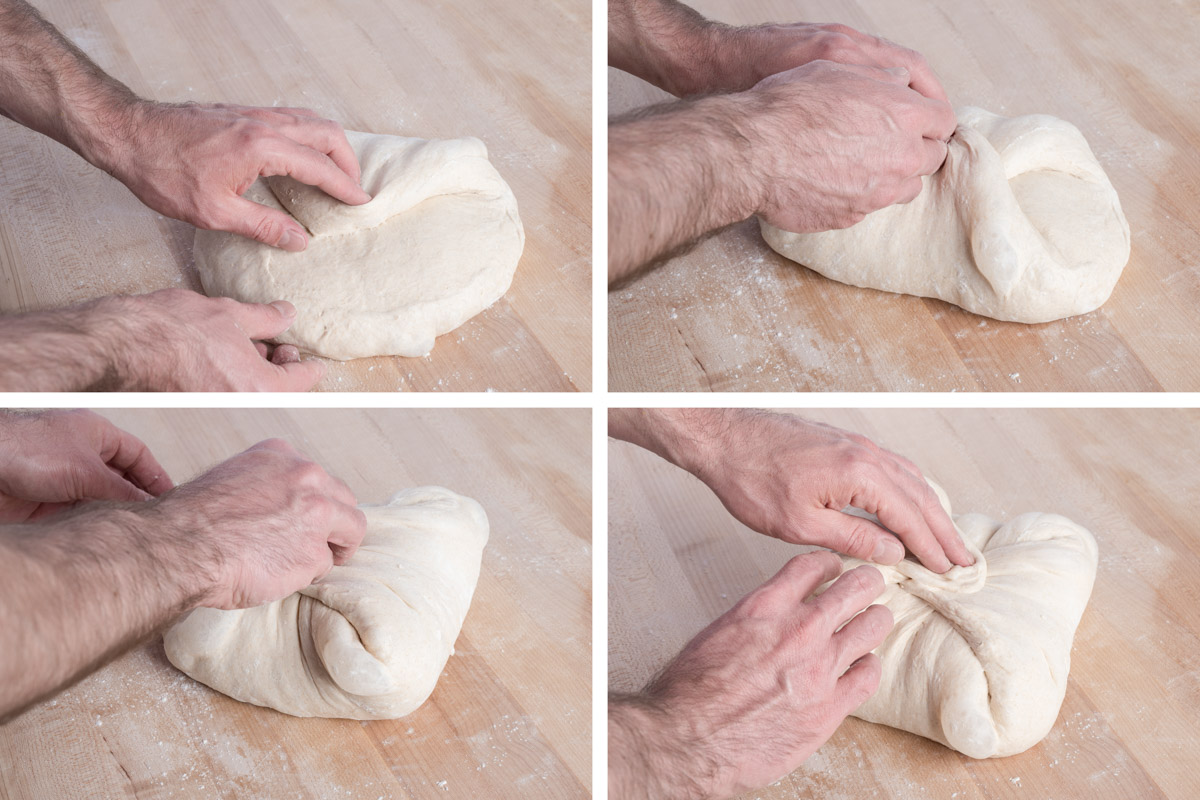
Lightly flour the bench and flip the rested and pre-shaped round onto the flour. Grab one side with the left hand and gather it up to the center (top left, above). Grab the opposite side with the right hand and fold it up and over to the center. Continue these motions with the other two sides until the dough is gathered up into a nice package. If the dough needs more strength continue to grab the newly formed corners and gather them into the middle. If the dough feels strong enough, stop after the first four.
After you've gathered the corners, flip the dough over so the seam is facing down. Next, using the same technique as the envelope fold, finish by lightly dragging the dough against the bench until taut.
Due to the structure imparted by gathering the corners, this dough rarely needs more than one or two tightening drags.
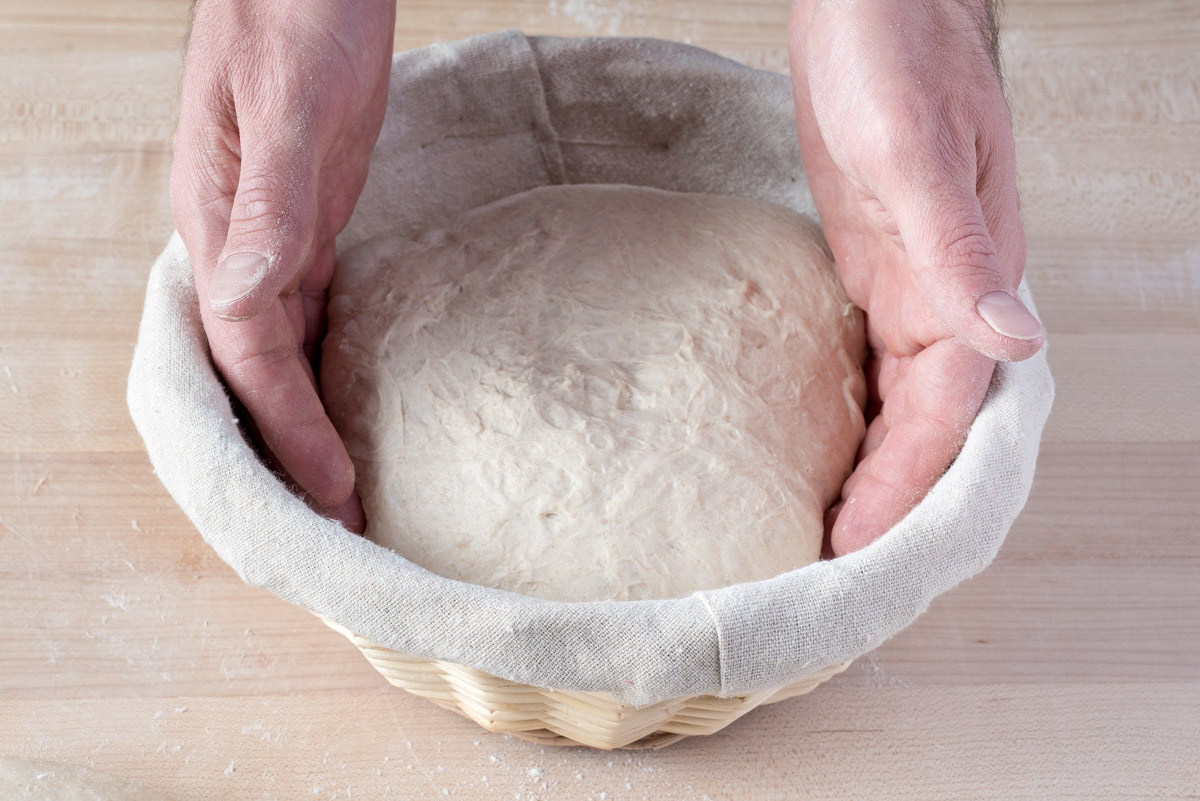
Using a bench knife, gently transfer the shaped round to a proofing basket, seam side up, for the final rise.
Each of these methods presents a slightly different take on shaping a round loaf. While I'm partial to the straightforward envelope fold, give a new method a try next time you're making a boule. With practice, you'll eventually settle on your favorite — and practice does make perfect!
For a detailed look at scoring dough similar to the boules shown here, see my post on scoring bread dough.