You encounter the same phrases in almost every bread recipe. That’s great unless ... you don’t know what those phrases mean! What, exactly, is a shaggy mass? When can the dough be considered “smooth and elastic”? Just how dark is “deep golden brown”? Here’s where our visual bread guide comes in. (And of course, for even more visual recipe demos you can always watch our YouTube channel.)
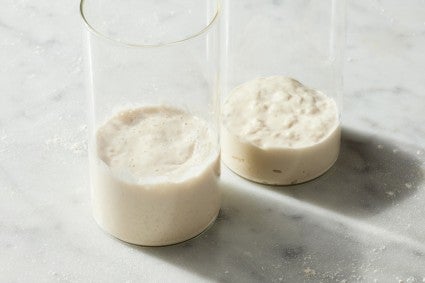
What’s happening: “Ripe” means that your starter is ready to use in baking. It’s at the height of its powers; if you have a healthy starter that you feed regularly, this should occur roughly 8 hours after feeding, though time may vary.
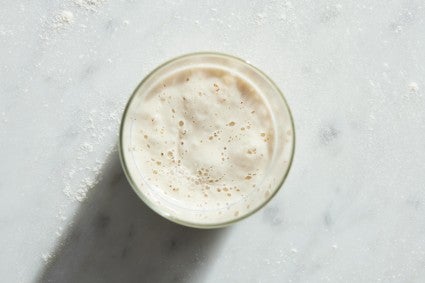
What to look for: The starter should have doubled in volume and show signs of just beginning to sag under its own weight. Look for the very edges of the starter, alongside the walls of the container, to be slightly higher than the center of the starter. The surface should have fine bubbles scattered across the top.
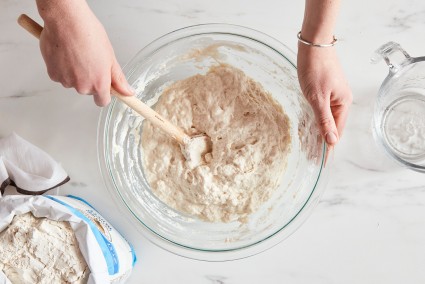
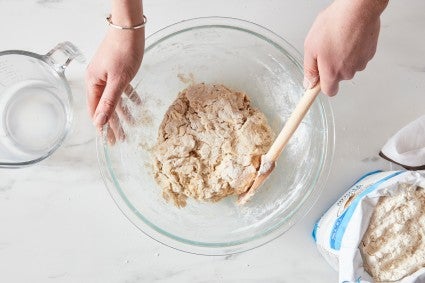
What’s happening: This step comes at the beginning of bread recipes, when you start mixing the dough ingredients together. You’re not kneading or developing the dough here; that will come later, either via manual kneading, folding, and/or lengthy rest. This step is simply mixing to combine.
What to look for: The dough should be rough, craggy, and lumpy. However, it should be fully and evenly mixed, with no visible traces of dry flour remaining.
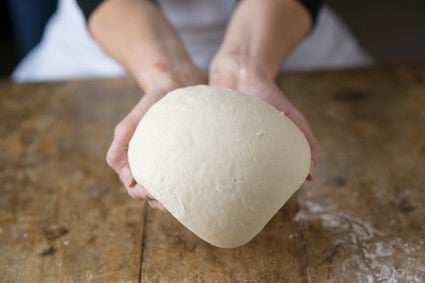
What’s happening: This step develops the gluten that was formed when you combined the flour with water, transforming the shaggy mass into a smooth, elastic, and extensible dough. By agitating the dough via kneading (by hand or by machine), you are linking the gluten into long, organized strands; this step smooths out the dough and gives it extensibility (the ability to be stretched) and elasticity (the ability to snap back like a rubber band).
What to look for: The dough should be smooth and soft to the touch. When you grab a piece and pull, it should not tear; instead, it should stretch out but have enough strength to snap back when released. The dough should not be overly sticky, but it may feel tacky — like the back of a Post-It note. If you lightly press it, the dough should spring back.
One handy visual cue is the windowpane test, a quick step to find out if your dough is sufficiently kneaded. Grab a hunk about the size of a ping pong ball and very gently pull on opposite ends to stretch out the middle. As you pull, the dough in the center will become thinner and thinner until at some point it tears. This may happen almost immediately, or the dough may stretch so far you can see light through it; this is called “achieving the windowpane.” Learn more: What is the windowpane test for bread dough?
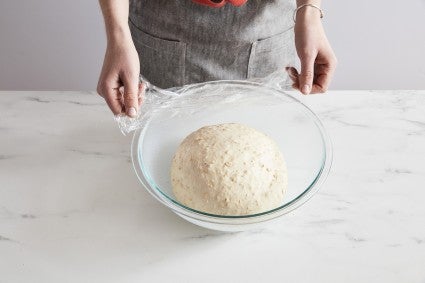
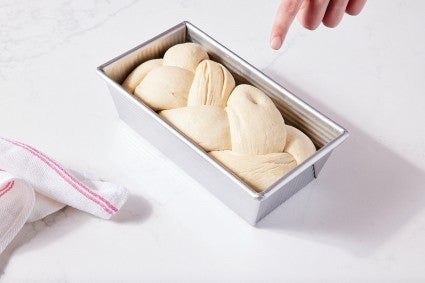
What’s happening: During proofing — both the first rise (bulk fermentation) and second rise — the yeast consumes the sugars and starches in the dough and expels carbon dioxide, which is captured in the strong gluten network created during kneading. As the dough captures gas, it expands, causing the dough to rise.
What to look for: The top of the dough should be stretched somewhat taut. The dough should look soft and pillowy — if you press a finger into it, an indent should remain. During the first rise (bulk fermentation) the dough will often, but not always, double in size.
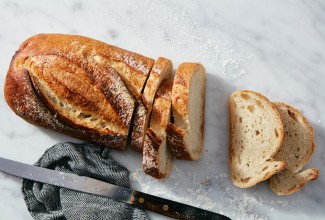
What’s happening: We like to say that color equals flavor. The golden brown crust of baked bread is a result of the Maillard reaction, a chemical process that can be simplified to sugar + protein + heat = browning. The result of that browning is a far more complex flavor profile than other types of browning, producing more attractive and flavorful bread. Ultimately, you want your crust to get enough color to ensure good flavor.
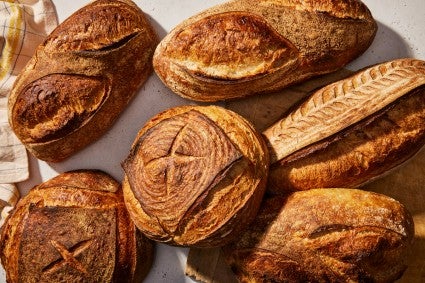
What to look for: Bread should have a deep, rich golden brown color when you remove it from the oven. Some places, like where you scored it, may be slightly lighter in color, but they should still be browned, not pale. When baking hearth loaves, Baking Ambassador Martin Philip also advises bakers to “look for the eyeliner” — a little strip of char on the loaf’s ear.
For more bread-baking visuals, check out our YouTube channel for videos like The Easiest Loaf of Bread You’ll Ever Bake, Baguettes You Can Brag About, and Fluffy, Crunchy Conchas.
Cover photo (Rustic Sourdough Bread) by Rick Holbrook; food styling by Kaitlin Wayne.