
Un baguette integrale?
Mais non – c’est incroyable!
Such might be the reaction of any self-respecting Parisian, who’d no doubt scoff at a whole-wheat version of France’s beloved baguette.
But as a new year dawns, and you vow – AGAIN – to eat healthier, get a little sauvage et fou: try this baguette.
I mean, if Panera can pull it off, why not you?

Click anywhere on this block of pictures to enlarge them to full size - this will work for any of the photos you see in this blog post.
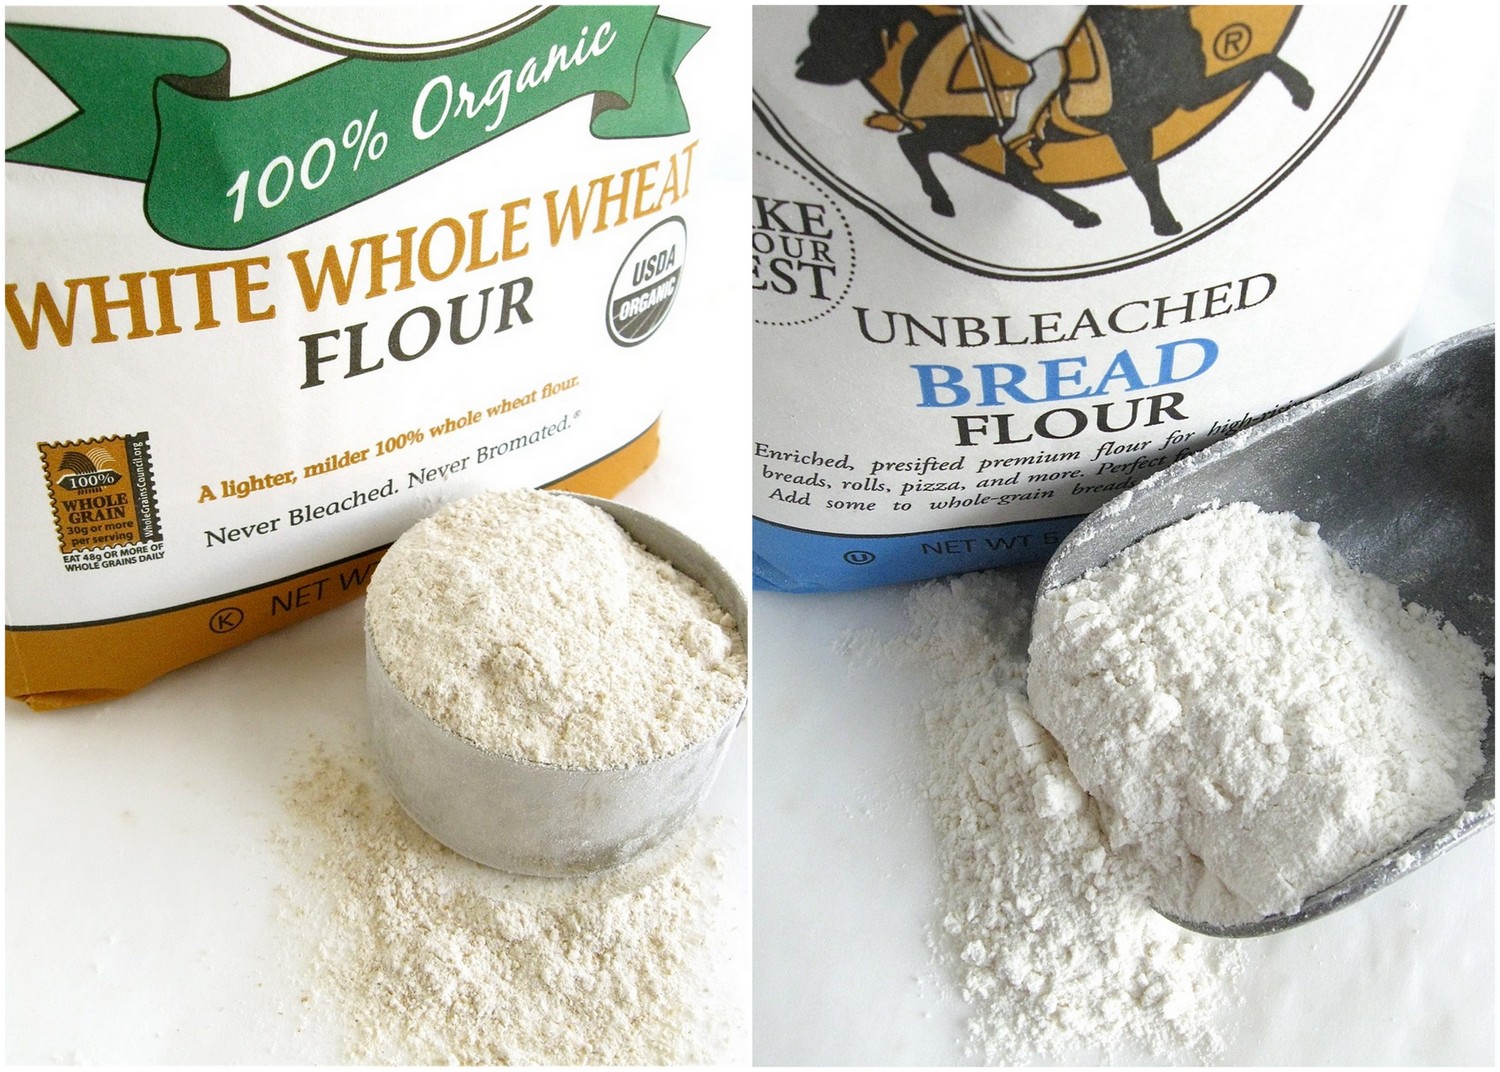
Since a baguette is nothing more than flour, water, salt, and yeast, the two ingredients that will do more to ensure your whole-grain baguette success than any other are whole wheat flour, and bread flour.
I happen to love our white whole wheat flour, a lighter-colored, milder-flavored 100% whole wheat. I especially like the organic version for bread; it seems to provide extra oomph in the rise.
In order to get anything approaching the light texture and large holes of a classic baguette, we’re going to combine our whole wheat flour with some unbleached bread flour, whose extra gluten will help the loaves rise.
If you don’t have bread flour, and don’t want to add another flour to your pantry, substitute unbleached all-purpose flour. You’ll want to reduce the water by 1 to 2 tablespoons, to account for all-purpose flour’s lower protein level.
OK, let’s get started – with a starter.
Mix the following ingredients in a small (2- to 3-cup) bowl:
1 cup (4 ounces) King Arthur White Whole Wheat Flour or Premium Whole Wheat Flour
1/2 cup cool water
pinch (about 1/16 teaspoon) instant yeast
Cover the bowl, and let the starter rest overnight at room temperature.
If your house is very cold at night, try to find the starter a somewhat cozy place to rest. You don’t want it really warm, but about 65°F-70°F will keep it happy. Near (not on) the wood stove or another heat source, or atop the water heater, would be good choices.
Next day, you’ll see that the starter has expanded and become bubbly. In a large mixing bowl or the bucket of your bread machine, combine this risen starter with the following ingredients:
3/4 cup + 2 tablespoons lukewarm water
1/4 cup room-temperature orange juice*
1 1/4 cups (5 ounces) King Arthur White Whole Wheat Flour or Premium Whole Wheat Flour
2 1/4 cups (10 1/2 ounces) King Arthur Unbleached Bread Flour
1 1/2 teaspoons salt
1/4 teaspoon instant yeast
*Orange juice tempers the flavor of whole wheat, without adding any orange flavor of its own; substitute water, if desired.
Mix and knead — by hand, mixer, or bread machine set on the dough cycle — to make a dough that’s cohesive, but whose surface may still be a tiny bit rough. If you’re using a bread machine, cancel the machine after about 7 minutes of kneading.
Cover the dough, and let it rise for 3 to 4 hours, gently deflating it and turning it over once each hour; this helps oxygenate the dough (for the sake of the yeast), and redistributes the yeast.
You’ll find this dough isn’t an exuberant riser; whole wheat’s sharp bran particles shred gluten, which means the dough is constantly releasing a bit of its CO2, like a tire with a slow leak.
Also, you may have noticed we’re not using a whole lot of yeast. Why not? Because we’re giving this bread a couple of long, slow, cool rises, to increase its rich flavor; and slow, cool rises prefer less (rather than more) yeast.
Note the bottom two pictures in the series above; the one on the left is the dough before its first rise, while the shot on the right is that same dough, 2 hours later (with a deflation at 1 hour). See what I mean? Though you can see that it’s expanded a bit, it’s not exactly filling the bowl.
Turn the dough out onto a lightly greased or floured work surface, and divide it into three pieces.
Shape each piece into a rough, slightly flattened oval, cover with greased plastic wrap or the cover of your choice, and let rest for 15 minutes.
Working with one piece of dough at a time, fold the dough in half lengthwise, and seal the edges, as pictured. Flatten the dough slightly, and fold and seal again.
With the seam side down, gently roll the dough into a 16″ to 17″ log.
Now, you can leave your baguettes plain and simple, but I happen to love the nutty flavor of seeded bread. This seed mixture isn’t something we sell here at King Arthur, nor is it mentioned in the recipe for these whole wheat baguettes. But since you’re inquisitive enough to be reading this blog, here’s a formula for a tasty bread topping, courtesy of Modern Baking magazine.
Mix the following:
2 ½ ounces brown flax seeds
2 ½ ounces golden flax seeds
2 ½ ounces sunflower seeds
2 ½ ounces sesame seeds
2 ½ ounces pumpkin seeds
1 ounce poppy seeds
1 ounce coarse yellow cornmeal or semolina
1 ounce wheat germ
If you don’t have a scale, simply mix equal parts, by volume, of the first five seeds; and about half as much of each of the final three ingredients. Store in an airtight container, preferably in the refrigerator.
I only had golden flax seeds, so used 5 ounces of them, instead of 2 1/2 ounces each brown and golden.
Want to make up your own mixture? Go for it! I’m thinking some fennel seeds would be a nice addition next time…
To add seeds, spritz the loaf with warm water, and sprinkle heavily with seeds. For complete coverage, top and bottom, sprinkle some seeds on your work surface, and roll the baguette back and forth through the seeds.
Lightly grease (or line with parchment) a large (13″ x 18″) baking sheet. Place the shaped baguette on the prepared baking sheet.
Repeat with the remaining pieces of dough, spacing them evenly lengthwise on the pan.
Cover the loaves with heavily greased plastic wrap, tenting it over them gently. Allow them to rest for 30 minutes.
After 30 minutes gently remove the plastic wrap, grease it again, and re-cover the loaves. Again, drape the plastic gently; you don’t want to anchor it to the sides of the pan.
Refrigerate the loaves overnight.
Next day, let the loaves rest at room temperature, covered, for about 1 1/2 hours. Towards the end of their rising time, preheat your oven to 425°F.
Notice the loaves have indeed risen a bit (top picture), though again, the rise is nothing like that you’d get with a standard white-flour baguette.
Uncover the loaves. Spritz them with warm water, and make 3 or 4 diagonal slashes in each.
This slashing guides how and where the baguettes will expand as they bake, and will help them attain an even, regular shape; but if you’re afraid of slashing, that’s OK.
Also, if you do slash, the loaves may start to deflate alarmingly; they’ll be fine if you get them into the oven ASAP, so don’t dawdle.
Place the pan on a middle oven rack, and bake the baguettes for 18 minutes. Notice how the loaf in front was sagging (from its slashing) going into the oven; but within 15 minutes or so, it was standing tall again.
Tent lightly with foil, and bake for an additional 5 to 10 minutes, until they’re a deep, golden brown, and their sides and bottom are hard/crisp, not soft/spongy.
Remove the baguettes from the oven. Turn the oven off, crack it open a couple of inches, and place the baguettes on the oven rack (without the pan) to cool; this will increase their crisp crustiness.
Pretty nice texture, eh? And the flavor, thanks to those long, cool rises, is good, too.
AWESOME holes! (Or, as our bakers would say, “nice crumb.”)
Serve baguettes the same day they’re made, if possible. If not, store loosely wrapped (not sealed) in plastic; just before serving, heat in a preheated 350°F oven, tented with foil, until warmed through, about 10 minutes.
Question: Can you freeze the dough?
Well, for greatest stability and best results, I’d rather parbake any loaf you don’t want to enjoy immediately, then freeze. Simply bake for 12 to 15 minutes, until the bread is completely set, but not totally browned. Remove from the oven, cool completely, wrap airtight, and freeze.
When you want to serve the bread, thaw it in the fridge overnight, still wrapped; then bake in a 425°F oven until it’s a deep-dark brown.
Any other questions? Call our baker’s hotline, 802-649-3717.
Please read, bake, and review our recipe for Whole Wheat Baguettes.
Print just the recipe.


January 4th, 2013 at 9:02 am
PLEASE – how about a printable short version to accompany this article.
Each blog has a link at the end that allows you to print the recipe itself without the lengthy article. It will read “Print just the recipe.” ~Amy
January 4th, 2013 at 10:11 am
NICE! Thanks for the recipe. Not a work-day bread, but I’m going to try it this weekend. One question: Your WWW flour seems to have disappeared from the shelves locally (Western Oregon). Is there a supply problem? Do I need to look harder? (And I know ordering is always an option.)
WB, there’s no supply problem; your local grocers have simply decided not to carry it, apparently. A word in the store manager’s ear from one of his loyal customers goes a long way towards putting KA back on the shelf, trust me, so if you get the chance – ask for it where you shop, OK? And BTE – have you tried our store finder? That might help. Cheers! PJH
January 4th, 2013 at 11:49 am
What about adding moisture to the oven by spraying or ice etc?
We baked great results using the spritz of water on the loaves before the slash and bake. Happy Baking! Irene @ KAF
January 4th, 2013 at 12:21 pm
I don’t have anywhere warm enough to put the starter overnight. I wonder, could I use my new Bread Proofer?
This will be an experiment – Be sure to set the Bread Proofer to 70′ as the starter is happiest at temps. between 65′ and 70′. Happy Baking! Irene @ KAF
January 4th, 2013 at 12:35 pm
Thanks so much for the beautiful step by step. I am mostly self taught and do slow rising artisan breads a lot. I am still struggling to learn. Your reassuring, concise comments and photos are terrific. I have a terror of slashing loaves and always thought deflating them meant I had done it wrong. Your seed mix formula and method for getting it stuck to the loaves is great. I love this kind of bread and will be trying baguettes again now with this confidence boost from you.
January 4th, 2013 at 12:54 pm
The baguette recipe in the whole grain cookbook have always been intimidating to me, so I am very thankful for this post! I’m certainly no expert bread maker and since I usually try to bake with whole grains I feel like it is a little harder to get nice results. This looks like an excellent project for one snowy weekend while I cook a big pot of stew!
January 4th, 2013 at 1:54 pm
Sorry, but I just do not consider a loaf that has double the amount of white flour as whole wheat to be a “whole wheat baguette”.
I have no problem making baguettes out of 100% King Arthur white whole wheat and sometimes even put in half regular whole wheat bread flour as well. I add extra wheat gluten to help things out.
On a side note, I’ve also personally noticed that I taste NO difference in wheat bread that has orange juice added and bread that doesn’t. No one in my family can discern the difference either, even when I use 100% whole wheat.
I love to see things like this though! Please keep up with the whole wheat recipes!
Kimberly, the loaf is 50% whole wheat – 2 1/4 cups whole wheat, 2 1/4 cups bread flour. No, it’s not 100% – I found that most people identified the texture and flavor as being more baguette-like by cutting the ww with bread flour, so that’s the path I took. I’m glad you have a 100% ww baguette recipe you like – when you have a winner, stick with it! As for the OJ – some people can taste a difference (usually at the back of their tongue, with the absence of that somewhat tannic “bite”); some people can’t. Again, do what you like best. Thanks for connecting here, and we’ll definitely keep the whole-grain recipes coming – we’ll be focusing on them more this year than we have recently, so stay tuned… PJH
January 4th, 2013 at 2:05 pm
Love WW bread recipes — thanks! Two questions: 1) Can I use a sourdough starter? 2) Is it OK to keep in the fridge for more than one day?
This recipe uses an overnight starter, which is a different flavor profile than a sourdough starter – they aren’t interchangeable in recipes. Keeping the retarded dough more than overnight you’ll risk results that will make you happy! Irene @ KAF
January 4th, 2013 at 2:47 pm
could i use my sour dough starter. like a cup and a half equal to the amount of the starter u are using?
And if i dont use a bagette pan my bread seems to flatten out.
does the whole wheat have more body for support?
Sourdough starter is a different flavor profile and process than the overnight starter used in the flavor of baguettes. If you’d like to use starter to make the baguette – we have recipes written for “sourdough baguettes”. Happy Baking – Irene @ KAF
January 4th, 2013 at 6:38 pm
How do I get the same result gluten free?
By using a recipe written specifically for gluten free baking. We’ve found GF recipes to be most successful when the batter for the bread is baked in a pan that helps hold the shape. We’ll add a GF baguette to the list of recipes we need to develop. Happy Baking! Irene @ KAF
January 4th, 2013 at 10:12 pm
What changes (if any) would I have to make if I wanted to use regular, instead of instant, yeast? Thanks.
If regular yeast = active dry, follow the same amount and procedure written in this recipe. Active Dry yeast is processed differently now, so the two yeasts can be interchanged. Since this recipe has a bit of yeast in the starter and a small amount of yeast in the finished dough this recipe will work with instant or active dry – Happy Baking! Irene @ KAF
January 5th, 2013 at 2:17 pm
I have the French Style Flour, can I use that?
Sure, just follow the blog advice for AP flour
” If you don’t have bread flour, and don’t want to add another flour to your pantry, substitute unbleached all-purpose flour. You’ll want to reduce the water by 1 to 2 tablespoons, to account for all-purpose flour’s lower protein level.”
~ MaryJane
January 5th, 2013 at 9:03 pm
How would you make this into rolls?
You are welcome to shape the dough into rolls rather than baguettes. When the recipe calls to divide the dough into thirds, divide it up into equal sized pieces, 16 pieces for larger rolls, 24 for smaller ones. For seeds on the outside, dip each dough ball in water then seeds (or dip in egg white beaten with 1 tbs of water for better sticking power). Place them in a 9 x 13 pan for pull-apart rolls (give an inch of space between each one, using another pan if you run out of room in the 9×13) OR place the rolls on cookie sheets with 2-3 inches of space between them. Then, gently cover and proof for 30 minutes, covering completely but lightly with plastic wrap and let proof overnight in the fridge. The next day, let rise (still covered) for 60-90 minutes and pre-heat the oven to 425F near the end of this time. Uncover and mist the rolls with water before popping into the oven. You can gently make a small slash on each roll with a VERY sharp knife after misting before placing into the oven, too. This will change their shape but allow them to rise higher. Bake until golden brown, checking after 10 minutes for color–if browning too quickly, tent with foil and bake until done. The 9 x 13 pan will likely need an extra 10 minutes with a foil tent to finish baking all the way through. Again, this might need some tweaking, but should help you in baking up rolls and not baguettes! Best, Kim@KAF
January 6th, 2013 at 12:52 pm
You are welcome to shape the dough into rolls rather than baguettes. When the recipe calls to divide the dough into thirds, divide it up into equal sized pieces, 16 pieces for larger rolls, 24 for smaller ones. For seeds on the outside, dip each dough ball in water then seeds (or dip in egg white beaten with 1 tbs of water for better sticking power). Place them in a 9 x 13 pan for pull-apart rolls (give an inch of space between each one, using another pan if you run out of room in the 9×13) OR place the rolls on cookie sheets with 2-3 inches of space between them. Then, gently cover and proof for 30 minutes, covering completely but lightly with plastic wrap and let proof overnight in the fridge. The next day, let rise (still covered) for 60-90 minutes and pre-heat the oven to 425F near the end of this time. Uncover and mist the rolls with water before popping into the oven. You can gently make a small slash on each roll with a VERY sharp knife after misting before placing into the oven, too. This will change their shape but allow them to rise higher. Bake until golden brown, checking after 10 minutes for color–if browning too quickly, tent with foil and bake until done. The 9 x 13 pan will likely need an extra 10 minutes with a foil tent to finish baking all the way through. Again, this might need some tweaking, but should help you in baking up rolls and not baguettes! Best, Kim@KAF
January 7th, 2013 at 12:38 pm
I think the first instruction in the recipe should be “clean out and reorganize your refrigerator so that you have room for a large sheet pan of rising dough”.
I use to have a second fridge, sometimes I really miss it.
~ MaryJane
Too funny Gwen. I think we’ve all done that right?
January 8th, 2013 at 8:59 pm
I am hesitant to try this. I have been trying to make the Vermont Whole Wheat loaf for 2 days, and have thrown away more than I kept. Yesterday the dough was so sticky that I kept adding flour, which made it like lead…I DID use the whole grain bread improver, and thought that would make a difference, but it didn’t. Threw the loaf (door stop) away. Today I tried again with the White Whole Wheat Oatmeal recipe. First I read it wrong and had 2 cups of boiling water plus 2 cups of oatmeal..When I realized that mistake , I started again. (btw I added more water and finished cooking the oatmeal for a breakfast). After ALL DAY, I now have two loaves that are indented in the middle, didn’t crown as much as I hoped. I used 1 tsp bread improver for each cup of flour, ie..5 1/2 tsps. I didn’t add more for the oatmeal though. Haven’t tasted it yet, but they look terrible. Everything was fresh. I had just received an order from KAF last week. WHA HOPPEN????
We’re so sorry for the disappointment. This sounds like a great opportunity to call the Baker’s Hotline – we’ll ask questions about flour measurement, yeast, water temperature and dough consistency. Together we’ll get you on the path to making the Vermont Whole Wheat recipe and tips for other whole wheat bread baking. Call us at 800-827-6836 and ask to speak with a baker. We’re here from 8 AM to 9 PM weekdays and from 9 AM to 5 PM on weekends. We look forward to your call – Happy Baking – Irene @ KAF
January 9th, 2013 at 2:06 pm
Is there any reason that these shouldn’t be baked on a pre-heated baking stone? That’s where I bake my “almost no-knead” baguettes and I find that they do well there.
Thanks for encouraging us to use whole wheat in baguettes – we are normally a 100% whole grain family, but we do love the baguettes and pizza crust made in the traditional way.
Using the baking stone, you’ll get a nice pop or rise from the whole wheat baguette – we’d love to hear about your results once you try this in your home oven. Happy Baking – Irene @ KAF
January 12th, 2013 at 9:23 pm
Do you have a recipe for a sourdough starter that can be used to make whole wheat (or white whole wheat) baguettes?
Thanks!!!
This is a fantastic one to try: check out the blog that goes with it! http://www.kingarthurflour.com/recipes/whole-wheat-baguettes-recipe Best, Kim@KAF
January 13th, 2013 at 4:17 pm
Thanks! The recipe doesn’t say anything about a sourdough starter though, thanks!
February 12th, 2013 at 5:34 pm
I’m with Bziol. A ‘cool’ place’ overnight that’s 65-70 degrees? That’s a day-time warm temperature in my house. Overnight temperatures in my kitchen in Montana in winter are more likely to be in the mid 50′s. I’ll be interested to see if this bread still comes together OK.
I hear you – my house is 55°F at night, 62°F in the daytime these days. Low temps are fine; it’s the higher, summertime temps that overnight starters don’t like. Just give it as much time in its rises as it needs; the longer it rises in a cool place, the more nuanced and rich the flavor will be… PJH